Did you know that the average bathroom floor contains around 764 bacteria per square inch? That’s more than most people would ever want to think about, and yet bathroom floor cleaning is one of those tasks that gets pushed to the bottom of the to-do list more often than almost any other household chore. I get it. It’s not exactly anyone’s favorite job!
But here’s the thing. A dirty bathroom floor isn’t just an aesthetic problem. It’s a hygiene issue, a safety issue, and over time, a structural one too, as grime and moisture work their way into grout lines and cause real damage. The good news? With the right hacks and a smart routine, keeping your bathroom floor genuinely clean doesn’t have to be the dreaded chore it once was.
Understanding Your Bathroom Floor Before You Clean It
Before you reach for a single cleaning product, there’s something important to establish: what your bathroom floor is actually made of. This isn’t just interesting to know; it’s the foundation of every cleaning decision you’ll make, because the wrong product on the wrong floor type can cause real, lasting damage.
Ceramic and Porcelain Tile
These are by far the most common bathroom floor materials, and for good reason. They’re durable, water-resistant, and relatively easy to clean. Ceramic tile is made from clay fired at high temperatures, while porcelain is a denser, less porous version that’s even more resistant to moisture and staining. Both can handle most cleaning products well, but glazed tiles with a smooth finish behave differently from unglazed or textured tiles, which have more surface area for dirt and bacteria to hide in. The grout between tiles, however, is a completely different story. Porous, absorbent, and a magnet for everything you don’t want in your bathroom.
Natural Stone
Marble, travertine, slate, and limestone bathroom floors are stunning but demanding. Natural stone is porous and sensitive to acidic cleaners. Vinegar, lemon juice, and many commercial cleaners will etch and dull the surface permanently. Stone floors require pH-neutral, stone-specific cleaners and regular sealing to maintain their appearance and integrity. If you have natural stone floors, this is the most important thing to know: when in doubt, use less and test first.
Vinyl and Luxury Vinyl Plank
Vinyl bathroom floors are enjoying a massive resurgence in popularity thanks to luxury vinyl plank, a realistic-looking, waterproof, and highly durable option that’s much gentler on both budgets and knees than stone or tile. Vinyl is generally easy to clean but sensitive to harsh abrasives and highly concentrated cleaners that can dull or damage the surface coating. It responds beautifully to gentle, regular cleaning.
Laminate
Laminate in bathrooms is less common because of its sensitivity to moisture, but it does exist, particularly in half-bathrooms with lower humidity exposure. Laminate requires extremely careful moisture management during cleaning. Excess water causes swelling, warping, and delamination. Barely damp mopping and immediate drying are non-negotiable.
Identifying Your Grout Type
Standard cement-based grout is the most common type and the most porous. It stains easily and requires sealing to resist moisture and bacteria. Epoxy grout is denser, less porous, and far more stain-resistant, making it easier to maintain but harder to clean if grout haze has been left on the surface. Knowing which you have shapes your approach to grout cleaning significantly.
Signs Your Bathroom Floor Needs More Than a Regular Clean
Persistent discoloration that doesn’t respond to your usual cleaner, grout that looks consistently dark despite cleaning, a musty smell that lingers after mopping, or tile surfaces that feel perpetually grimy underfoot are all signs that your floor needs a deeper intervention, whether that’s a dedicated deep clean, a grout treatment, or professional restoration.

Essential Tools and Supplies for Bathroom Floor Cleaning
The right tools make bathroom floor cleaning faster, more effective, and significantly less physically demanding. Here’s what every bathroom cleaning kit should include.
The Grout Brush
This is the single most underrated bathroom cleaning tool in existence. A dedicated stiff-bristled grout brush, narrow enough to fit directly into grout lines, does what no mop or sponge can: it physically agitates and lifts the embedded grime from porous grout surfaces. You can find them for under $5, and the difference between cleaning grout with and without one is dramatic. If you only add one tool to your bathroom cleaning arsenal from this guide, make it a grout brush.
Microfiber Mop
Just as with hardwood floors, the flat microfiber mop is the superior choice for bathroom tile floors. It picks up bacteria, fine debris, and hair effectively, distributes cleaning solution evenly, and doesn’t leave excess moisture on the floor the way a traditional string mop does. Look for one with a washable, replaceable pad and a swivel head that reaches under vanities and around the toilet base with ease.
Scrub Brushes and Sponges
A medium-stiffness scrub brush handles the broader tile surface areas that need more than a mop pass but less than a grout brush. A non-scratch scrubbing sponge is useful for targeted spot cleaning on tile surfaces. Keep both in a dedicated caddy under the sink for immediate access.
Steam Cleaner
A handheld or upright steam cleaner is one of the most powerful tools available for bathroom floor cleaning. Steam penetrates grout lines, kills bacteria and mold spores without chemicals, and loosens soap scum and mineral deposits effectively. Unlike hardwood floors, where steam is damaging, ceramic tile, porcelain, and most stone floors handle steam beautifully, with the caveat that waxed or sealed stone should be tested first. For vinyl and laminate, avoid steam entirely as the heat and moisture can damage the surface layers.
Natural Cleaning Staples
Keep these four ingredients stocked, and you have the foundation of virtually every effective DIY bathroom floor cleaner: white vinegar, baking soda, hydrogen peroxide, and dish soap. Together and separately, these four ingredients address the full spectrum of bathroom floor cleaning challenges. From everyday grime to stubborn stains, from soap scum to mold and mildew.
Commercial Cleaners Worth Having
For tile and grout, Zout Tile and Grout Cleaner, Black Diamond Marble and Tile Floor Cleaner, and Soft Scrub with Bleach Cleanser are consistently well-rated options. For natural stone, look for pH-neutral stone-specific cleaners like Method’s Squirt and Mop Stone Floor Cleaner or StoneTech Revitalizer. For vinyl, Method Hard Floor Cleaner or Bona Hard Surface Floor Cleaner works excellently without damaging the surface.
The Best Bathroom Floor Cleaning Hacks for Sparkling Tiles
These are the tile cleaning hacks that deliver real, visible results. The ones that make you genuinely impressed with how clean your bathroom floor can look.
The Baking Soda and Vinegar Paste Hack
This is the bathroom floor equivalent of a power couple. Mix baking soda with just enough white vinegar to form a thick paste. It will fizz dramatically, which is completely normal and actually part of what makes it effective. Apply the paste directly to stained or grimy tile surfaces, let it sit for 10 to 15 minutes, then scrub with your brush and rinse thoroughly. The mild abrasiveness of the baking soda, combined with the cutting power of the vinegar’s acidity, lifts surface grime and light staining remarkably well. Important caveat: never use this on natural stone floors, where vinegar’s acidity will etch and damage the surface.
Dish Soap and Hot Water for Everyday Cleaning
Sometimes the most effective solution is the simplest one. A few drops of dish soap dissolved in a bucket of hot water, as hot as your gloved hands can comfortably handle, cuts through the grease, body oil, and soap residue that accumulates on bathroom tile floors. Apply with your microfiber mop, work in sections, and rinse with clean water to prevent soapy residue from making your floor look dull. This is your go-to weekly clean solution that’s safe for virtually all tile types, including most stone floors.
Hydrogen Peroxide for Tough Stains
Three percent hydrogen peroxide, the standard drugstore variety, is a powerful yet gentle stain remover and disinfectant for bathroom tile floors. Apply it directly to stained areas, let it sit for 10 to 15 minutes, then scrub and rinse. It’s particularly effective on organic stains, mildew marks, and yellowing. Unlike bleach, hydrogen peroxide breaks down into water and oxygen, making it a safer option around children and pets. It’s also safe on grout and won’t damage most tile finishes.
The Squeegee Hack
This is arguably the highest-impact preventive hack in this entire guide. Keep a small squeegee on the shower floor or hanging on the shower wall, and use it to push water off the bathroom floor toward the drain after every shower. It takes 30 seconds and dramatically reduces the soap scum, water spotting, and mineral deposit buildup that makes bathroom floors look perpetually grimy. Prevention is always easier than cure, and this simple habit is proof of that principle in action.
Lemon Juice and Salt
For a natural tile brightening treatment, mix lemon juice with enough salt to form a gritty paste. Apply to dull or lightly stained tile, let it sit for five minutes, scrub gently, and rinse. The citric acid in lemon juice dissolves light mineral deposits and brightens dull tile surfaces, while the salt provides gentle abrasion. Like vinegar, lemon juice should never be used on natural stone floors.

Natural and DIY Bathroom Floor Cleaning Solutions That Work
For those who prefer to minimize chemical exposure in one of the most enclosed rooms in the home, these natural solutions deliver genuine cleaning power without the harsh ingredients.
White Vinegar and Water Spray
A 50/50 solution of white vinegar and water in a spray bottle is a versatile, effective everyday bathroom floor cleaner for ceramic and porcelain tile. Spray it onto the floor, let it sit for a few minutes to dissolve mineral deposits and soap scum, then mop with a microfiber mop. The acetic acid in vinegar cuts through soap residue and light grime effectively and acts as a mild disinfectant. Critically: never use vinegar on natural stone, as it will etch and permanently dull the surface. For stone floors, stick to pH-neutral solutions.
Baking Soda Paste
For targeted stain removal anywhere on your bathroom floor, a paste of baking soda and a small amount of water applied directly to the stain, left for five to ten minutes, and then scrubbed gently with a soft brush is safe, effective, and completely non-toxic. Rinse thoroughly afterward to remove all residue.
Hydrogen Peroxide as a Natural Disinfectant
Three percent hydrogen peroxide applied to bathroom floor surfaces and grout lines is a genuinely effective natural disinfectant that kills a broad range of bacteria, viruses, and mold spores. Apply, let it dwell for five to ten minutes, then mop or wipe clean. It’s odorless, breaks down safely, and won’t damage most bathroom floor surfaces. Making it an excellent choice for households with children, pets, or anyone with sensitivities to chemical cleaners.
Tea Tree Oil for Antibacterial Power
Add 10 to 15 drops of tea tree essential oil to your regular cleaning solution for a natural antibacterial and antifungal boost. Tea tree oil has well-documented antimicrobial properties and is particularly effective against the mold and mildew strains that thrive in bathroom environments. It also leaves a clean, fresh scent without synthetic fragrance. Combine with the castile soap solution or the vinegar spray for an enhanced natural cleaner.
The Lemon and Baking Soda Scrub
For naturally brightening dull ceramic or porcelain tile, cut a lemon in half, dip the cut surface in baking soda, and use it directly as a scrubber on tile surfaces and grout lines. The combination of citric acid and mild abrasion from the baking soda lifts surface dullness and light staining while leaving a genuinely fresh scent. Rinse thoroughly afterward. Never use on natural stone.
How to Remove the Toughest Bathroom Floor Stains
Some bathroom floor stains require more targeted treatment than your regular cleaning routine provides. Here’s your complete reference guide for the most stubborn and common bathroom floor staining challenges.
Soap Scum Buildup
Soap scum is the white, chalky, or filmy residue that forms when the fatty acids in soap react with the minerals in hard water. It builds up gradually and, left untreated, becomes progressively harder to remove. For light soap scum, a vinegar and water spray left to dwell for five minutes before scrubbing is usually sufficient. For heavy buildup, apply undiluted white vinegar or a commercial soap scum remover like Method Bathroom Cleaner or Lime-A-Way, allow it to penetrate for 10 to 15 minutes, then scrub with a non-scratch brush and rinse thoroughly.
Hard Water Stains and Limescale
The chalky white or rust-colored deposits that form wherever water sits on bathroom floors, around drains, along grout lines, and at the base of the shower are mineral deposits left behind as water evaporates. Acidic cleaners are the most effective treatment: white vinegar, lemon juice, or commercial limescale removers like CLR or Lime-A-Way dissolve the mineral bonds effectively. Apply, let dwell for 15 to 30 minutes depending on severity, scrub, and rinse. For severe buildup, a second application may be needed. For natural stone floors, use a stone-safe limescale remover rather than acidic solutions.
Mold and Mildew
Mold and mildew on bathroom floors are among the most common and frustrating cleaning challenges. For surface mold on tile, a solution of one cup of hydrogen peroxide to two cups of water sprayed directly onto the affected area and left for 30 minutes before scrubbing is highly effective and safer than bleach. For mold in grout lines, the bleach pen hack or oxygen bleach treatment described in the grout section delivers the best results. For recurring mold problems, the root cause is almost always inadequate ventilation. Address the humidity issue, and the mold problem becomes dramatically more manageable.
Rust Stains
Rust stains on bathroom tile, typically caused by metal fixtures, aerosol can bases, or metal accessories left sitting on the wet floor, look alarming but are generally treatable. Commercial rust removers containing oxalic acid, like Bar Keepers Friend, are the most effective treatment. Make a paste, apply it directly to the rust stain, let it sit for several minutes, scrub gently, and rinse. Lemon juice and salt left on the stain for several hours is a natural alternative that works well on lighter rust marks. Never use bleach on rust stains. It sets the stain and makes it permanent.
Yellow or Discolored Grout
Grout that has yellowed is almost always the result of accumulated soap residue, hard water mineral deposits, and embedded grime rather than true permanent staining. The baking soda and hydrogen peroxide paste treatment, particularly when combined with an electric toothbrush for application, addresses yellowing grout remarkably effectively. For grout that remains stubbornly discolored after thorough cleaning, grout colorant or grout paint, available at hardware stores, can restore it to a consistent, clean color without the need for regrout.
Mystery Stains
For unidentified stains, a methodical approach works best. Start with the gentlest option, dish soap and warm water, and work up in strength if needed, moving through baking soda paste, hydrogen peroxide, vinegar, and finally a commercial stain remover. Test any new product in an inconspicuous area first, particularly on natural stone or vinyl. When in genuine doubt, a professional tile cleaning service can assess and treat mystery stains with the expertise and equipment to do it safely.
Bathroom Floor Cleaning Hacks for Specific Floor Types
Ceramic and Porcelain Tile
These floors are the most forgiving and can handle the widest range of cleaning approaches. For regular cleaning, the dish soap and hot water method or a commercial tile cleaner applied with a microfiber mop works perfectly. For deeper cleaning, the baking soda and vinegar paste handles most surface challenges, and steam cleaning is both safe and highly effective. The main thing to protect on ceramic and porcelain tile is the grout. Clean it regularly, seal it annually, and you’ll prevent the vast majority of maintenance headaches these floors can develop.
Natural Stone Floors
Natural stone, marble, travertine, slate, and limestone demand a gentler approach than almost any other bathroom floor type. Acid is the enemy: vinegar, lemon juice, and any cleaner with a low pH will etch and permanently dull polished stone surfaces. Always use pH-neutral, stone-specific cleaners. Warm water and a few drops of pH-neutral dish soap or castile soap are a safe everyday option. Dry the floor thoroughly after mopping to prevent water spotting. Seal natural stone floors every six to twelve months to maintain their resistance to staining and moisture penetration. For staining or etching that cleaning can’t address, professional stone restoration is the appropriate solution.
Vinyl and Luxury Vinyl Plank
Vinyl bathroom floors are genuinely low-maintenance but benefit from regular, gentle cleaning. Sweep or vacuum daily to remove the grit that causes surface scratching underfoot. For mopping, a very dilute solution of dish soap and warm water or a vinyl-specific cleaner like Bona Hard Surface Floor Cleaner works beautifully. Avoid abrasive scrubbers that can scratch the surface coating, avoid highly concentrated cleaners that can dull the finish, and never use a steam mop. The seams and edges of vinyl planks are vulnerable to moisture penetration. Clean with a barely damp mop and dry promptly.
Laminate Bathroom Floors
Laminate and water are not friends, which makes bathroom installation of laminate a perpetual moisture management challenge. Use the driest possible cleaning method, a microfiber mop wrung out to the point of barely damp, and dry the floor immediately after cleaning. Never allow standing water. For spot cleaning, a slightly damp cloth is preferable to mopping entire sections. Commercial laminate floor cleaners provide the best balance of cleaning effectiveness and moisture minimization for these surfaces.
Textured and Anti-Slip Tile
The same surface texture that makes anti-slip bathroom tile safe to stand on in the shower creates a significant cleaning challenge. More surface area means more places for soap scum, grime, and mold to hide and adhere. A stiff-bristled brush and a dwell-time cleaning solution are essential here. Apply your cleaner of choice, let it sit for 10 minutes to penetrate the textured surface, then scrub firmly with a brush and rinse thoroughly. A handheld steam cleaner is particularly effective on textured tile, reaching into the surface texture and dislodging embedded debris that brushing alone can’t fully remove.

Speed Cleaning Hacks for a Clean Bathroom Floor in Minutes
Not every bathroom cleaning needs to be a production. These speed hacks keep your floor looking presentable between deep cleans with minimal time and effort.
The 5-Minute Bathroom Floor Reset
Set a timer for five minutes. Quickly sweep or vacuum the floor to remove hair and loose debris. Spray your cleaning solution on the tile and grout surfaces. While it dwells, wipe down the toilet base and vanity cabinet bases with a damp cloth. Then mop the floor quickly with your microfiber mop. Done. Five minutes, consistently applied, keeps grime from ever reaching the point of requiring a serious intervention. It’s the single most impactful habit you can build for bathroom floor maintenance.
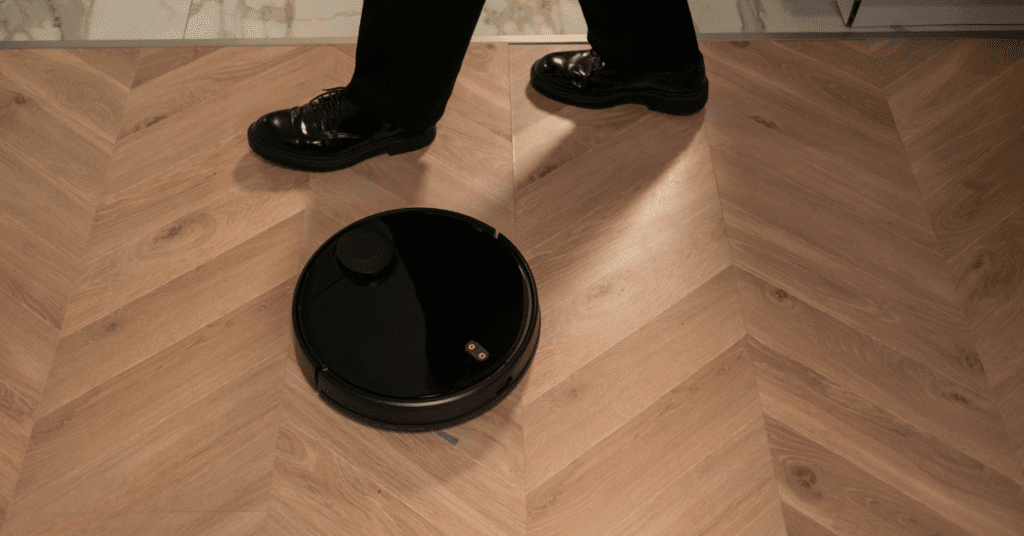
Robot Mops for Daily Maintenance
Robot mops, particularly models like the Shark Matrix Plus or the Roborock S series with mop attachments, are genuinely useful for bathroom floor maintenance between manual cleans. Set one to run daily or every other day, and it keeps light grime from accumulating on tile surfaces. Robot mops don’t replace a proper scrub, but they dramatically reduce the frequency with which a proper scrub is needed.

Dry Sweep First
The single habit that most improves bathroom floor cleaning efficiency is always dry sweeping before any wet cleaning. Hair, dust, and fine debris swept up dry require no mopping at all. What’s left after sweeping, the actual grime and residue that needs a wet clean, is a fraction of what would otherwise need to be mopped. This habit alone cuts bathroom floor cleaning time nearly in half.
Keep Supplies Inside the Bathroom
The primary reason speed cleaning doesn’t happen is friction, the effort of going to get supplies makes the task feel bigger than it is. Keep a small cleaning caddy inside the bathroom cabinet with your spray cleaner, a scrub brush, and a spare microfiber cloth. When the supplies are right there, a 2-minute spot clean becomes something you actually do rather than something you mean to do later.
The After-Shower Spray Habit
Keep a small spray bottle of your daily cleaner on the shower shelf. After every shower, give the bathroom floor, particularly the shower floor and the area immediately outside, a quick spray while the steam has the surfaces warm and more receptive to cleaning solution. Let it sit and rinse the next time someone showers. This simple 10-second habit prevents soap scum and mineral deposit buildup more effectively than any amount of reactive cleaning.
How to Keep Your Bathroom Floor Clean for Longer
The ultimate goal isn’t just a clean bathroom floor. It’s a bathroom floor that stays clean with minimal ongoing effort. These habits and strategies make it genuinely achievable.
Daily Habits That Make the Biggest Difference
A quick sweep for hair and debris each morning takes 60 seconds and prevents the buildup that makes bathroom floors look perpetually grimy. The after-shower squeegee or spray habit prevents soap scum and mineral deposit accumulation. Keeping bath mats shaken out and washed weekly prevents them from becoming sources of mold and mildew transfer onto the floor beneath them. These three daily micro-habits collectively have a more significant impact on long-term bathroom floor cleanliness than any amount of periodic deep cleaning.
Bathroom Ventilation
Mold, mildew, and the musty smell that pervades inadequately ventilated bathrooms are almost entirely moisture problems. A properly functioning exhaust fan running during and for 20 to 30 minutes after every shower removes the humidity that feeds mold growth before it can settle on floor surfaces and grout. If your bathroom fan isn’t doing its job effectively, you can test this by holding a piece of toilet paper near the grille: it should be pulled firmly toward the fan. The impact on bathroom cleanliness, air quality, and structural integrity is significant.
Strategic Bath Mat Placement
Bath mats serve a dual purpose: they absorb moisture from wet feet and protect high-traffic floor areas from concentrated wear. Place them at the shower or tub exit, in front of the sink, and at the bathroom entrance. Wash them at least weekly, a damp bath mat left in place for days becomes a mold and bacteria factory that transfers contamination directly to your clean bathroom floor. Rotate between two sets so one is always clean and dry.
Sealing Grout Annually
We’ve mentioned this in the grout section, but it deserves emphasis here as a long-term maintenance strategy. Grout sealer is the single most effective product for reducing the ongoing effort required to maintain clean bathroom floors. Sealed grout resists staining, repels moisture, and prevents mold and mildew from taking hold in the porous grout surface. Apply it once a year after your annual deep clean and watch how much easier your regular cleaning becomes in the months that follow.
A Realistic Cleaning Schedule
The most effective bathroom floor cleaning schedule is one you’ll actually follow. Daily: quick sweep and after-shower spray. Weekly: full mop with your chosen cleaner and targeted grout brush in problem areas. Monthly: deeper clean addressing soap scum, grout lines, edges, and corners. Every three to six months: deep clean including steam treatment, full grout scrub, stain treatment, and grout resealing. Build this into your broader home cleaning routine and your bathroom floor will never again reach the point of being genuinely difficult to clean.
Conclusion
A clean bathroom floor is one of those things you don’t fully appreciate until you have it, and then you never want to go back. With the right hacks in your arsenal, a smart cleaning routine, and a few simple daily habits, keeping your bathroom floor spotless becomes far less of a battle and far more of a manageable, even satisfying, part of your home care routine.
The biggest lesson from everything in this guide? Prevention is always easier than cure. A quick squeegee after the shower, a weekly mini-clean, properly sealed grout, a functioning exhaust fan. These small, consistent actions stop grime and buildup in their tracks before they ever become a real problem. You don’t need harsh chemicals, hours of scrubbing, or professional help for most bathroom floor challenges. You need the right tools, the right techniques, and the commitment to a few smart habits.
Start with one or two of these hacks today. Seal your grout this weekend. Add a squeegee to your shower. Move your cleaning supplies inside the bathroom cabinet. Small changes, applied consistently, compound into a bathroom floor that genuinely stays clean and a cleaning routine that no longer feels like a dreaded chore. Your bathroom deserves to be the clean, fresh, hygienic space it’s supposed to be. And now you have everything you need to make that happen!