I think floor cleaning is nobody’s favorite activity. But what if I told you that most of us are doing it wrong? Like, completely, unnecessarily wrong?
I’ve tested cleaning tips, products, and techniques across every floor type over the past years: hardwood, tile, laminate, vinyl, carpet, and everything in between. Some hacks I discovered are so simple that it’s almost embarrassing that I didn’t know them sooner. Others completely changed the way I approach floor care altogether. Whether you’re battling stubborn grout stains, scratched hardwood, or carpet that just won’t come clean, this guide has you covered. Read further to clean smarter, not harder!
Why Most People Are Cleaning Their Floors Wrong
Before we get into the hacks, let’s talk about what most of us are getting wrong. Because if you’re making these mistakes, even the best cleaning tips in the world won’t give you the results you’re looking for.
The single biggest floor cleaning mistake? Using too much water. It seems counterintuitive that more water means cleaner floors, right? Wrong. Excess water is the enemy of hardwood, laminate, and even certain tile installations. It seeps into seams and joints, causes warping, promotes mold growth underneath, and can permanently damage your flooring over time. The rule of thumb is simple: your mop should be damp, not wet. If water is pooling on your floor after you mop, you’re using far too much.
The second most common mistake is using the wrong cleaning products for your specific floor type. A cleaner that’s perfectly safe on tile can strip the finish off hardwood. A product that works beautifully on vinyl can leave a cloudy residue on laminate. Floors are not one-size-fits-all, and neither are the products that clean them. Always check the manufacturer’s recommendations for your specific flooring before reaching for a new product.
Cleaning frequency matters more than most people realize, too. Many homeowners do a big clean once a week and consider it done. But high-traffic areas actually benefit far more from light, frequent cleaning than from infrequent deep cleans. Daily dry sweeping or vacuuming in the kitchen and living areas prevents dirt and grit from acting as sandpaper on your floor surface, which, over time, causes scratches, dulling, and premature wear.
Finally, there’s the hidden cost of poor floor care. Floors that aren’t maintained properly wear out faster, lose their finish sooner, and ultimately need replacing years earlier than they should. Hardwood floors that are properly cared for can last a lifetime. Neglected ones might need refinishing or replacement within a decade. The right cleaning routine isn’t just about aesthetics; it’s genuinely an investment in your home.

Hardwood Floor Cleaning Hacks That Protect and Shine
Hardwood floors are beautiful, timeless, and surprisingly delicate. Here’s how to keep them looking their absolute best.
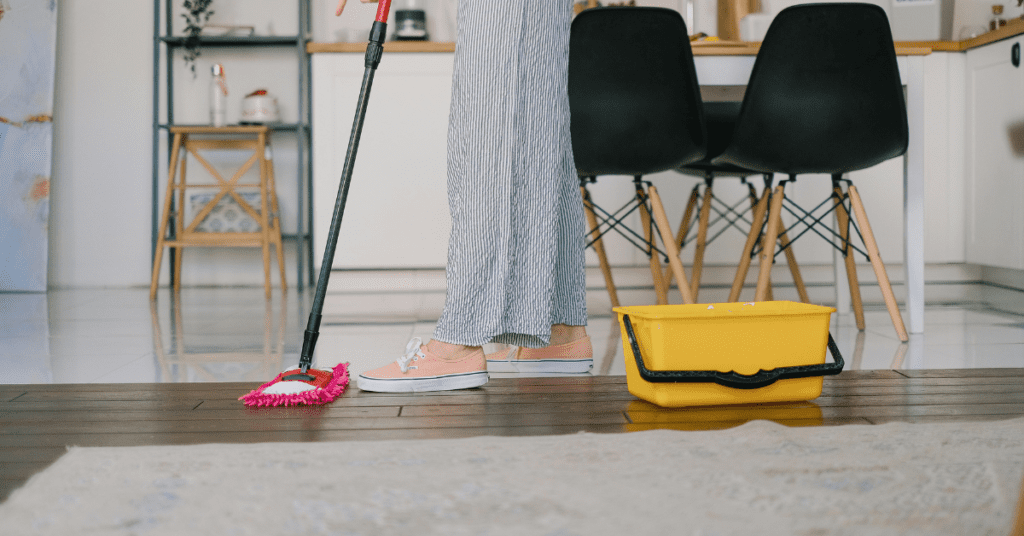
The Microfiber Mop Hack
Ditch the traditional string mop immediately. Seriously, throw it away. A microfiber flat mop is the single best thing you can do for your hardwood floors. Microfiber pads trap and hold dust, dirt, and pet hair rather than pushing it around. They require minimal moisture, and they’re gentle enough to use on finished hardwood every day without causing wear. If you only take one piece of advice from this entire article, make it this one.
DIY Hardwood Floor Cleaner
You don’t need expensive, branded floor cleaners. Mix one tablespoon of dish soap with one gallon of warm water, and add a splash of white vinegar for extra cleaning power. Dampen your microfiber mop pad in the solution, wring it out thoroughly until it’s just barely damp, and mop in the direction of the wood grain. This simple solution cleans effectively without leaving residue or damaging the finish.
The Tea Hack for Natural Shine
This one sounds unusual, but it genuinely works. Brew two or three black tea bags in a quart of hot water and let it cool completely. Use the cooled tea on a barely-damp microfiber cloth to wipe down your hardwood floors. The tannic acid in black tea adds a subtle natural shine and helps restore the warm tone of the wood. It’s an old-fashioned trick that’s stood the test of time for good reason.
Removing Scuff Marks Without Chemicals
Scuff marks on hardwood are incredibly common and surprisingly easy to remove. Try rubbing a clean tennis ball over the scuff mark using gentle circular pressure. The rubber surface buffs out the mark without scratching the finish. For more stubborn scuffs, a small amount of baking soda on a damp cloth works beautifully. Just wipe gently and buff dry immediately afterward.
Dealing with Sticky Residue
Sticky spots on hardwood (from spilled drinks, tape residue, or food) respond well to a small amount of rubbing alcohol on a soft cloth. Apply it directly to the sticky area, let it sit for thirty seconds, then wipe clean. Follow up with a barely-damp microfiber cloth and buff dry. The alcohol evaporates quickly, so there’s minimal moisture risk to the wood.
Deep Cleaning Without Stripping the Finish
Every few months, your hardwood floors will benefit from a slightly deeper clean. Use a pH-neutral hardwood floor cleaner applied sparingly with a microfiber mop. Bona is a widely trusted brand for this. Work in sections, buff as you go, and never let the cleaner sit on the surface. This removes the buildup of cleaning product residue that accumulates over time and restores the floor’s natural luster.
Tile and Grout Cleaning Hacks for a Sparkling Finish
Tile floors are among the most durable surfaces in any home, but grout? Grout is the eternal nemesis of clean floors everywhere. Here’s how to win the battle.
The Baking Soda and Vinegar Grout Hack
Yes, this classic combination actually works, but technique matters. Sprinkle baking soda directly onto wet grout lines, then spray undiluted white vinegar over the top. Let the fizzing reaction do its work for five to ten minutes before scrubbing with a stiff-bristle grout brush. Rinse thoroughly with clean water. For lightly stained grout, this is genuinely effective and completely chemical-free.
The Steam Cleaner Hack
For heavily soiled grout, nothing beats a steam cleaner. The high-temperature steam penetrates deep into the porous grout surface, loosening and killing bacteria, mold, and ground-in dirt without any chemicals at all. Run the steam cleaner nozzle slowly along each grout line, then wipe away the loosened grime with a microfiber cloth. The results are often dramatic. Grout that looked permanently stained can be restored to near-original color.
The Electric Toothbrush Hack
An old electric toothbrush is one of the most underrated grout cleaning tools available, and it costs you nothing if you have a spare one. Apply your cleaning solution of choice to the grout lines and use the electric toothbrush to scrub. The oscillating motion covers more area with less effort than manual scrubbing and gets into the texture of the grout far more effectively than a standard brush.
DIY Grout Whitening Paste
For grout that has yellowed or stained beyond what basic cleaning can fix, mix baking soda with hydrogen peroxide into a thick paste. Apply it to the grout lines, cover with plastic wrap to keep it moist, and leave for at least thirty minutes or up to two hours for tough staining. Remove the plastic wrap, scrub, and rinse. This combination is a powerful natural bleaching agent that can genuinely restore discolored grout.
Sealing Grout to Prevent Future Staining
Here’s the hack that saves you from doing all the above work repeatedly. Once your grout is clean, seal it. Grout sealer creates a protective barrier that prevents dirt, moisture, and staining agents from penetrating the porous surface. Apply it with a small brush or roller applicator, let it cure according to the product instructions, and you’ll find that future cleaning becomes dramatically easier. Reseal once a year for best results.
Removing Hard Water Stains from Tile
Hard water deposits on tile floors respond beautifully to undiluted white vinegar. Soak a cloth in vinegar and lay it directly over the affected area for fifteen to thirty minutes. The acetic acid dissolves mineral deposits without scratching the tile surface. For particularly stubborn buildup, use a paste of cream of tartar and a few drops of hydrogen peroxide instead.

Laminate Floor Cleaning Hacks: Clean Without Causing Damage
Laminate floors are wonderfully practical but notoriously unforgiving when it comes to moisture and the wrong cleaning products. Here’s everything you need to know.
The Dry Mop First Rule
This is non-negotiable. Always dry-sweep or vacuum your laminate floors before introducing any moisture at all. Laminate has a photographic layer beneath its protective coating, and grit or debris dragged around by a wet mop will scratch this surface permanently. Vacuum on the hard floor setting, never the beater bar setting, which can damage laminate edges. Or use a dry microfiber mop to pick up all loose debris first. And if you don’t want to vacuum at all, check out the best robot vacuums here:

The Baby Shampoo Hack
This one surprises people, but it’s brilliant. Add a small squirt of baby shampoo, about half a teaspoon, to a bucket of warm water. The ultra-mild formula cleans laminate effectively without leaving residue, without stripping any protective coating, and without the risk of damage that comes with stronger cleaners. It’s gentle, effective, and incredibly cheap.
DIY Streak-Free Laminate Cleaner
Mix one part rubbing alcohol with one part water and a few drops of dish soap in a spray bottle. Spray lightly onto sections of the floor and wipe immediately with a dry microfiber mop. The alcohol helps the solution evaporate quickly, which is exactly what you want on laminate, and the result is a streak-free, clean finish. This is genuinely one of the best DIY laminate floor cleaners available.
Removing Scuffs and Marks
Rubber scuff marks on laminate respond well to a small amount of WD-40 on a soft cloth. Apply sparingly, rub gently over the scuff mark, then wipe away any residue thoroughly with a clean, damp cloth, followed by a dry one. For lighter marks, a pencil eraser often works surprisingly well, simply rub over the mark and wipe away the eraser debris.
What to Never Use on Laminate
Steam mops are a hard no on laminate floors. The heat and moisture combination can cause the planks to swell, warp, and separate at the seams, damage that is often irreversible. Wax-based cleaners, oil soaps, and abrasive scrubbing pads are also off-limits. And never, ever soak laminate floors with standing water. A damp mop should be so dry that the floor dries within seconds of being wiped.
Vinyl and LVP Floor Cleaning Hacks Made Simple
Luxury vinyl plank (LVP) has exploded in popularity over the past decade, and one of the biggest reasons is how easy it is to maintain. But “easy to maintain” doesn’t mean “impossible to damage.” Here’s how to keep it looking perfect.
The Dish Soap and Warm Water Hack
It really is this simple. A few drops of dish soap in a bucket of warm water, applied with a well-wrung microfiber mop, is all you need for regular vinyl floor cleaning. No fancy products, no complicated routines. Dish soap cuts through grease and grime effectively without damaging the vinyl’s protective wear layer. Rinse the floor with clean water afterward to prevent any soap film buildup.
Removing Black Scuff Marks Instantly
Black scuff marks on vinyl floors from shoes, furniture feet, or rubber-backed mats can look alarming, but they’re almost always surface-level and easy to remove. Apply a small amount of WD-40 or rubbing alcohol to a soft cloth and rub over the scuff mark gently. It lifts away almost instantly. Wipe the area clean with a damp cloth afterward.
Preventing Dulling and Film Buildup
One of the most common complaints about vinyl floors over time is that they develop a dull, cloudy appearance. This is almost always caused by product buildup, cleaning solutions that weren’t rinsed away properly, or wax-based cleaners that should never be used on vinyl in the first place. To restore clarity and shine, mop the floor with a solution of one cup of white vinegar per gallon of warm water. The mild acidity cuts through buildup without damaging the surface.
Restoring Shine to Dull Vinyl
If your vinyl floors have lost their original luster, a light application of a vinyl-specific floor polish can restore it beautifully. Apply a thin, even coat with a clean mop, allow it to dry completely, and buff lightly with a microfiber pad. Avoid over-applying; thin coats build up gradually to a beautiful finish, while thick applications become sticky and attract dirt.
The Best Tools for LVP
On luxury vinyl plank, the tools matter as much as the products. Use a soft-bristled vacuum attachment or a microfiber flat mop exclusively. Avoid beater bar vacuums, abrasive scrubbing pads, and steam mops. The heat from steam can soften the adhesive beneath LVP planks and cause them to shift or bubble over time.
Carpet Cleaning Hacks That Remove Stains Like Magic
Carpet stains are a fact of life. Especially if you have kids, pets, or a habit of eating on the couch. These hacks tackle even the toughest stains without a professional cleaning bill.
The Club Soda Hack
Club soda for carpet stains is one of the most widely repeated cleaning tips out there. And yes, it does work, but not for the reason most people think. It’s not the carbonation that removes the stain. It’s the water and the act of blotting. Still, club soda is a perfectly good first-response tool for fresh spills. Pour it directly onto the stain, let it sit for a minute, then blot firmly with a clean white cloth. Never rub, because rubbing pushes the stain deeper into the fibers.
Baking Soda for Carpet Deodorizing
Sprinkle a generous layer of baking soda over your carpet before bed and leave it overnight. In the morning, vacuum it up thoroughly. The baking soda absorbs odors at a molecular level, including pet smells, cooking odors, and that general musty smell that carpets can develop over time. For a pleasant scent boost, mix a few drops of essential oil into the baking soda before sprinkling.
The Shaving Cream Hack
Regular white shaving cream is one of the best carpet stain removers I’ve ever tested. Apply a generous dollop directly to the stain, work it gently into the fibers with your fingers or a soft brush, and let it sit for thirty minutes. Blot away the shaving cream with a clean cloth, then spray lightly with a mixture of equal parts white vinegar and water and blot again. The result is remarkable. Even old, set-in stains respond well to this treatment.
The Ice Cube Hack for Furniture Dents
Moved your furniture recently and discovered deep dents in the carpet where the legs were sitting? Place one or two ice cubes directly into each dent and let them melt completely. As the water is absorbed, the carpet fibers rehydrate and swell back up. Once dry, use a coin or a spoon to gently lift the fibers back upright. It sounds too simple to work, but it works almost every time.
Removing Pet Stains and Odors Permanently
For pet accidents on carpet, enzyme cleaners are the only real solution. Regular cleaning products mask odors temporarily, but enzyme-based cleaners like Nature’s Miracle actually break down the uric acid crystals in pet urine at a biological level, eliminating the odor permanently. Saturate the affected area, cover with a damp cloth, and let the enzymes work for at least fifteen minutes before blotting dry. For old, dried stains, you may need to repeat the process.
The Squeegee Pet Hair Hack
If you have pets, you know that vacuuming alone never fully removes embedded pet hair from carpet. Run a rubber window squeegee firmly across the carpet surface in one direction. The rubber creates static that pulls hair up from deep within the fibers and collects it into easy-to-remove clumps. It’s genuinely astonishing how much hair a vacuum misses. Follow up with a regular vacuum pass to finish the job.
Natural and DIY Floor Cleaning Solutions That Actually Work
Switching to natural floor cleaners isn’t just better for the environment. It’s also better for your floors, your family’s health, and your wallet too.
The Ultimate DIY All-Purpose Floor Cleaner
This recipe works on tile, vinyl, and sealed hardwood. Mix one gallon of warm water with half a cup of white vinegar, a few drops of dish soap, and ten drops of your favorite essential oil for fragrance. Shake well before each use. Apply with a damp microfiber mop and dry quickly. This simple formula cleans effectively, disinfects naturally, and leaves floors smelling fresh without any harsh chemical residue.
Essential Oils for Floor Cleaning
Beyond fragrance, certain essential oils have genuine cleaning and antibacterial properties. Tea tree oil is a powerful natural disinfectant. Add ten to fifteen drops per gallon of cleaning solution for antibacterial action. Lavender is calming and naturally antimicrobial. Lemon and orange oils cut through grease and leave a bright, clean scent. Peppermint oil also acts as a natural deterrent for ants and other insects. A bonus for kitchen floors.
White Vinegar: What’s Safe and What’s Not
White vinegar is one of the most versatile natural cleaners available, but it’s not safe on every surface. It’s excellent on tile, vinyl, and sealed stone. However, it should never be used undiluted on hardwood floors. The acidity can dull the finish over time with repeated use. Always dilute to a ratio of half a cup per gallon of water for floor cleaning, and avoid using it on unsealed stone, marble, or granite surfaces, where it can cause etching.
Castile Soap Floor Cleaner
Pure castile soap, like the well-known Dr. Bronner’s brand, is a plant-based, biodegradable cleaning agent that works beautifully on most floor types. Use no more than a quarter teaspoon per gallon of water to avoid leaving a soapy residue. It cleans effectively, is safe for children and pets once dry, and is gentle enough for daily use on hardwood, tile, and vinyl.
Hydrogen Peroxide as a Natural Disinfectant
Three percent hydrogen peroxide, the standard concentration available at any pharmacy, is an effective natural disinfectant for tile and vinyl floors. Dilute it further by mixing equal parts with water in a spray bottle, apply to the floor surface, let it sit for five minutes, then mop with clean water. It kills bacteria and viruses without the harsh fumes of bleach-based cleaners. Do not use on hardwood or laminate, as the peroxide can lighten the wood and affect the finish.

Time-Saving Floor Cleaning Hacks for Busy Households
Cleaning doesn’t have to eat your entire weekend. These time-saving strategies keep floors consistently clean with minimal daily effort.
The Two-Minute Daily Floor Reset
This is the single habit that has the biggest impact on how clean your home looks and feels day to day. Every evening, spend two minutes dry sweeping the kitchen and high-traffic living areas. That’s it. Two minutes. This removes the day’s accumulation of crumbs, dust, and debris before it gets ground into the floor surface, which means your weekly mop takes half the time and your floors always look presentable. Two minutes a day saves hours over a month.
Zone Cleaning Strategy
Instead of trying to clean every floor in your home in one session, divide your home into zones and tackle one per day. Monday is the kitchen. Tuesday is the living room. Wednesday is the hallways and entryway. And so on. Each cleaning session is short and manageable, but across the week, your entire home stays consistently clean. This approach is far more sustainable than the marathon weekend clean and far less exhausting.
Robot Vacuum Scheduling Hacks
If you have a robot vacuum, you’re already ahead. But most people underutilize them. Set your robot vacuum to run daily in high-traffic zones such as the kitchen, living room, and entryway, while scheduling less frequent passes in bedrooms and lower-traffic areas. Use the no-go zone features to keep it away from problem areas like pet feeding stations. Wake up every morning to already-vacuumed floors, and you’ll wonder how you ever lived without it.
The Microfiber Slipper Hack
This one is delightfully lazy, and I mean that as a compliment. Microfiber cleaning slippers (yes, they exist) attach microfiber pads to the bottom of soft slippers. Wear them around the house, and you passively pick up dust and light debris as you walk. It’s not a replacement for proper mopping, but as a between-clean maintenance tool, it’s oddly satisfying and genuinely effective.
Mopping Faster with the Right Technique
Most people mop in a back-and-forth motion across the entire room, which is actually quite inefficient. Instead, work in a figure-eight pattern. This technique covers more surface area per stroke, keeps the mop pad in consistent contact with the floor, and reduces the number of passes needed to clean an area. Combined with a spray mop (which eliminates the bucket), you can mop a standard kitchen in under five minutes.
Floor Cleaning Hacks for Pet Owners
Pet owners face unique floor cleaning challenges and deserve specific solutions.
The Rubber Broom Hack
A rubber broom is an absolute game-changer for pet owners. Unlike traditional brooms that scatter hair or bristle brushes that get tangled, rubber brooms create static that attracts and collects pet hair into neat, easy-to-pick-up clumps on both hard floors and carpet. Run it in one direction across the floor, collect the hair pile, and dispose of it before vacuuming. You’ll be genuinely shocked by how much hair accumulates.
Stopping Muddy Paw Prints
Prevention is better than cleaning. Keep a washable doormat and a stack of old microfiber cloths near every entrance your pet uses. Wiping paws before they hit your floors takes ten seconds and saves you significant cleaning time. For dogs, a small tub of water near the back door for paw rinsing after muddy walks is a life-changing habit if you can get your pet used to it.
Protecting Hardwood and Laminate from Nail Scratches
Pet nails are a genuine threat to hardwood and laminate floors. Keep your pet’s nails trimmed regularly. This is the most effective preventative measure. Place area rugs and runners along the routes your pets travel most frequently. Apply felt pads to furniture feet to prevent furniture from being pushed across the floor by excited pets. And consider a hardwood floor refresher product every six months to maintain the protective coating that absorbs minor scratches.
The Best Pet-Safe Floor Cleaners
Many conventional floor cleaning products contain chemicals that are toxic to pets, including certain essential oils like tea tree oil, pine oil, and citrus extracts in high concentrations. Look for plant-based floor cleaners specifically labeled as pet-safe. Alternatively, your DIY dish soap and warm water solution is completely safe for pets once dry. Always allow floors to dry completely before allowing pets back onto the cleaned surface.
Deep Cleaning in Multi-Pet Households
In homes with multiple pets, odor control is as important as visual cleanliness. Mop hard floors with a solution containing a pet-safe enzymatic cleaner once a week to break down the microscopic organic residue that causes persistent pet odors. Steam clean carpets every two to three months. Wash area rugs regularly. And keep on top of daily vacuuming. In a multi-pet household, daily is not excessive.
Tools and Products That Make Floor Cleaning Dramatically Easier
The right tools genuinely transform the floor cleaning experience. Here’s what’s actually worth investing in.
The Microfiber Flat Mop
If there’s one tool that appears repeatedly throughout this guide, it’s the microfiber flat mop, and that’s not a coincidence. Microfiber is the superior cleaning material for floors across virtually every category. It traps dirt rather than pushing it around, requires minimal moisture, is gentle on delicate surfaces, and is machine washable. Brands like Bona, O-Cedar, and Norwex make excellent options across a range of price points. This is the one tool upgrade that delivers an immediate, noticeable improvement.
Steam Mops
Steam mops are powerful, chemical-free, and deeply satisfying to use on the right surfaces. They’re excellent on sealed tile, vinyl, and sealed stone. The high-temperature steam kills bacteria, loosens grime, and sanitizes without any products at all. However, as mentioned throughout this guide, they are not suitable for hardwood, laminate, or unsealed surfaces. If your home is predominantly tile or vinyl, a steam mop is a worthy investment.
Spray Mops
For speed and convenience on everyday cleaning, a spray mop is hard to beat. Fill the built-in reservoir with your cleaning solution of choice, trigger the spray mechanism with your foot or a button, and mop. No bucket, no wringing, no mess. Brands like Brayden Studio and Vileda make well-reviewed options. For busy households where speed matters, a spray mop on a microfiber pad is the daily cleaning tool of choice.
Grout Cleaning Brushes and Electric Scrubbers
For tile grout, a dedicated stiff-bristle grout brush is essential. But if you want to take things up a notch, an electric spin scrubber with a narrow brush attachment removes the manual effort entirely. These cordless tools oscillate or spin at high speed, making light work of grout lines, tile edges, and other areas that are awkward to scrub by hand. They’re also excellent for bathroom tile walls and tub surrounds.
The Organized Cleaning Caddy
This isn’t a glamorous tip, but it’s genuinely impactful. Keep all your floor cleaning supplies, sprays, cloths, brush attachments, and the spare mop pad in a single portable caddy. When everything is in one place and ready to go, the psychological barrier to cleaning is dramatically lower. You’re far more likely to do a quick two-minute floor wipe if you don’t have to hunt through a cupboard for supplies first.
Conclusion
Floor cleaning doesn’t have to be the dreaded, time-consuming chore it’s always been. With the right hacks, the right tools, and a smarter approach tailored to your specific floor types, you can keep your home looking spotless in a fraction of the time, and genuinely protect your floors in the process.
From the microfiber mop hack for hardwood to the shaving cream stain trick for carpet, from the grout whitening paste to the rubber broom pet hair revolution. Each of these tips is designed to make your real, everyday life easier. You don’t need to implement all twenty-five at once. Start small! Pick two or three hacks that address your biggest floor cleaning frustrations and add them to your routine this week. I promise you’ll notice the difference almost immediately.
And remember, consistency beats perfection every single time. A two-minute daily sweep is worth more than a monthly marathon cleaning session. Build small, sustainable habits, and your floors will look better than ever with less effort than you’ve ever put in before.
So grab that microfiber mop, put on a great podcast, and let’s get those floors gleaming. Your home will absolutely thank you for it!