Wood floors are one of the most beautiful investments you can make in a home. They add warmth, character, and genuine value to any space. But they’re also surprisingly sensitive. What works brilliantly on tile or laminate can cause serious, lasting damage to wood. And the frustrating part? The damage often happens so gradually that most people don’t realize the cause until it’s too late.
That’s exactly why I put this guide together. Whether you’ve just had new wood floors installed and want to protect that investment from day one, or you’re trying to revive floors that have lost their luster, this complete guide covers everything you need to know about how to clean wood floors correctly, safely, and effectively.
Know Your Wood Floor Before You Clean It
Before you pick up a single cleaning tool, the most valuable thing you can do is understand exactly what type of wood floor you’re dealing with. This knowledge shapes every decision you’ll make, including which products are safe, which methods work best, and which approaches could cause irreversible damage.
Solid Hardwood vs. Engineered Wood vs. Laminate
These three floor types look remarkably similar but behave very differently when it comes to cleaning. Solid hardwood is milled from a single piece of wood all the way through. It’s durable, beautiful, and can be sanded and refinished multiple times over its lifetime, but it’s the most sensitive to moisture of the three. Too much water causes solid hardwood to swell, warp, cup, and crack in ways that can be extremely costly to repair.
Engineered wood flooring consists of a real wood veneer layer bonded to multiple layers of plywood or high-density fiberboard. This construction makes it significantly more dimensionally stable than solid hardwood. It handles humidity fluctuations and temperature changes better and is generally slightly more forgiving with moisture during cleaning. That said, the veneer layer is real wood and still requires careful, moisture-controlled cleaning.
Laminate wood flooring features a photographic wood-effect layer over a composite core. It’s not real wood, but it’s included here because it’s often mistaken for it and requires its own specific cleaning approach. Laminate is particularly vulnerable to moisture penetration at the seams and edges, where water can cause the core material to swell and bubble permanently.
Identifying Your Floor’s Finish
This is the single most important piece of information you need before cleaning any wood floor, and most homeowners simply don’t know what finish their floors have. The four main finish types are polyurethane, oil-finished, wax-finished, and unfinished, and they each require completely different cleaning approaches.
Polyurethane-finished floors are the most common in modern homes. The polyurethane creates a hard, plastic-like protective layer that sits on top of the wood, making the floor relatively durable and easy to clean. These floors can handle most pH-neutral wood floor cleaners and gentle damp mopping without issue.
Oil-finished floors have a penetrating finish that soaks into the wood grain rather than sitting on top, creating a more natural, matte appearance. These floors require specialized oil-based cleaners to maintain the finish. Water-based products can strip the protective oil over time.
Wax-finished floors, most common in older or period homes, are the most delicate and require entirely different care. Water-based products cause white marking on wax finishes, and many commercial cleaners are completely incompatible with wax. These floors need wax-specific cleaners and periodic re-waxing.
Unfinished wood floors have no protective coating at all and are extremely vulnerable to moisture and staining. If you have unfinished floors, professional finishing is strongly recommended before regular cleaning begins.
The Water Droplet Test
Here is the simplest and most reliable way to identify your floor’s finish at home. Find an inconspicuous spot, inside a closet or behind a door, and place a few drops of water on the surface. Watch what happens over the next two to three minutes. If the water beads up and sits on the surface without penetrating, you have a surface-sealed finish like polyurethane. If the water soaks into the wood and darkens it, you have a penetrating finish, oil, wax, or unfinished wood that requires more delicate treatment. This 30-second test gives you genuinely critical information that shapes everything about how you should clean your floors.
How Wood Species Respond to Cleaning
Different wood species have different densities and grain structures that affect their sensitivity to moisture and cleaning products. Dense, tight-grained species like maple and cherry are more resistant to moisture penetration than softer, more open-grained species like pine and oak. Exotic hardwoods like teak and bamboo have unique properties and may require species-specific cleaning advice. When in doubt, consult your flooring manufacturer’s guidelines. These are almost always available online, even for older floor installations.

The Essential Tools and Products for Cleaning Wood Floors
Having the right tools and products assembled before you start makes wood floor cleaning faster, more effective, and significantly safer for your floors. Here is exactly what belongs in a complete wood floor cleaning kit.
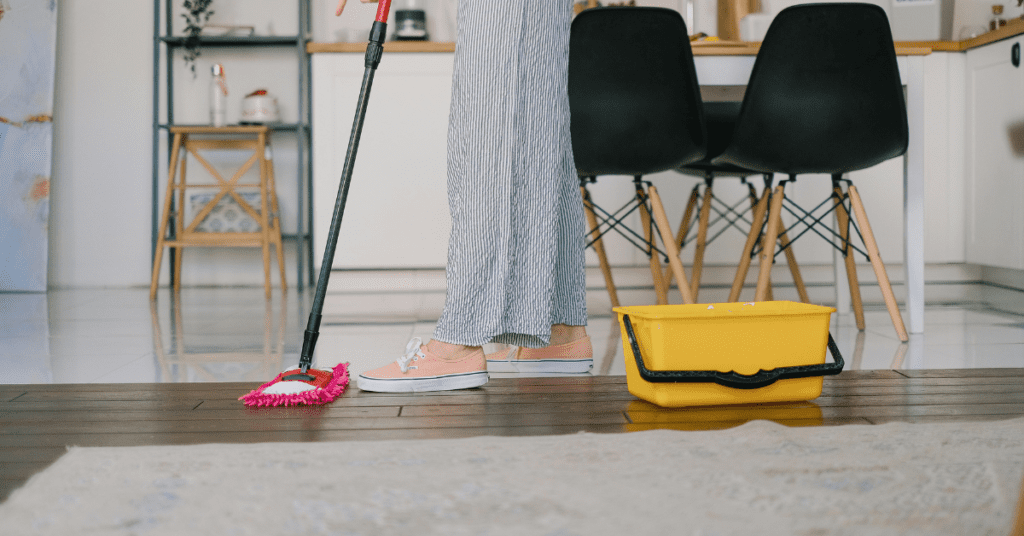
The Right Mop Changes Everything
If you’re still using a traditional string mop on your wood floors, this is the single most impactful change you can make today. String mops hold a large volume of water and release it unevenly onto the floor surface, creating precisely the excess moisture conditions that cause warping, swelling, and finish damage over time. Replace it immediately with a flat microfiber mop.
The flat microfiber mop is the definitive tool for cleaning wood floors. The microfiber material picks up dust, debris, hair, and bacteria effectively rather than redistributing them. It holds far less water than a string mop, and when properly wrung out, applies cleaning solution as a fine, even dampness that dries within seconds. The Bona Premium Microfiber Mop, the Bissell SpinWave, and the Swiffer WetJet Wood are all excellent choices at various price points.
Vacuuming: The Foundation of Wood Floor Care
Regular vacuuming is arguably more important than mopping for wood floor maintenance. Fine grit, sand, and debris on a wood floor act like sandpaper underfoot. With every step, it micro-scratches the finish progressively until the floor looks dull and worn. Removing this abrasive debris through regular vacuuming prevents this damage entirely.
The critical detail: always switch your vacuum to its hard floor setting before using it on wood. This disengages the rotating beater bar, which is designed to agitate carpet fibers and will scratch and dull a wood floor finish mercilessly if left running. Use the hard floor attachment with soft bristles, work systematically across the floor, and pay particular attention to corners and along baseboards where fine debris accumulates.

The Best Commercial Wood Floor Cleaners
Bona Hardwood Floor Cleaner is the product most consistently recommended by flooring professionals, installers, and refinishers. It’s water-based, pH-neutral, residue-free, quick-drying, and GREENGUARD certified for safety around children and pets. It works beautifully on all surface-sealed hardwood and engineered wood floors and is available in both ready-to-use spray bottles and concentrated refill formats.
Murphy Oil Soap is a plant-based, biodegradable option that has been trusted for over a century and remains excellent for regular wood floor cleaning, particularly on older floors or any wood surface that benefits from gentle, conditioning care. Dilute it properly according to instructions, a small amount goes a very long way.
Method Squirt and Mop Hard Floor Cleaner is a strong, budget-friendly, non-toxic option that performs excellently on sealed wood floors without leaving residue. For oil-finished floors, Rubio Monocoat Soap or Loba CLEAN are specifically formulated to clean without stripping the protective oil finish. For wax-finished floors, dedicated wax floor cleaners like Minwax Hardwood Floor Cleaner maintain compatibility with the delicate wax surface.
Products and Tools to Avoid Completely
Some products have absolutely no place near a wood floor. Ammonia-based cleaners break down polyurethane finish over time, causing progressive dulling and deterioration. Bleach damages wood fibers and strips the finish. Vinegar, despite its enormous popularity as a natural cleaner, is acidic enough to dull and etch wood floor finishes with repeated use. It’s a conditional option at best, not a regular cleaner. Steam mops drive moisture directly into wood fibers under heat and pressure, causing warping and finish damage that accumulates over time. And abrasive scrubbing tools, steel wool, rough scrub pads, and scratch and permanently dull wood floor surfaces.
How to Clean Wood Floors Step by Step
With the right tools assembled and your floor type and finish identified, here is the complete step-by-step process for cleaning wood floors correctly and efficiently.
Step 1: Dry Sweep or Vacuum First
This step must always come before any wet cleaning, and skipping it is one of the most common and damaging mistakes wood floor owners make. The fine grit, dust, hair, and debris present on any floor surface become intensely abrasive under a damp mop, creating microscopic scratches in the finish with every single pass. Over time, these micro-scratches accumulate into visible, widespread dullness that no amount of cleaning will reverse, only refinishing.
Use a microfiber dry mop, a soft-bristle broom, or your vacuum on the hard floor setting. Work methodically from one end of the room to the other, sweeping in the direction of the wood grain. Pay particular attention to corners, edges along baseboards, and under furniture edges where debris accumulates fastest. Take your time with this step, the quality of your wet cleaning depends entirely on how thoroughly you’ve completed the dry phase first.
Step 2: Choose the Right Cleaning Solution
Based on your floor’s finish type, select the appropriate cleaner. For polyurethane surface-sealed floors, the most common type, a commercial wood floor cleaner like Bona or a very dilute dish soap solution works perfectly. For oil-finished floors, use only a cleaner specifically formulated for oil-finished wood to avoid stripping the finish. For wax-finished floors, use a dedicated wax floor cleaner. For engineered wood, follow the manufacturer’s specific recommendations. Most handle standard wood floor cleaners well, but some have restrictions worth checking.
Step 3: The Barely Damp Mop Technique
This is the most critical technique element in the entire guide, and it cannot be overstated. Your mop must be barely damp, not wet, not even slightly wet, but barely damp. After applying your cleaning solution to the mop pad, wring it out firmly, and then wring it again. When you press the pad hard against your palm, no moisture should drip or transfer. The pad should feel just slightly cool to the touch, almost dry.
On the floor, the visual test is this: after the mop passes over a section, that section should look momentarily slightly damp and then dry completely within 30 to 60 seconds. If moisture is visible on the floor for longer than that, your mop is too wet. Reduce the moisture level before continuing. This single parameter, mop dampness, is the most important variable in wood floor cleaning, and getting it right protects your floors from the most common and damaging cleaning mistake.
Step 4: Mop in the Direction of the Wood Grain
Always mop in the direction the wood planks run, typically lengthwise down the room. Mopping against the grain pushes dirty water and cleaning solution into the seams between planks, where it can penetrate down to the subfloor and cause structural problems over time. Moving with the grain also produces cleaner, more streak-free results and is gentler on the finish surface. Start at the far end of the room and work your way toward the door so you’re never walking back over freshly cleaned sections.
Step 5: Dry the Floor Quickly
After mopping, any residual moisture on the surface should dry naturally within a minute if your mop was properly wrung out. If any areas appear to be staying damp for longer, follow up immediately with a dry microfiber cloth or a fresh dry mop pad to absorb the excess moisture. Never leave standing water or prolonged dampness on a wood floor under any circumstances.
Step 6: Buff for a Streak-Free Shine
Once the floor is completely dry, a quick buff with a clean, dry microfiber cloth or buffing pad in gentle circular motions brings out a beautiful natural shine and eliminates any remaining streaks or haze. This step is optional but makes a visible difference, particularly on darker wood floors and any floor with a high-gloss polyurethane finish where streaks are most noticeable.
How Often to Clean Wood Floors
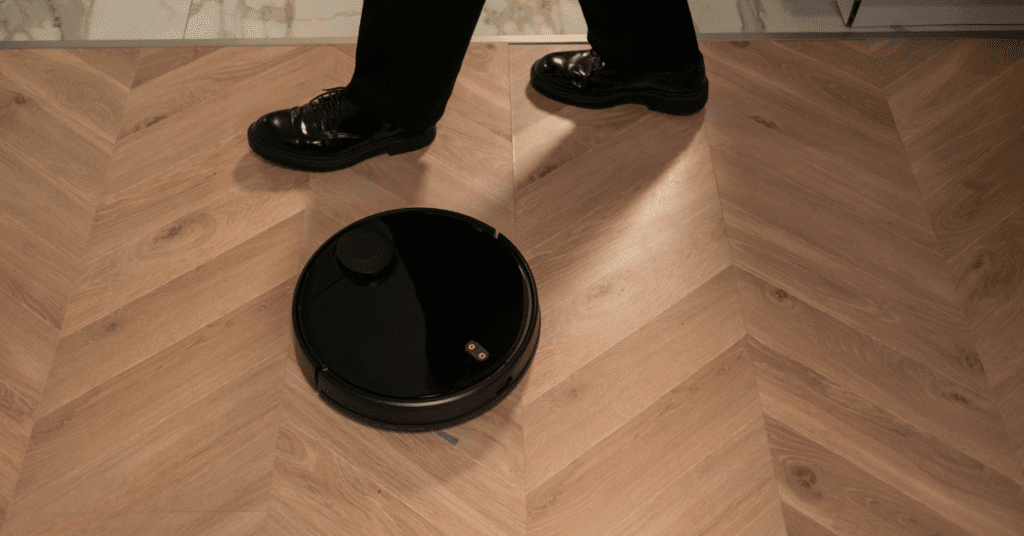
Daily, in high-traffic areas, a quick dry sweep or robot vacuum pass takes minutes and prevents the grit accumulation that causes progressive finish damage. Weekly, a thorough dry sweep of the entire floor followed by a damp mop maintains the floor in genuinely clean condition. Monthly, give extra attention to edges, corners, under furniture, and any areas showing early signs of grime buildup or staining. Every one to three months, plan for a deeper clean that addresses any buildup, treats stains, and assesses the overall condition of the finish.
How to Deep Clean Wood Floors Without Causing Damage
Regular cleaning maintains your wood floors, but periodically, they need something more thorough. A proper deep clean removes the accumulated buildup of cleaning product residue, foot oils, environmental grime, and anything that’s worked its way into the wood grain and finish over months of regular use.
When Your Floors Need a Deep Clean
Several signs indicate a deep clean is needed rather than your routine. If floors look dull and flat immediately after mopping, not just when they’re dirty, product residue has likely accumulated on the finish surface. If the floor feels slightly tacky or sticky underfoot, that’s a classic indicator of soap or cleaner buildup. If mopping seems to smear rather than clean, the same residue issue is at work. And if your floors have simply stopped responding to regular cleaning the way they once did, a thorough deep clean almost always restores their appearance before refinishing becomes necessary.
Removing Product Buildup
Years of cleaning with products used in too-high concentrations, or simply the wrong products, leave a film on the finish surface that progressively dulls the floor’s appearance and creates a slightly grimy feel that regular mopping can’t address. To remove this buildup, use a commercial wood floor deep cleaner or residue remover. Bona Deep Clean is specifically formulated for this purpose. Apply it with a microfiber mop in small sections, working the solution gently into the finish surface, then follow with a clean, damp mop pass to lift and remove the dissolved residue. You may need to repeat the process in areas with heavy buildup, and the results when the residue is fully removed can be genuinely dramatic.
Deep Cleaning Heavily Soiled Areas
For high-traffic areas, hallways, kitchen floors, and the area in front of heavily used doors that have accumulated significant grime, apply your deep cleaning solution and allow it to dwell on the surface for the manufacturer’s recommended time, typically two to five minutes, before mopping. This dwell time allows the cleaner to penetrate and loosen embedded grime rather than simply running off the surface. Work in sections and follow up each section promptly with a clean mop pass so the loosened grime is lifted rather than redistributed.
Wood Floor Refreshers and Revivers
For floors that are clean but have lost their luster due to finish wear rather than grime buildup, a wood floor refresher or reviver product applies a thin, clear coating that restores shine and provides a degree of fresh protection without the full process of sanding and refinishing. Products like Bona Hardwood Floor Refresher and Basic Coatings StreetShoe Refresher are applied like a thin polish, dry quickly to a clear finish, and can extend the functional life of a worn finish by years. They’re particularly valuable for floors showing light, widespread finish wear that hasn’t yet progressed to the point of exposing raw wood.
When to Call a Professional
Some situations genuinely require professional expertise and equipment. Significant finish wear that has exposed raw wood in large areas, deep staining that has penetrated through the finish into the wood fibers, widespread scratching that has etched the finish surface, or structural issues like warping, cupping, or significant gapping all warrant professional assessment. A professional wood floor cleaning and restoration service can determine whether a professional deep clean, a screen-and-recoat application, or a full sand-and-refinish is the most appropriate solution for your floor’s specific condition.

The Best Natural and DIY Wood Floor Cleaning Solutions
For those who prefer minimal chemical exposure or want cost-effective alternatives to commercial products, here are the DIY solutions that work on wood floors — along with honest guidance about their limitations.
White Vinegar and Water
This is far and away the most widely shared DIY floor cleaner recipe online, and it deserves a nuanced, honest assessment rather than either blanket endorsement or rejection. A dilute solution of white vinegar, roughly half a cup per gallon of warm water, does clean wood floors effectively, cutting through light grease, grime, and soap residue. However, vinegar is acidic, and the acetic acid that makes it an effective cleaner also reacts with polyurethane finishes over time, gradually dulling and etching the surface with repeated use. Use it occasionally, no more than monthly, and always dilute it properly. Never use it on oil-finished or wax-finished floors, where the acid causes immediate damage.
Black Tea
This underrated natural cleaner works beautifully on wood floors. Brew two or three black tea bags in a quart of boiling water, allow it to cool completely to room temperature, and use the cooled tea to mop your floors with a microfiber mop. The tannic acid in black tea enhances and enriches the natural color of wood, particularly darker species, and leaves a subtle, beautiful shine with no chemical residue. It’s completely non-toxic, costs essentially nothing, and leaves your floors smelling fresh. Use it as a periodic treatment, monthly or every couple of months, alongside your regular cleaner.
Olive Oil and Lemon Juice
A mixture of three parts olive oil to one part fresh lemon juice creates a natural conditioning cleaner that both cleans and nourishes the wood surface simultaneously. Apply it sparingly with a soft cloth, work it into the surface with gentle circular motions, and then buff away any excess with a clean dry cloth. This is particularly effective on older or oil-finished floors that have become dry and dull. The keyword here is sparingly. Too much oil leaves a slippery, greasy residue that attracts more dirt and can be difficult to remove fully.
Castile Soap Solution
A few drops of pure, unscented castile soap dissolved in a gallon of warm water make a gentle, effective, completely plant-based everyday cleaner that is safe on sealed wood floors. It lifts grime without leaving heavy residue, is non-toxic and safe around children and pets, and is very economical to use since such a small amount of soap is needed per cleaning session. Follow up with a clean water pass if you notice any soapy film developing on the surface over time with repeated use.
Baking Soda for Stain Removal
For targeted stain treatment on wood floors, a paste of baking soda mixed with a small amount of water applied directly to the stain, left for a few minutes, and then gently rubbed with a soft cloth is a safe and moderately effective approach for surface-level staining. The mild abrasiveness helps lift contamination without scratching the finish. Always rinse the treated area with a barely damp cloth afterward to remove all baking soda residue completely.
How to Remove Common Stains from Wood Floors
Stains happen in every home. The key to successful treatment is acting quickly, using the right method for the specific stain type, and understanding the difference between stains that are in the finish and stains that have penetrated through to the raw wood below.
Water Stains and White Rings
White cloudy marks or rings on wood floors are caused by moisture that has penetrated the finish layer but not yet reached the raw wood. They look alarming but are usually treatable at home. For fresh water marks, apply a small amount of mayonnaise or petroleum jelly directly to the white mark, cover loosely with plastic wrap, and leave for several hours or overnight. The oils penetrate the finish and help displace the trapped moisture, often eliminating the white mark. For more persistent white rings, 0000-grade steel wool rubbed very gently in the direction of the wood grain can remove the mark, but use extreme caution as this removes a thin layer of finish along with the stain.
Pet Stains and Urine
Pet urine is among the most damaging substances for wood floors because its ammonia and acid content attacks the finish and, if left untreated, penetrates deeply into the wood fibers and potentially the subfloor below. For fresh accidents, blot immediately and thoroughly with an absorbent cloth. Never rub, as rubbing spreads the contamination. Clean with an enzymatic pet stain cleaner specifically formulated for wood floors, which breaks down uric acid crystals and eliminates the odor at its biological source rather than simply masking it. For old, dried pet stains that have darkened the wood with a characteristic dark halo, the damage has almost certainly penetrated the finish into the raw wood and may require professional sanding and refinishing to fully address.
Grease and Oil Stains
Fresh grease or cooking oil on a wood floor should be addressed immediately. Apply a small amount of dish soap directly to the spot, work it gently into the stain with a soft cloth using circular motions, then wipe clean with a barely damp cloth. For dried grease, a small amount of mineral spirits on a soft cloth dissolves the oil effectively. Apply sparingly, wipe clean promptly, and follow with your regular floor cleaner to remove any solvent residue completely.
Scuff Marks
Light scuff marks from shoes, furniture, or appliances on wood floors are usually surface-level and often respond to surprisingly gentle treatment. Try rubbing the scuff mark with a clean tennis ball, a soft pencil eraser, or a small amount of baking soda on a damp cloth. For more stubborn scuffs, a tiny amount of mineral spirits on a soft cloth almost always removes them. Work gently and always in the direction of the wood grain.
Ink, Wine, and Food Stains
For ink stains, apply a small amount of rubbing alcohol to a cotton ball and dab carefully onto the stained area. Do not rub, as this spreads the ink. For wine and dark liquid stains, the key is immediate action: blot aggressively to remove as much liquid as possible before it penetrates the finish, then clean with your regular wood floor cleaner. For dried food stains, soften with a barely damp warm cloth first, then clean with dish soap solution and a soft cloth. For any organic stain that has penetrated through the finish and discolored the raw wood beneath, a small amount of hydrogen peroxide applied carefully on a cloth can lift the discoloration. Always test in a hidden area first, as hydrogen peroxide can lighten certain wood species.

Wood Floor Cleaning Mistakes That Are Quietly Damaging Your Floors
Even the most well-intentioned wood floor owners make these mistakes. Recognizing and eliminating them is often more impactful than any new cleaning technique or product.
Using Too Much Water
This is the most damaging, most common, and most preventable wood floor cleaning mistake, and it can’t be emphasized strongly enough. Wood is a hygroscopic natural material that absorbs moisture from its environment. Excess water applied during cleaning seeps into seams between planks, penetrates worn or damaged finish areas, and is absorbed directly into the wood fibers. The consequences, warping, cupping, crowning, swelling, finish delamination, and subfloor damage develop gradually and become progressively harder and more expensive to reverse. Barely damp. Every time. No exceptions.
Steam Mopping
Steam mops produce genuinely excellent results on tile and stone floors. On wood floors, they are a reliable path to long-term damage. The high-temperature steam penetrates the finish and drives moisture forcefully into wood fibers with every use, causing the same swelling and warping problems as excess liquid water but accelerated by the heat and pressure of the steam delivery. This damage accumulates over time and is cumulative and progressive. No wood floor manufacturer recommends steam mopping, and most explicitly state that steam mopping voids the floor warranty. Avoid it entirely on any wood floor, regardless of what the steam mop packaging claims.
All-Purpose Cleaners, Ammonia, and Bleach
Products like Pine-Sol, Fabuloso, and most general household multi-surface cleaners are formulated for surfaces that are far more chemically robust than wood floor finishes. Ammonia-based products, including many glass cleaners, break down the polyurethane finish over time. Bleach damages and discolors wood fibers and destroys the finish. Even products that seem gentle often contain ingredients incompatible with wood floor finishes when used repeatedly. Always use a product specifically formulated for wood floors. The additional investment is negligible compared to the cost of refinishing damaged floors.
Skipping the Dry Sweep
Mopping a wood floor without sweeping it first is one of the most widely made and least recognized cleaning errors. Every particle of grit, sand, or debris on the floor surface becomes abrasive under a wet mop, and each mopping pass grinds these particles across the finish surface, creating hundreds of fine scratches. Repeated over months and years, this produces the widespread, hazy dullness that makes wood floors look old and worn long before their time. The fix is completely free and takes two minutes: sweep or vacuum before you mop, every single time.
Waxing Over Polyurethane
This mistake is made most often by homeowners with older-looking floors who want to restore shine, or those acting on incorrect advice. Applying paste wax over a polyurethane-finished floor creates a cloudy, uneven film that is extremely difficult to remove and prevents any future refinishing products from bonding properly to the floor surface. If your floor has a polyurethane finish, use a polyurethane-compatible floor refresher product to restore shine, not wax.
Cleaning Too Infrequently
Somewhat paradoxically, cleaning too rarely is also a significant source of wood floor damage. Fine grit and debris allowed to accumulate and sit on the floor surface get ground progressively deeper into the finish with every footstep, creating micro-abrasion damage that compounds over time. Regular dry sweeping, even a quick daily pass in high-traffic areas, costs almost no time and prevents this progressive, cumulative finish damage entirely.
Room-by-Room Wood Floor Cleaning Tips
Different rooms impose different demands on wood floors. Targeted strategies for each space produce significantly better results than a uniform approach applied everywhere.
Kitchen Wood Floors
Kitchen wood floors face the most challenging combination of cleaning demands: cooking grease that coats tile and grout surfaces invisibly, frequent liquid spills including acidic substances like vinegar and citrus that can damage the finish if left, food debris that attracts pests and bacteria, and constant heavy foot traffic. The most critical kitchen habit is immediate spill response. Any liquid on a kitchen wood floor, especially acidic liquids, should be wiped up within seconds of the spill occurring. Dry sweep or vacuum kitchen floors daily, given the high debris load. For weekly mopping, a degreasing dish soap solution in warm water cuts through cooking residue effectively. Place a mat or runner in front of the cooking area and sink to intercept grease splashes and moisture before they reach the floor.
Bathroom Wood Floors
Wood in bathrooms is beautiful but demands rigorous moisture management. Ensure your bathroom exhaust fan is functioning properly and run it during and for 20 minutes after every shower to remove the humidity that causes wood to expand and contract. Place highly absorbent bath mats at the shower or tub exit and at the sink, and wash them weekly to prevent mold and mildew from developing on the mat and transferring to the floor beneath. Wipe up any water splashes or spills on the floor immediately rather than allowing them to sit. Inspect the floor regularly near water sources for any areas where the finish is wearing, these need prompt attention before moisture penetration reaches the raw wood.
Living Room and Bedroom Wood Floors
These rooms are generally the most straightforward to maintain since they see less moisture and fewer spill risks. The primary concerns are dust accumulation, pet hair, and furniture-related scratching. Place felt pads on the legs of every piece of furniture, such as sofas, chairs, tables, bed frames, and replace them when they compress and thin, which happens more quickly than most people expect. A robot vacuum set to run daily is particularly effective in living rooms and bedrooms where fine dust and pet hair accumulate consistently. Weekly damp mopping with your chosen cleaner keeps these floors in excellent condition with minimal effort.
Entryway and Hallway Wood Floors
Entryways and hallways are the highest-traffic areas in most homes and the first line of contact with everything tracked in from outdoors. A high-quality outdoor doormat and a second absorbent indoor mat at every entry point capture the majority of outdoor debris, grit, and moisture. A no-outdoor-shoes policy, or even a partial policy of removing shoes at the front door, dramatically reduces the amount of fine grit and outdoor contamination that reaches and abrades the floor finish. Sweep entryway and hallway floors daily in active households, and give these areas extra attention during wet weather and winter when moisture and salt are constant concerns.
Open-Plan Spaces
Large open-plan spaces present a logistics challenge: covering a large floor area efficiently without allowing any section to dry too slowly or receive too much moisture. Work in methodical sections from the far end back toward the exit, completing each section fully before moving to the next. Use a spray bottle to apply cleaning solution directly to the mop pad rather than to the floor, which gives you precise control over moisture application across large areas.
How to Maintain and Protect Wood Floors Long-Term
Cleaning addresses what’s on your floors. Long-term maintenance protects the floors themselves, the finish, the wood, and the structural integrity against the forces that cause premature wear and aging.
Building Your Maintenance Routine
Sustainable wood floor maintenance doesn’t require significant time investment. It requires consistent, small efforts. Make daily dry sweeping in high-traffic areas a non-negotiable habit, two minutes that prevent progressive finish damage. Do a full floor sweep and damp mop weekly, completing the process in 15 to 20 minutes for most rooms when the floor is maintained regularly. Monthly, pay extra attention to edges, corners, and under furniture where grime accumulates. Seasonally, assess the overall finish condition and plan for any refreshing treatments or professional attention the floor may need.
Rugs, Mats, and Floor Protection
Strategic rug and mat placement is one of the most cost-effective wood floor protection strategies available. Place mats at every exterior door, in front of the kitchen sink and cooking area, at bathroom entrances, and in the highest-traffic paths through living areas and hallways. Area rugs in living rooms, dining rooms, and bedrooms protect large sections of floor from concentrated foot traffic and furniture movement. Choose rugs with natural fiber or felt backing rather than rubber backing, which can discolor certain wood floor finishes over time.
Furniture Pads and Floor Protectors
Furniture is responsible for a disproportionate share of wood floor scratching and denting. Felt adhesive pads on every furniture leg, all chairs, sofas, tables, cabinets, and bed frames are essential and inexpensive. Check and replace them every six to twelve months as they compress and wear down with use. For heavy furniture that moves during use, dining chairs, particularly, floor protector glides specifically designed for hard floors provide more durable protection than standard felt pads.
Managing Indoor Humidity
Wood floors are in constant dialogue with the humidity of their environment, expanding slightly when humidity rises and contracting when it falls. The recommended indoor humidity range for wood floors is 35 to 55 percent. Outside this range, the repeated expansion and contraction cycles stress the wood and lead to warping, cupping, gapping, and cracking over time. Use a humidifier during dry winter months to maintain adequate humidity, and air conditioning or a dehumidifier during humid summers to prevent excess moisture. A digital hygrometer, available for under $15, lets you monitor your home’s humidity levels accurately and adjust accordingly.
When and How to Refinish
Even the best-maintained wood floors eventually need refinishing. The finish, the protective coating on the wood’s surface, wears down over years of use, and when it does, the raw wood beneath becomes vulnerable. Signs that refinishing is needed include widespread dullness unresponsive to cleaning, visible scratches penetrating through to raw wood, bare patches in high-traffic areas, or persistent staining that cleaning can’t address. For floors with light finish wear, a screen-and-recoat, light abrasion of the existing finish, followed by a fresh topcoat, is less disruptive, faster, and less expensive than full refinishing. Full sand-and-refinish involves sanding the floor to bare wood and applying completely new stain and finish coats, restoring the floor to essentially new condition. A professional flooring contractor can assess which approach is appropriate for your floor’s specific condition.

Conclusion
Beautiful wood floors don’t maintain themselves, but with the right knowledge, keeping them looking stunning is far simpler than most people think. The difference between floors that look incredible for decades and floors that need replacing in years almost always comes down to consistently correct cleaning habits applied from the very beginning.
Start with what you’ve learned here today. Know your floor’s finish type, and take the water droplet test right now if you haven’t already. Swap that string mop for a microfiber one. Keep your mop barely damp, not wet. Sweep before you mop every single time. Respond to spills immediately. Choose a cleaner specifically formulated for wood floors. Build a simple routine that fits realistically into your life and stick with it. None of these steps is complicated or time-consuming. But their cumulative impact on the long-term beauty, durability, and value of your wood floors is genuinely enormous.
Your wood floors are one of the finest features of your home, and one of its most significant long-term investments. They deserve the right care. And with everything in this complete guide, you are now fully equipped to give it to them. Start today, build the habits, and enjoy floors that look stunning not just this week, but for decades to come!