The challenge with kitchen floors specifically is that they don’t just collect ordinary dust and dirt. They deal with grease. Sticky residue. Dried food. Liquid spills that get walked through before anyone notices. And underneath all of that, grout lines that absorb every bit of it like tiny sponges. A regular mop often just moves the problem around rather than solving it.
The good news? With the right hacks, the right tools, and a smarter approach to your cleaning routine, keeping your kitchen floor genuinely spotless doesn’t have to be the frustrating, time-consuming battle it sometimes feels like. Whether you’re dealing with tile, hardwood, vinyl, or laminate, I’ve pulled together the best kitchen floor cleaning hacks that actually deliver results. Let’s get your kitchen floor looking the way it deserves to look!
Understanding Your Kitchen Floor Before You Start Cleaning
Before you reach for a single cleaning product, the most valuable thing you can do is understand exactly what type of kitchen floor you’re dealing with. Kitchen floors face challenges that no other room in the house does. The combination of cooking grease, moisture, heavy daily foot traffic, and food debris creates a uniquely demanding cleaning environment. And different floor types respond to that environment, and to cleaning products, in completely different ways.
Ceramic and Porcelain Tile
Ceramic and porcelain tile are the most common kitchen floor materials, and for good reason. They’re durable, water-resistant, and relatively easy to clean. The tiles themselves handle most cleaning products well, but the grout between them is a completely different story. Kitchen grout is in a constant battle against cooking grease, food splatter, and moisture, and without regular targeted cleaning and proper sealing, it becomes progressively darker and harder to restore. This is the primary cleaning challenge for tile kitchen floors, and it shapes the cleaning approach more than almost anything else.
Hardwood Kitchen Floors
Hardwood in the kitchen is beautiful but demanding. Wood is naturally sensitive to moisture and grease, and the kitchen environment provides both in abundance. Hardwood kitchen floors require careful moisture-controlled cleaning. Excess water causes warping, swelling, and finish deterioration. They also need regular degreasing to prevent the invisible film of cooking grease that coats kitchen surfaces from building up on the floor finish and creating a sticky, dull surface over time. The key with hardwood kitchen floors is quick spill response and moisture-minimal cleaning techniques.
Vinyl and Luxury Vinyl Plank
Vinyl kitchen floors are increasingly popular because they handle kitchen conditions beautifully, are waterproof, comfortable underfoot, and relatively forgiving in cleaning. Luxury vinyl plank, in particular, has become a go-to kitchen flooring choice for its realistic appearance and practical performance. Vinyl handles most cleaning products well but is sensitive to highly concentrated cleaners, abrasive scrubbing tools, and steam, all of which can damage the surface coating over time.
Laminate Kitchen Floors
Laminate in the kitchen requires extra vigilance around moisture management. The layered composite core of laminate flooring swells irreversibly when water penetrates the seams and edges, which makes kitchen laminate a perpetual moisture-management challenge. Cleaning with barely damp methods and immediate drying is non-negotiable for laminate kitchen floors.
Natural Stone
Marble, slate, travertine, and limestone kitchen floors are stunning but sensitive. Natural stone is porous and reactive to acidic cleaners. Vinegar, lemon juice, and many commercial cleaners etch and permanently dull polished stone surfaces. Stone kitchen floors require pH-neutral, stone-specific products and regular sealing to maintain their appearance against the grease and moisture demands of the kitchen environment.
Kitchen Grout: The Most Challenging Element
Regardless of your tile type, kitchen grout deserves special attention in any cleaning discussion. The combination of cooking grease, which penetrates porous grout deeply and bonds to organic matter, and daily food debris creates a grout-darkening challenge that no other room in the house matches. Understanding this from the outset shapes the entire kitchen floor cleaning approach.

Essential Tools and Products for Kitchen Floor Cleaning
The right tools make kitchen floor cleaning dramatically faster and more effective. Here is exactly what a well-equipped kitchen floor cleaning kit should contain.
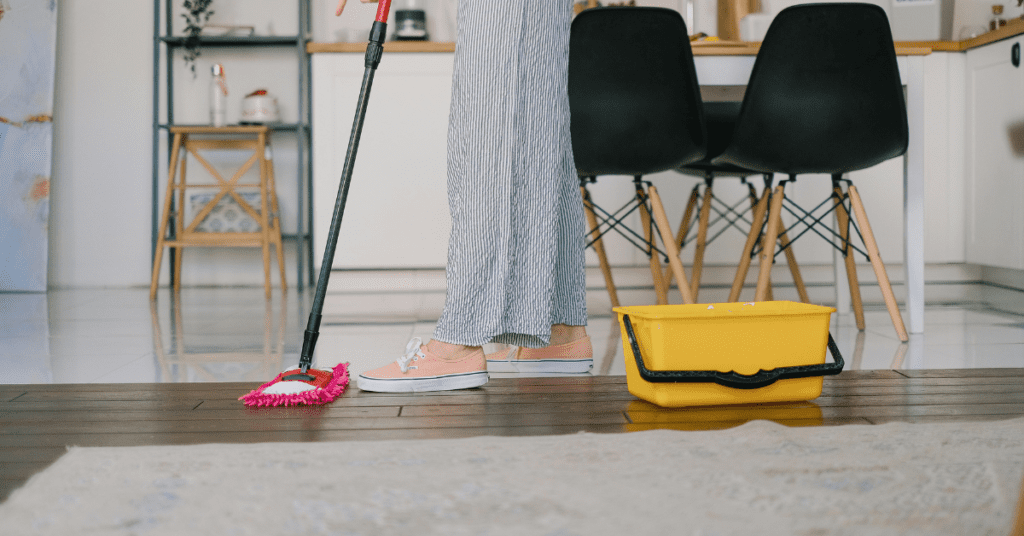
The Best Mops for Kitchen Floors
The flat microfiber mop is the best everyday mop for most kitchen floor types. It distributes cleaning solution evenly, picks up grease and debris rather than redistributing it, and holds far less water than a traditional string mop, critical for any kitchen floor sensitive to moisture. The O-Cedar EasyWring Spin Mop is an excellent choice for kitchen floors that need more water capacity for heavier cleaning sessions, with a centrifugal wringing mechanism that controls moisture level effectively.
Steam mops deserve specific mention for kitchen tile floors. The combination of high-temperature steam and mechanical action cuts through cooking grease on ceramic and porcelain tile with impressive effectiveness. Steam penetrates grout lines, kills bacteria, and loosens baked-on food residue without any chemical cleaners. For tile and most stone kitchen floors, steam cleaning is one of the most powerful tools available. For hardwood, vinyl, and laminate kitchen floors, avoid steam entirely, the heat and moisture combination damages these surfaces progressively over time.
The Grout Brush
If you have a tile kitchen floor, a dedicated stiff-bristle grout brush is genuinely non-negotiable. No mop, sponge, or cloth can reach into grout lines and physically agitate the grease and grime embedded there the way a grout brush can. Keep one permanently in your kitchen cleaning kit. For a game-changing upgrade, pair it with an old electric toothbrush for the powered-scrubbing approach described later, the difference in effort and results is significant.
Natural Cleaning Staples
Four ingredients form the backbone of virtually every effective DIY kitchen floor cleaning solution. Dish soap is the essential kitchen degreaser. Its surfactants are specifically formulated to emulsify and lift grease, which makes it the ideal base cleaner for kitchen floors above all others. Baking soda provides gentle abrasion and deodorizing power for targeted stain treatment. White vinegar cuts through mineral deposits, light grease, and soap residue effectively on ceramic and porcelain tile. Hydrogen peroxide is a natural disinfectant and stain lifter that works particularly well on kitchen grout.
Commercial Products Worth Having
For everyday tile floor cleaning, Black Diamond Marble and Tile Floor Cleaner performs well across multiple tile types. For serious kitchen grease, a dedicated commercial degreaser like Zep Heavy Duty Citrus Degreaser or Simple Green All-Purpose Cleaner diluted appropriately cuts through cooking grease accumulation that dish soap solutions can’t fully address. For grout specifically, OxiClean Versatile Stain Remover dissolved in warm water is one of the most effective whole-floor grout treatment products available.
The Best Kitchen Floor Cleaning Hacks for an Instant Transformation
These are the hacks that produce the most dramatic, immediate improvements in kitchen floor appearance, the ones worth trying today.
The Dish Soap and Hot Water Hack
This is the foundational kitchen floor cleaning hack and the single most effective everyday degreaser available at virtually no cost. Add three to four drops of dish soap to a bucket of the hottest water your gloved hands can handle. The heat loosens grease and baked-on residue while the dish soap emulsifies and lifts it from the floor surface. Apply with a well-wrung microfiber mop, work in sections, and follow with a clean water rinse to prevent soapy residue from leaving a dull, sticky film. Simple, inexpensive, safe for virtually all kitchen floor types, and remarkably effective against the primary enemy of kitchen floors, grease.
The key to making this hack work better than standard mopping: use genuinely hot water, not warm. The temperature difference between warm and hot water has a significant impact on grease removal because heat lowers the viscosity of cooking oils, making them far easier to emulsify and lift from the floor surface.
The Baking Soda and Vinegar Paste
For ceramic and porcelain tile surfaces with accumulated grease and stubborn grime, mix baking soda with white vinegar to form a thick paste. The fizzing reaction is normal and part of what makes it effective. Apply directly to stained or grimy tile surfaces and grout lines, allow it to sit for 10 to 15 minutes, scrub with a brush, and rinse thoroughly. The mild abrasiveness of the baking soda, combined with the degreasing acidity of the vinegar, lifts surface grime and light grease accumulation effectively. Never use this combination on natural stone kitchen floors. The acidity causes permanent etching damage.
The Boiling Water Hack
For dried food debris, sticky residue, and anything that has bonded to the kitchen floor surface through heat and time, carefully poured boiling water is a surprisingly powerful first step. Pour a small amount of boiling water directly onto the stubborn spot, allow it to sit for 30 seconds to a minute, then wipe or scrub immediately. The heat rehydrates and softens dried food and loosens the bond between sticky residue and the floor surface, making removal dramatically easier and requiring far less physical scrubbing effort. Use caution on natural stone and laminate, where extreme temperature changes can cause surface damage.
The Magic Eraser Trick
A damp melamine foam eraser is extraordinary on glazed ceramic and porcelain kitchen tile surfaces for removing scuff marks, dried residue, and stubborn marks that resist other approaches. The micro-abrasive structure of melamine foam lifts contamination from the glazed tile surface with minimal chemical input. Use it carefully on soft or delicate tile finishes and never on natural stone, but on standard glazed kitchen tile, it’s one of the most satisfying spot-cleaning tools available.
The WD-40 Hack
A small spray of WD-40 applied to scuff marks, heel marks, or stubborn sticky residue on ceramic or porcelain kitchen tile and wiped with a clean cloth removes marks that nothing else will touch. Always follow up immediately by cleaning the treated area with dish soap and water to remove the oily residue before it attracts additional debris. Use this targeted on specific marks rather than broadly across the floor.
Rubbing Alcohol for Streak-Free Results
For a quick-dry, streak-free clean on ceramic and porcelain kitchen tile between deeper cleaning sessions, diluted rubbing alcohol, one part alcohol to three parts water, applied with a microfiber mop, evaporates quickly and leaves no residue. It’s an excellent option for a fast refresh of the kitchen floor before guests arrive or after a cooking session that left the floor looking grimy but doesn’t warrant a full mop.
Kitchen Floor Grout Cleaning Hacks That Actually Work
Kitchen grout is in a category of its own when it comes to cleaning difficulty. The combination of porous cement-based grout, cooking grease that penetrates deeply and bonds with other organic matter, and daily food debris creates a darkening and staining challenge that requires targeted, specific treatment.
Why Kitchen Grout Is the Hardest Grout to Clean
Standard cement-based grout is porous, it absorbs everything it contacts. In most rooms, this means dirt and occasional spills. In the kitchen, it means cooking grease, food particles, liquid spills, and the steam from cooking that deposits a fine layer of aerosolized grease across every surface in the room, including the floor. This grease penetrates deep into the grout pores and bonds with other organic matter, creating a form of contamination that water-based cleaning alone struggles to address effectively. Understanding this chemistry is what makes the targeted approaches below so much more effective than standard mopping for kitchen grout specifically.
The Baking Soda and Hydrogen Peroxide Paste
This is the single most effective DIY kitchen grout cleaner available and costs almost nothing to make. Combine baking soda with enough hydrogen peroxide to form a thick, spreadable paste. Apply generously along grout lines using a grout brush or old toothbrush, pressing the paste firmly into the lines. Allow it to sit for 10 to 15 minutes, long enough for the hydrogen peroxide to penetrate and the baking soda to begin lifting contamination. Scrub firmly along each grout line and rinse thoroughly. On kitchen grout that has been darkened by grease accumulation, the results are frequently remarkable.
The Electric Toothbrush Hack
Manual scrubbing along grout lines is effective but physically exhausting, particularly across a full kitchen floor. An old electric toothbrush transforms the experience entirely. Apply your cleaning paste to the grout lines, set the toothbrush to its highest setting, and work it methodically along each line. The rapid oscillation does the scrubbing work for you, agitating the cleaning solution deep into porous grout without requiring significant physical effort. For kitchen floors with extensive grout lines, this single tool change reduces the effort of grout cleaning by roughly half.
The Bleach Pen Hack
For white or near-white kitchen grout that has become seriously stained or greasy, a household bleach pen allows precision application of bleach gel directly into grout lines without the mess and risk of liquid bleach spreading across surrounding tile. Apply the gel along the grout lines, leave for 10 to 15 minutes, then rinse thoroughly. The results on white cement grout are dramatic. Always use with adequate ventilation, wear gloves, and never use chlorine bleach on colored grout, it strips the pigment permanently.
Oxygen Bleach for Whole-Floor Grout Revival
When kitchen grout across the entire floor needs addressing rather than just spot treatment, oxygen bleach, OxiClean dissolved in warm water per the package instructions, is the most powerful and practical whole-floor approach. Apply generously across all grout lines, allow to dwell for 15 to 30 minutes, scrub with your grout brush, and rinse thoroughly. Oxygen bleach is color-safe, produces no chlorine fumes, and is significantly more effective on the grease-based contamination common in kitchen grout than many other cleaning approaches.
Steam Cleaning Kitchen Grout
For the most effective kitchen grout cleaning available without professional intervention, steam cleaning combines heat, which melts and loosens grease, with mechanical penetration into the porous grout surface. Direct the steam nozzle along each grout line, move slowly and deliberately, and wipe the lifted residue with a clean cloth as you work. For heavily greased kitchen grout, pre-treating with the baking soda and hydrogen peroxide paste before steam cleaning combines the chemical degreasing action of the paste with the physical penetrating power of the steam for maximum results.
Sealing Kitchen Grout After Cleaning
Cleaning kitchen grout is only half the battle. Sealing it immediately after is what protects your work and prevents rapid re-soiling. Once your grout is completely clean and thoroughly dry, allow at least 24 hours after wet cleaning, and apply a penetrating grout sealer along all grout lines. In the kitchen specifically, look for a grout sealer with oil resistance in its specifications. Standard grout sealers provide moisture resistance but may not fully resist the grease penetration that kitchen grout is uniquely subjected to. Reseal annually for maximum protection.

Natural and DIY Kitchen Floor Cleaning Solutions That Work
For households that prefer minimal chemical exposure in the room where food is prepared, these natural solutions deliver genuine kitchen floor cleaning power.
White Vinegar and Warm Water
A 50/50 solution of white vinegar and warm water in a spray bottle or mop bucket is an effective everyday cleaner for ceramic and porcelain kitchen tile. The acetic acid in vinegar cuts through light grease, mineral deposits, and soap residue effectively. Apply with a microfiber mop, allow a brief dwell time on greasy areas, and mop clean. The vinegar smell dissipates completely as the floor dries. Critical reminder: never use vinegar on natural stone kitchen floors — the acidity permanently etches polished stone surfaces.
Dish Soap and Warm Water
For a plant-based, everyday kitchen floor degreaser, a few drops of mild dish soap in warm water is simultaneously the most effective and the most accessible kitchen floor cleaning solution available. Dish soap’s surfactants are specifically engineered to cut through cooking grease, the primary kitchen floor enemy, making it more naturally suited to kitchen floor cleaning than any other common cleaning ingredient. Always follow with a clean water rinse to prevent residue buildup.
Lemon Juice and Baking Soda Scrub
For naturally brightening dull ceramic or porcelain kitchen tile that has lost its clarity to grease film and product buildup, mix lemon juice with enough baking soda to form a gritty paste. Apply to tile surfaces, scrub with a soft brush, and rinse thoroughly. The citric acid dissolves light grease and mineral deposits while the baking soda provides gentle abrasive action. Never use on natural stone. Use monthly as a brightening treatment alongside your regular cleaning routine.
Castile Soap Solution
A few drops of pure castile soap dissolved in warm water creates a gentle, completely non-toxic kitchen floor cleaner that is safe on all floor types, including most natural stone. It lifts grease and food residue without leaving harmful residue, is safe in homes with children and pets, and produces a clean, fresh result. Dr. Bronner’s unscented variety is the ideal choice for kitchen cleaning purposes. Follow with a clean water rinse to prevent any soapy film from developing over time.
Tea Tree Oil for Antibacterial Power
Adding 10 to 15 drops of tea tree essential oil to any of the above cleaning solutions provides a natural antibacterial and antifungal boost that is particularly valuable in the kitchen environment, where food-borne bacteria are a genuine hygiene concern. Tea tree oil has well-documented antimicrobial properties and is effective against common kitchen bacteria, including E. coli and Salmonella. It leaves a clean, fresh scent and doesn’t affect the cleaning power of the base solution.
How to Remove the Toughest Kitchen Floor Stains and Grease
Kitchen floors encounter stains that other rooms simply don’t, and some of them require targeted, specific treatment to address effectively.
Cooking Oil and Grease Buildup
Fresh cooking oil on any kitchen floor should be treated immediately. Blot or absorb as much as possible with paper towels or absorbent cloth, then apply dish soap directly to the spot and work it in with a soft cloth. For old, built-up cooking grease that has hardened and bonded to tile or grout surfaces, a commercial degreaser applied and allowed to dwell for 5 to 10 minutes before scrubbing is the most effective approach. On hardwood kitchen floors, mineral spirits applied sparingly on a cloth dissolve grease without damaging the wood finish — follow immediately with your regular wood floor cleaner to remove all solvent residue.
Burned-On Food and Dried Residue
Baked-on food that has been walked into the floor surface and dried hard is one of the most common and frustrating kitchen floor staining challenges. The boiling water hack, described earlier, is the most effective first step, rehydrating and softening the dried material for easy removal. For residue that has been on the floor long enough to genuinely bond with the surface, a plastic scraper held at a very low angle can carefully lift the material without scratching the tile. Never use metal scrapers on any kitchen floor surface.
Wine, Juice, and Dark Liquid Stains
For dark liquid stains on ceramic and porcelain kitchen tile, immediate action is the most important factor. Blot aggressively to remove as much liquid as possible before it penetrates the grout, then clean with your regular floor cleaner. For dried dark stains in grout, hydrogen peroxide applied directly and allowed to dwell is the most effective treatment. It lifts organic color staining from grout without the harshness of chlorine bleach. For natural stone kitchen floors, use only stone-safe stain removers. Standard treatments can etch and permanently damage polished stone surfaces.
Rust Stains
Rust stains on kitchen tile, from metal appliance bases, cast iron pans set on the floor, or metal accessories stored at floor level. Respond well to Bar Keepers Friend, which contains oxalic acid, specifically effective against iron oxide staining. Make a paste, apply it to the rust mark, allow it to sit for several minutes, scrub gently, and rinse. Lemon juice and salt applied to lighter rust marks and left for several hours is an effective natural alternative. Never apply chlorine bleach to rust stains. It reacts with the iron oxide and permanently sets the discoloration.
Pet Food and Water Bowl Stains
The area around pet food and water bowls develops a unique type of staining, a combination of food residue, water mineral deposits, and the oils from pet food that create a persistent sticky ring on the kitchen floor. Clean this area daily with dish soap and warm water to prevent accumulation. For established pet bowl stains, a baking soda paste applied to the affected area and left for 15 minutes before scrubbing addresses the buildup effectively. Consider placing a dedicated waterproof mat under pet bowls, it protects the floor and is far easier to clean than the floor itself.
Mystery Stains
For unidentified kitchen floor stains, a methodical approach works best. Start with dish soap and hot water. It addresses the most common kitchen staining agents, including grease and food residue. If that doesn’t resolve it, move to baking soda paste for additional abrasive action. Then, hydrogen peroxide for organic staining. Then, a commercial kitchen degreaser for grease-based contamination that resisted earlier approaches. Always test any new product in an inconspicuous area first, particularly on natural stone or specialty vinyl.

Kitchen Floor Cleaning Hacks by Floor Type
Ceramic and Porcelain Tile
These floors are the most forgiving kitchen floor type and handle the widest range of cleaning approaches. For regular cleaning, the dish soap and hot water method or a commercial tile cleaner applied with a microfiber mop handles everyday grease and grime effectively. For grout, the baking soda and hydrogen peroxide paste combined with electric toothbrush scrubbing addresses kitchen grease accumulation better than almost any other DIY approach. Steam cleaning is both safe and highly effective on ceramic and porcelain kitchen tile. The combination of heat and steam is ideal for kitchen grease. The primary maintenance focus should always be the grout. Clean it monthly, seal it annually, and you’ll prevent the vast majority of maintenance challenges these floors can develop.
Hardwood Kitchen Floors
Hardwood in the kitchen requires the most careful approach of any kitchen floor type. The combination of heat from cooking, moisture from dishwashing and steam, and grease from cooking creates conditions that are genuinely challenging for wood floors to handle. Use a microfiber mop wrung out to barely damp for all wet cleaning. For degreasing, a dilute dish soap solution applied with minimal moisture and followed immediately by a dry microfiber pass works well for regular maintenance. Never allow standing water on hardwood kitchen floors for any reason. Place mats and runners in the highest-risk zones, in front of the sink, dishwasher, and cooking area, to intercept moisture and grease before they reach the wood.
Vinyl and Luxury Vinyl Plank
Vinyl kitchen floors are genuinely low-maintenance but benefit from regular, gentle cleaning. Daily sweeping or vacuuming removes the grit that micro-scratches the surface coating underfoot. For mopping, a dilute dish soap solution or a vinyl-specific cleaner applied with a barely damp microfiber mop cleans effectively without risking surface damage. Avoid abrasive scrubbers that scratch the surface coating, highly concentrated cleaners that dull the finish, and steam mops that damage the layers. Pay attention to the seams and edges of vinyl planks. These are vulnerable to moisture penetration, and cleaning with a well-wrung mop and prompt drying protects them effectively.
Laminate Kitchen Floors
Laminate and water are fundamentally incompatible, which makes kitchen installation particularly challenging. Use the driest possible cleaning method at all times, a microfiber mop wrung to the absolute limit of damp, used quickly across small sections with immediate drying. Spills must be addressed within seconds on laminate kitchen floors any liquid left to sit risks seeping into seams and causing irreversible swelling. Commercial laminate floor cleaners provide the best balance of cleaning effectiveness and moisture minimization for these surfaces.
Natural Stone Kitchen Floors
Natural stone kitchen floors require both the most careful and the most specific cleaning approach. Acid is the absolute enemy of natural stone. Vinegar, lemon juice, most commercial kitchen cleaners, and anything with a low pH etch polished stone surfaces permanently. Use only pH-neutral, stone-specific cleaners for all kitchen stone floor cleaning. For grease removal on stone, pH-neutral dish soap in warm water is safe and effective. Seal natural stone kitchen floors every six to twelve months with a stone-specific sealer. The kitchen environment demands more frequent sealing than stone floors in other rooms due to the constant grease and moisture exposure.
Textured Kitchen Tile
The same surface texture that provides grip in a kitchen floor environment creates a significant cleaning challenge. More surface area means more places for grease and food to hide and accumulate. A stiff-bristled brush and a generous dwell time with your cleaning solution are essential for textured kitchen tile. Apply the cleaner, let it sit for 10 minutes to penetrate the textured surface, then scrub firmly with a brush and rinse thoroughly. A steam cleaner is particularly effective on textured kitchen tile, reaching into the surface relief and dislodging embedded grease that scrubbing alone can’t fully remove.
Speed Cleaning Hacks for Kitchen Floors When You’re Short on Time
The 5-Minute Kitchen Floor Reset
Set a timer for five minutes. Dry sweep or vacuum first, one to two minutes to remove all loose debris, crumbs, and hair. Spray your cleaning solution across the floor and allow it to dwell for 60 seconds while you wipe the cabinet bases and baseboards quickly. Mop the floor in efficient parallel passes. Done. Five minutes, consistently applied after every cooking session, prevents grease from building up to the point where it requires serious intervention. This single habit is the most impactful change most kitchen floor owners can make.
The Dry Sweep First Rule
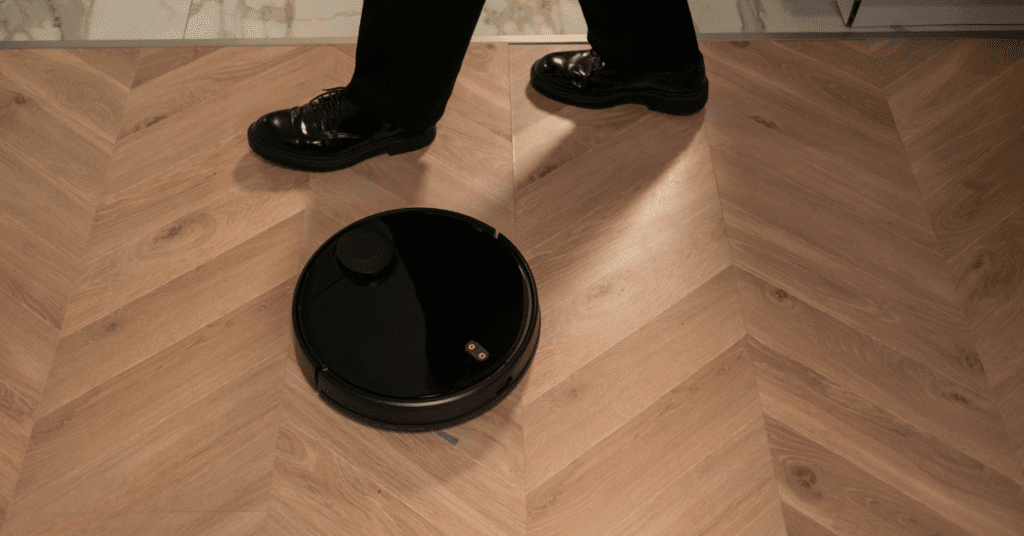
In the kitchen specifically, this rule is even more critical than in other rooms. Kitchen floors carry a combination of food debris, fine crumbs, and loose grit that becomes a greasy, sticky mess when wet. Sweeping or vacuuming first removes all of this before the mop turns it into a smeared problem. In the kitchen, this means dry sweeping before every single wet cleaning session, no exceptions. A robot vacuum set to run daily in the kitchen is one of the most effective investments for reducing the effort of kitchen floor cleaning because it handles this daily accumulation automatically.
Robot Mops for Daily Kitchen Maintenance
A robot mop set to run daily after dinner, once the household has finished in the kitchen for the evening, keeps light grease and food residue from accumulating on kitchen tile surfaces between manual deep cleans. Models like the Shark Matrix Plus with mop functionality apply cleaning solution consistently and handle the daily light cleaning that most people don’t have time to do manually. They dramatically extend the intervals between intensive manual cleaning sessions and keep the kitchen floor in consistently better baseline condition.

The Spray-and-Mop Hack
Keep a spray bottle of your daily cleaning solution, dilute dish soap and warm water works perfectly, on the kitchen counter or under the sink. After any cooking session that left the floor looking greasy, a 90-second spray-and-mop pass with your microfiber mop removes the fresh grease before it has time to cool, harden, and bond to the floor surface. Fresh grease is dramatically easier to remove than cooled, set grease, catching it immediately rather than leaving it until the weekly clean is one of the most effective kitchen floor maintenance habits available.
How to Deep Clean Kitchen Floors for a Fresh Start
When Deep Cleaning Is Needed
Several signs indicate your kitchen floor needs a deep clean rather than its routine. If the floor feels slightly sticky or tacky underfoot despite regular cleaning, grease has built up to a point that regular mopping can’t address. If grout lines are significantly darker than their original color despite regular mopping, embedded grease requires targeted deep treatment. If the floor looks dull and flat immediately after cleaning, product buildup is dulling the surface. And if there’s a faint, persistent odor from the kitchen floor despite regular cleaning, organic matter embedded in grout lines needs deep treatment.
Step-by-Step Deep Clean for Tile Kitchen Floors
Begin by clearing the kitchen floor completely. Move any freestanding items, chairs, and small appliances away from the floor area. Dry sweep or vacuum thoroughly to remove all loose debris. Apply your chosen deep cleaning solution, an oxygen bleach mixture works well for the whole floor, generously across both tile surfaces and grout lines. Allow it to dwell for 15 to 20 minutes. Scrub grout lines with your grout brush or electric toothbrush. Mop the tile surfaces with your cleaning solution and microfiber mop. Rinse the entire floor thoroughly with clean water. This step is critical, as cleaning product residue left on the floor after deep cleaning creates the sticky film that attracts more dirt. Dry promptly.
Deep Cleaning Under Kitchen Appliances
The areas under and behind the refrigerator, oven, and dishwasher are among the most contaminated spots in any kitchen floor and among the least regularly cleaned. Pull these appliances out for your quarterly deep clean and address the floor beneath them separately. Years of accumulated grease, food debris, and dust create a genuinely remarkable level of contamination in these areas that requires dedicated treatment. A commercial degreaser applied generously and allowed to dwell before scrubbing is the most effective approach for the floor under and behind cooking appliances.
How Often to Deep Clean
For high-traffic kitchen floors in busy households, a quarterly deep clean is the ideal frequency, thorough enough to address accumulated grease before it becomes permanent, infrequent enough to be sustainable. For less busy kitchens with consistent daily maintenance, twice yearly may be sufficient. The most reliable indicator is the floor’s response to regular cleaning, when regular mopping stops producing satisfying results, a deep clean is due.
How to Keep Your Kitchen Floor Cleaner for Longer
Daily Habits That Make the Biggest Difference
The single most impactful daily habit for kitchen floor maintenance is immediate spill response. Any liquid on a kitchen floor, particularly oil, wine, juice, or any acidic liquid treated within seconds prevents the staining, grout penetration, and surface damage that creates reactive cleaning work. Keep a roll of paper towels or a dedicated spill cloth within immediate reach of the cooking area at all times.
A daily dry sweep after dinner takes 60 seconds and removes the food debris accumulation that, if left overnight, gets walked further into the floor surface and becomes progressively harder to remove. Combined with the spray-and-mop hack for post-cooking grease removal, these two daily habits keep most kitchen floors in excellent baseline condition between weekly mopping sessions.
Strategic Mat and Rug Placement
The zones that accumulate the most grease and debris on a kitchen floor are entirely predictable: directly in front of the oven and cooking area, in front of the sink and dishwasher, and at the kitchen entrance. Placing high-quality, washable kitchen mats or runners in each of these zones intercepts a significant proportion of the grease splatter and debris before it reaches the floor. Wash kitchen mats weekly, a greasy mat left in place transfers its contamination to the floor beneath it and compounds the problem it was meant to solve.
The No-Outdoor-Shoes Policy
A no-outdoor-shoes policy in the kitchen, or throughout the home, dramatically reduces the amount of outdoor grit, chemicals, and bacteria that reach your kitchen floor. The fine grit tracked in on outdoor shoes is responsible for a disproportionate share of kitchen tile scratch damage and grout soiling. A simple shoe rack at the entrance and a household habit of changing to indoor footwear at the door create a noticeable improvement in kitchen floor cleanliness over time.
A Realistic Kitchen Floor Cleaning Schedule
The most effective schedule is one sustainable for your actual lifestyle. Daily: dry sweep after dinner and immediate spill response throughout the day. After cooking sessions: quick spray-and-mop pass on visibly greasy areas. Weekly: full sweep followed by thorough mopping with your chosen degreasing solution. Monthly: targeted grout scrubbing in the worst areas and treatment of any developing stains. Quarterly: full deep clean including steam treatment where appropriate, whole-floor grout scrub, under-appliance cleaning, and grout resealing once clean and dry. Built into your regular household routine, this schedule keeps your kitchen floor in genuinely excellent condition without any single session becoming an overwhelming task.
Conclusion
A clean kitchen floor isn’t just about appearances. It’s about hygiene, safety, and the genuine satisfaction of having one of the hardest-working surfaces in your home looking the way it should. With the right hacks in your arsenal and a few smart daily habits in place, keeping your kitchen floor spotless becomes far less of a battle and far more of a manageable, satisfying part of your home care routine.
The biggest takeaway from everything in this guide? Prevention is always easier than a cure. A quick daily sweep, immediate spill response, properly sealed grout, and a smart weekly clean-up routine stop grease and grime in their tracks before they ever become a serious problem. Start with the dish soap and hot water hack for your next clean. Add the baking soda and hydrogen peroxide grout treatment to your monthly routine. Seal your grout this weekend. Place a mat in front of the oven. Small changes, applied consistently, compound into a kitchen floor that genuinely gleams.
Your kitchen floor takes more punishment than almost any other surface in your home, it deals with grease, heat, spills, dropped food, and constant foot traffic every single day. It deserves better than a hasty mop once a week. And now, with every hack, tip, and technique in this complete guide, you have absolutely everything you need to give it exactly that. Start today, your kitchen floor will thank you!