Laminate floors are one of the most popular flooring choices in homes today, and it’s easy to understand why. They look stunning, they’re durable, they’re relatively affordable, and they’re available in a breathtaking range of styles from realistic wood effects to stone and tile looks. But here’s the thing: they have specific cleaning requirements that differ significantly from both hardwood and tile, and most people clean them using methods designed for one of those two surfaces rather than for laminate itself.
Once you understand exactly what laminate floors need, and what they absolutely don’t, keeping them looking beautiful is genuinely straightforward. This complete guide covers everything from daily maintenance to deep cleaning, stain removal to long-term protection. Let’s get your laminate floors looking their absolute best!
Understanding Laminate Flooring Before You Clean It
Before picking up a single cleaning tool, understanding what laminate flooring actually is (how it’s constructed, what protects it, and what makes it vulnerable) gives you the foundation to make every correct cleaning decision automatically.
The Four-Layer Construction
Laminate flooring is an engineered product consisting of four distinct layers bonded together under high pressure. Understanding these layers explains why laminate behaves the way it does and why specific cleaning methods cause specific types of damage.
The bottom layer is the backing layer, a moisture-resistant base that provides structural stability and protects the floor from moisture rising from below. Above that sits the core layer, typically high-density fiberboard or medium-density fiberboard, which gives laminate its rigidity and dimensional stability. This core layer is the most vulnerable component of the entire floor system. Despite the moisture-resistant treatments most manufacturers apply, the fiberboard core absorbs liquid readily when it penetrates through the seams between planks, causing swelling, warping, and bubbling that is permanent and irreversible.
The decorative layer is a photographic paper layer printed with the floor’s visual design, whether that’s a wood grain, stone texture, tile pattern, or any other aesthetic. This is what makes laminate look so convincingly like the real materials it mimics. And finally, the wear layer sits on top. A clear, hard aluminum oxide coating that protects the decorative layer beneath from scratches, stains, foot traffic, and everyday wear. Everything about laminate floor cleaning is fundamentally about protecting the wear layer and preventing moisture from reaching the core.
The AC Rating System
Laminate floors are rated on the Abrasion Class (AC) scale from AC1 through AC5, with higher numbers indicating greater durability and wear resistance. AC1 and AC2 floors are designed for light residential use in low-traffic areas. AC3 is the standard for general residential use throughout the home. AC4 is suitable for heavy residential and light commercial use, and AC5 handles the most demanding commercial environments. Your floor’s AC rating affects which cleaning methods are appropriate. Lower-rated floors with thinner wear layers require gentler cleaning approaches than higher-rated floors with more robust protection.
Why Laminate Cannot Be Refinished
This is perhaps the most important structural fact about laminate floors from a maintenance perspective. Unlike hardwood floors, which can be sanded down to bare wood and refinished multiple times over their lifetime, laminate floors have a fixed wear layer that cannot be renewed. Once the wear layer is scratched, dulled, or damaged, the only remedy is replacement of the affected planks or the entire floor. This makes protecting the wear layer through correct cleaning methods not just good practice. It’s the only strategy available for maintaining the floor’s appearance over its lifetime.
How Laminate Differs From Hardwood and Vinyl
Laminate is frequently confused with both hardwood and luxury vinyl plank. They share aesthetic similarities but have meaningfully different cleaning requirements. Hardwood floors, while also sensitive to moisture, have the capacity to be sanded and refinished when damaged. They also tolerate slightly more moisture exposure than laminate before permanent damage occurs, given that solid wood is more dimensionally stable than fiberboard. Luxury vinyl plank is genuinely waterproof throughout its thickness. Water that penetrates vinyl seams doesn’t cause structural damage the way it does with laminate’s fiberboard core. Laminate sits between these two in terms of water sensitivity, more vulnerable than hardwood to moisture damage, and far more vulnerable than vinyl. Cleaning methods designed for either of these surfaces are not automatically appropriate for laminate.
The Most Common Laminate Problems Caused by Incorrect Cleaning
The four most common laminate floor problems all have cleaning-related causes. Warping, planks that bow upward at the center, results from moisture penetrating the core layer. Edge swelling, planks that rise at the seams and create ridges between planks, results from water seeping into the joints. Bubbling, raised spots on the surface of individual planks, result from localized moisture penetration. And surface dullness, the hazy, flat appearance that makes floors look old and dirty even after cleaning, results from soap residue, product buildup, or the use of oil-based cleaners that leave a film on the wear layer surface. Every one of these problems is preventable with correct cleaning practice.

The Essential Tools and Products for Laminate Floor Cleaning
The right tools make laminate floor cleaning effective and safe. The wrong tools, even used with good intentions, are among the primary causes of the damage described above.
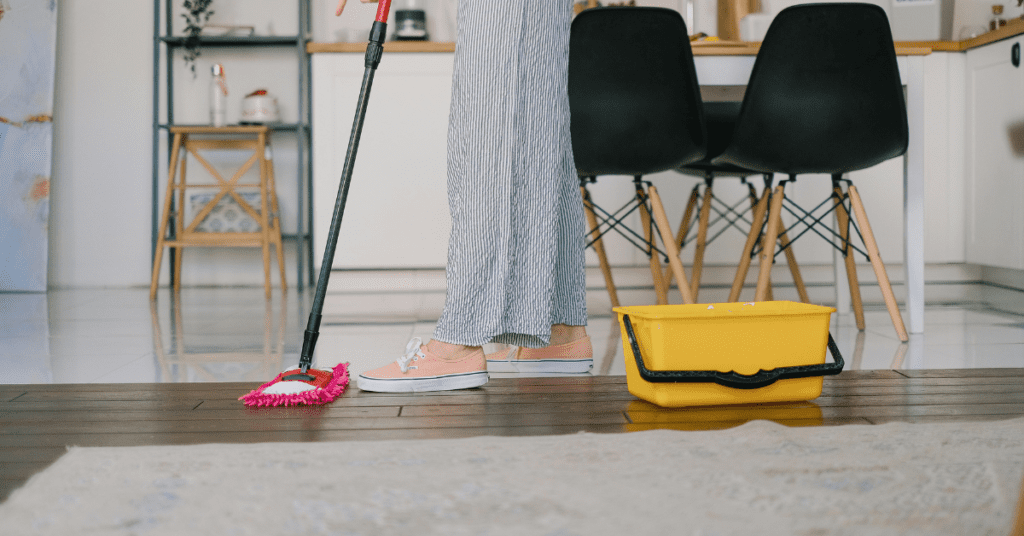
The Microfiber Flat Mop: The Only Safe Mop for Laminate
If you currently clean your laminate floors with a traditional string mop, this is the most important change you can make right now. String mops hold a significant volume of water and deposit it unevenly across the floor surface, precisely the conditions that cause laminate’s fiberboard core to swell and warp at the seams. The flat microfiber mop replaces all of this with a tool designed for moisture-sensitive surfaces.
A flat microfiber mop distributes cleaning solution as a fine, controlled dampness rather than depositing pools of liquid. The microfiber material picks up rather than redistributes debris. When properly wrung, it leaves the floor surface barely damp, dry to the touch within 30 to 60 seconds, which is exactly the moisture level laminate floors can handle safely. The Bona Microfiber Floor Mop, the Swiffer WetJet Wood, and the O-Cedar ProMist Max are all excellent choices for laminate floor cleaning.
Vacuums for Laminate Floors
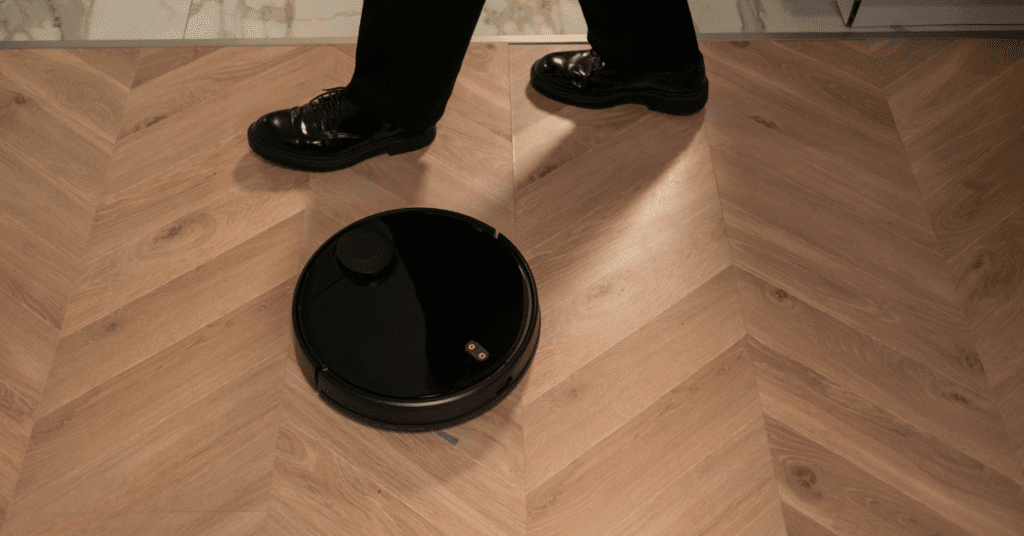
Regular vacuuming is critical for laminate floor maintenance because fine grit and debris on the surface cause micro-scratching of the wear layer underfoot. The key is using the correct settings and attachments. Always disengage the rotating beater bar before vacuuming laminate. The spinning brush designed for carpet agitation will scratch the wear layer on a laminate floor. Use the hard floor setting and a soft-bristle floor attachment. A robot vacuum set to run daily is one of the most effective investments for laminate floor maintenance, removing the daily debris accumulation that causes progressive wear layer damage.

The Best Commercial Laminate Floor Cleaners
Several commercial products are specifically formulated for laminate floors and produce excellent results. Bona Stone, Tile and Laminate Floor Cleaner is pH-neutral, residue-free, and quick-drying. Exactly what laminate floors need. Black Diamond Wood and Laminate Floor Cleaner is another consistently well-rated option that cleans effectively without leaving a dulling film. Method Squirt and Mop Hard Floor Cleaner is a non-toxic, budget-accessible alternative that works well on sealed laminate surfaces.
The critical feature to look for in any laminate floor cleaner is that it’s specifically formulated for laminate or hard sealed surfaces, pH-neutral, and residue-free. Products that leave any residue, however light, build up over multiple cleaning sessions into the dull, sticky film that makes laminate floors look perpetually dirty despite regular cleaning.
Products and Tools to Avoid Completely
Several categories of products should never come into contact with laminate floors. Vinegar, despite its widespread popularity as a natural cleaner, is acidic enough to dull and etch the wear layer over time with repeated use. Bleach damages the decorative layer and causes discoloration. Ammonia-based cleaners degrade the laminate surface chemistry. Oil-based cleaners and furniture polishes leave a residue that dulls the floor and attracts dirt. Wax and polish products, designed for hardwood, clog the laminate surface and create a hazy, impossible-to-remove film. Abrasive scrubbing pads and steel wool scratch the wear layer permanently. And steam mops, detailed more fully below, drive moisture into the core layer under heat and pressure, causing irreversible structural damage.
How to Clean Laminate Floors: The Complete Step-by-Step Process
With your tools assembled and your floor type understood, here is the complete cleaning process that produces excellent results while protecting your laminate from the damage that incorrect cleaning causes.
Step 1: Dry Sweep or Vacuum
This step is mandatory before any wet cleaning, and skipping it is among the most damaging things you can do to your laminate floor. Every particle of grit, sand, and debris on the floor surface becomes abrasive under a damp mop. Grinding against the wear layer with each pass and creating micro-scratches that accumulate over time into widespread surface dullness. A thorough dry sweep or vacuum removes this abrasive material entirely before it can cause damage.
Use a microfiber dry mop or your vacuum on the hard floor setting. Work methodically from one end of the room to the other, paying close attention to the edges along baseboards, corners, and under furniture overhangs where the finest and most abrasive debris concentrates. Take your time with this step, it takes two to three minutes and prevents damage that would otherwise require plank replacement to remedy.
Step 2: Choose the Right Cleaning Solution
For laminate floors, this decision is simpler than for most other floor types, because many of the options available for tile and hardwood are not suitable here. Use a commercial laminate floor cleaner specifically formulated for laminate or sealed hard floor surfaces. Alternatively, a very dilute solution of mild dish soap in warm water, just one or two drops per gallon, or a dilute rubbing alcohol solution is a safe DIY option. The key requirement is that the solution be pH-neutral or close to it, residue-free, and appropriately diluted.
Step 3: The Barely Damp Mop Technique
This is the single most important technique element for laminate floor cleaning, and it bears repeating as many times as necessary: your mop must be barely damp. Not damp. Not slightly wet. Barely damp, almost dry, with just enough moisture to clean the surface without risking penetration into the seams.
After applying your cleaning solution to the mop pad, wring it out firmly. Then wring it again. Press the pad hard against your palm. Not a single drop of moisture should transfer to your hand. The pad should feel almost dry to the touch, with just the faintest coolness suggesting the presence of moisture. On the floor, the visual test is this: the mop should leave no visible moisture trail, and any slight change in the floor’s appearance from the cleaning pass should disappear within 30 seconds. If moisture is visible on the floor for longer than 30 seconds, your mop is too wet. Stop, wring again, and reduce your moisture level before continuing.
Step 4: Work in Small Sections
Unlike tile or sealed hardwood, where you can mop relatively large sections at once, laminate floors benefit from working in smaller sections, roughly 3 to 4 feet at a time. This approach ensures you’re not leaving moisture on any section of the floor for longer than necessary before it’s wiped clean. Move through the room systematically, completing each small section and allowing it to dry before moving to adjacent sections. This minimizes the total time any moisture is in contact with the floor surface and the seams between planks.
Step 5: Dry the Floor Immediately and Completely
After each section is mopped, any remaining surface moisture should evaporate naturally within 30 to 60 seconds, given the minimal moisture level of your mop. If any area appears to retain moisture for longer, follow up immediately with a clean, dry microfiber cloth to absorb it. Never allow any standing moisture on a laminate floor under any circumstances. If you accidentally use too much water, dry the floor as quickly as possible with dry microfiber cloths and consider running a fan or opening windows to accelerate evaporation. Moisture sitting on laminate seams for even a few minutes can begin the swelling process.
Step 6: Buff for a Streak-Free Finish
Once the floor is completely dry, a pass with a clean, dry microfiber cloth or dry mop pad in the direction of the plank pattern brings out a beautiful clarity and eliminates any streaks or haze. Laminate floors are particularly prone to showing streaks, particularly in direct sunlight, so this final buffing step makes a meaningful difference to the finished appearance.
How Often to Clean Laminate Floors
Daily: a quick dry sweep or robot vacuum pass in high-traffic areas removes the grit that causes progressive wear layer damage. This is the single most important daily habit for laminate floor longevity. Weekly: a thorough dry sweep of the entire floor followed by a barely damp microfiber mop maintains floors in a genuinely clean condition. Monthly: pay extra attention to edges, corners, under furniture, and any areas developing residue buildup or staining. Every three to six months: a deeper clean addressing any accumulated product residue and a thorough assessment of the floor’s condition.
How to Remove Common Stains from Laminate Floors
Laminate floors are reasonably stain-resistant thanks to the aluminum oxide wear layer, but stains do happen, and knowing the correct treatment for each type prevents the well-intentioned but damaging responses that cause more problems than they solve.
The Golden Rule of Laminate Stain Treatment
Before addressing specific stain types, one principle applies universally: act quickly. Laminate floors are stain-resistant but not stain-proof, and the window between a fresh spill and a set stain is shorter on laminate than on many other floor types because liquid can penetrate the seams rapidly. The faster you respond to any spill or stain on laminate, the simpler and more completely it can be addressed.
Scuff Marks and Heel Marks
Scuff marks from shoes, furniture movement, or rubber-soled footwear are among the most common laminate floor blemishes. The good news is that most scuffs are surface-level and respond to surprisingly gentle treatment. Try rubbing the scuff gently with a clean pencil eraser first, this works on lighter scuffs without any chemical input whatsoever. For more stubborn scuffs, a small amount of rubbing alcohol on a clean microfiber cloth rubbed gently on the mark removes most scuff marks effectively. A barely damp melamine foam eraser is also effective on glazed laminate surfaces for scuff marks that resist other approaches.
Grease and Oil Stains
Fresh grease or oil on laminate should be blotted immediately, never rubbed, as rubbing spreads the stain and potentially drives it into the seam if the spill is near a joint. After blotting, apply a small amount of dish soap directly to the spot, work it gently with a soft cloth, and wipe clean with a barely damp cloth. For dried grease, a small amount of mineral spirits on a cloth dissolves the oil, apply sparingly, clean promptly, and follow with a barely damp clean cloth to remove any solvent residue.
Wine, Juice, and Food Stains
These are the laminate stains where speed makes the greatest difference. Blot any liquid spill immediately and thoroughly before it has time to seep into a seam. Once the liquid is removed, clean the area with a barely damp cloth and your regular laminate cleaner. For dried food stains, soften first with a warm, barely damp cloth, then clean with a mild dish soap solution applied with a soft cloth. For tannin stains, wine, tea, coffee, dark juice, that have dried and set, a small amount of rubbing alcohol on a cloth is usually effective. Always test in an inconspicuous area first.
Ink and Marker Stains
Ink and marker stains on laminate floors respond well to rubbing alcohol. Apply a small amount to a clean white cloth, avoiding colored cloths as the dye can transfer, and dab carefully onto the stained area. Do not rub aggressively, as this can damage the wear layer surface. Work the alcohol into the stain with gentle, patient dabbing and blotting, then wipe clean with a barely damp cloth. Acetone, nail polish remover, is effective on ink stains that rubbing alcohol cannot fully resolve, but use it sparingly and with extreme care as it can dull the wear layer if used in excess.
Pet Stains and Urine
Pet urine is one of the most chemically aggressive substances laminate floors can encounter. Its ammonia content can damage the wear layer surface, and if it penetrates a seam before being addressed, the moisture causes fiberboard core swelling that is permanent. For fresh pet accidents, blot immediately and thoroughly with a highly absorbent cloth to remove as much liquid as possible before it reaches any seam. Clean the area with an enzymatic pet stain cleaner formulated for hard floors, this breaks down the uric acid compounds and eliminates the odor at its source. Avoid any product containing ammonia for pet stain treatment, as ammonia in cleaners can interact with urine residue and damage the floor surface.
Wax and Chewing Gum
For wax drips from candles or chewing gum that has hardened on the laminate surface, the ice cube hack is the most effective approach. Place a few ice cubes in a zip-lock bag and hold it against the wax or gum for several minutes. The cold hardens the material to a brittle consistency that can then be carefully lifted with a plastic scraper held at a very low, flat angle to the floor. Never use a metal scraper. Even a carefully used metal edge will scratch the wear layer. After removing the bulk of the material, clean any residue with a small amount of rubbing alcohol on a cloth.
Paint and Nail Polish
For fresh paint on laminate, blot immediately before it dries. Water-based paint wipes up easily while still wet. For dried paint, a small amount of rubbing alcohol softens most water-based paints for careful removal. For oil-based paint, acetone, nail polish remover, used very sparingly on a cloth, is effective but requires care not to over-apply. For nail polish, acetone applied carefully on a cotton ball removes the polish without significant wear layer impact when used minimally and wiped clean promptly.

The Biggest Laminate Floor Cleaning Mistakes to Avoid
Understanding what not to do is just as important as knowing the correct approach, because the most common laminate floor damage comes directly from these specific mistakes.
Using Too Much Water
This is the most critical, most common, and most consequential laminate floor cleaning mistake, and it genuinely cannot be overstated. Laminate’s fiberboard core is fundamentally vulnerable to moisture. When excess water is applied during cleaning, it gravitates toward the path of least resistance, the seams between planks, and penetrates downward into the core material. The fiberboard absorbs the moisture and expands, causing the characteristic edge swelling, warping, and bubbling that homeowners find when they lift a rug or rearrange furniture. This damage is permanent. There is no drying out and recovering. The affected planks must be replaced. Barely damp. Every single time. No exceptions whatsoever.
Steam Mopping
Steam mops have become enormously popular for hard floor cleaning, and they work effectively on ceramic tile, porcelain, and sealed stone. On laminate floors, they are a reliable mechanism for causing irreversible damage. The steam drives high-temperature moisture into the seams between planks under pressure, bypassing even a healthy surface entirely and delivering damaging moisture directly to the fiberboard core. The heat also stresses the adhesive bonds between the laminate layers, leading to delamination and bubbling. No laminate floor manufacturer recommends steam mopping, and most explicitly state that steam mopping voids the floor’s warranty. Under no circumstances should a steam mop be used on laminate, regardless of what the steam mop’s packaging claims.
Vinegar, Bleach, and Ammonia
White vinegar is frequently recommended as a natural floor cleaner, and for certain surfaces it works well. On the laminate, it is genuinely damaged with repeated use. The acetic acid in vinegar reacts with the aluminum oxide wear layer chemistry over time, causing dulling and degradation of the surface that is progressive and cumulative. Each application may seem harmless, but the damage is subtle at first. Over months of regular use, the wear layer loses its clarity, and the floor begins to look permanently dull despite cleaning. Bleach causes discoloration and chemical damage to the decorative layer. Ammonia degrades the surface chemistry and can cause adhesive bond weakening in the laminate layers.
Abrasive Scrubbers and Steel Wool
The wear layer of laminate flooring, while durable against everyday foot traffic, is vulnerable to abrasion from cleaning tools. Steel wool, abrasive scrubbing pads, stiff-bristled brushes, and any rough cleaning surface used directly on the laminate surface create scratches that penetrate and permanently damage the wear layer. Once the wear layer is scratched through, the decorative layer beneath is exposed and vulnerable to staining, moisture, and further damage. Always use soft cloths, microfiber materials, and gentle brushes on laminate floors.
Wax, Polish, and Oil-Based Products
Laminate floors are designed with a hard, pre-finished wear layer that does not benefit from wax or polish, and is actively damaged by it. Applying wax, furniture polish, or oil-based products to laminate creates a film on the surface that the wear layer cannot absorb. This film dulls the floor, attracts and holds dirt, and becomes extremely difficult to remove without aggressive cleaning that risks damaging the wear layer. If your laminate floor has lost its shine, the cause is almost certainly surface residue or wear layer dulling, not a need for polish. The solutions are residue removal and, if necessary, plank replacement, not the application of more product.
Soap-Based Cleaners Used Too Concentrated
Soap-based cleaners, including dish soap used in too high a concentration, leave a soap residue on the laminate surface that builds up with each cleaning session. This residue is what causes the hazy, dull appearance that makes laminate floors look perpetually dirty despite regular cleaning. It also creates a slightly sticky surface texture that attracts more dirt than a clean floor would. Use soap-based cleaners only in very dilute form, one to two drops of dish soap per gallon of water, and always follow with a clean water pass to remove any residual soap from the surface.
Natural and DIY Laminate Floor Cleaning Solutions
For those who prefer to minimize chemical cleaning product use in their home, several natural and DIY solutions clean laminate floors safely and effectively, with important caveats about what to avoid.
Dilute Rubbing Alcohol Solution
A solution of one part rubbing alcohol to three parts water is arguably the best natural laminate floor cleaning solution available. It cleans effectively, evaporates quickly, minimizing moisture contact time with the floor surface, and leaves no residue. The quick evaporation characteristic of alcohol makes it particularly well-suited to laminate cleaning because the concern about moisture penetrating seams is dramatically reduced when the cleaning solution evaporates within seconds of application. Apply with a microfiber mop wrung to barely damp and buff dry immediately after. This solution is also excellent for streak-free results on the laminate surface.
Warm Water Only
For lightly soiled laminate floors that simply need freshening rather than stain treatment or degreasing, plain warm water applied with a barely damp microfiber mop is genuinely sufficient and is the safest possible cleaning approach. No residue risk, no chemical concerns, complete moisture control. For daily maintenance cleaning between deeper weekly sessions, warm water on a barely damp microfiber mop is often all that’s needed and all that’s appropriate.
Dish Soap and Water
A very dilute solution of mild dish soap and warm water, one to two drops of soap per gallon of water, is safe and effective for laminate floor cleaning when used with proper moisture control. The key words are very dilute, far more dilute than most people would naturally use. The soap concentration should be low enough that the water doesn’t produce visible suds. At this concentration, the soap provides enough surfactant action to lift light grease and general grime without leaving residue that accumulates over time.
Baby Shampoo Solution
A surprising but effective option: one teaspoon of baby shampoo per gallon of warm water makes a gentle, low-residue laminate floor cleaner that’s particularly suitable for households with young children or pets where minimizing chemical exposure is important. Baby shampoo is formulated to be exceptionally gentle, rinses cleanly, and at this dilution level produces excellent results without residue buildup. Apply with a barely damp microfiber mop and buff dry.
What Natural Cleaners to Avoid
Despite the general appeal of natural cleaning solutions, several popular natural cleaners are specifically unsuitable for laminate floors. White vinegar, as discussed, damages the wear layer with repeated use and should be avoided entirely. Lemon juice and other citric acid-based solutions cause similar acid-related wear layer degradation. Baking soda paste, while gentle on tile and hardwood, is mildly abrasive and risks scratching the laminate’s wear layer surface. Essential oil-based cleaners can leave oily residue that dulls the surface. Stick with the safe natural options, dilute alcohol, plain water, very dilute dish soap, or very dilute baby shampoo, and your laminate floors will remain in excellent condition.
Room-by-Room Laminate Floor Cleaning Tips
Different rooms impose different challenges on laminate floors, and tailoring your approach to the specific demands of each space produces significantly better long-term results.
Kitchen Laminate Floors
The kitchen is the most demanding environment for laminate floors, combining cooking grease, frequent liquid spills, steam from cooking, and heavy daily foot traffic. The most critical kitchen laminate habit is immediate and thorough spill response. Any liquid spill, particularly near the seams between planks, must be addressed within seconds, blotted completely dry before any moisture can begin seeping into the core layer. Keep a roll of paper towels or a dedicated spill cloth within immediate reach of the cooking area at all times.
For weekly kitchen laminate mopping, the barely damp microfiber mop with a very dilute dish soap solution or commercial laminate cleaner handles cooking grease and food residue effectively. Place a mat or runner in front of the cooking area and sink to intercept the worst of the moisture and grease splatter before it reaches the laminate surface. Ensure the mat has a backing that doesn’t discolor or damage the laminate. Rubber backings can cause discoloration over time with prolonged contact.
Bathroom Laminate Floors
Laminate in bathrooms is genuinely challenging given the constant moisture exposure from showers, baths, and sink splashing. The key strategies for bathroom laminate maintenance are ensuring excellent ventilation, run the exhaust fan during and for 20 minutes after every shower to reduce ambient humidity, placing highly absorbent bath mats at the shower exit and sink, and wiping up any water splashes on the floor immediately. Inspect the seams and edges of bathroom laminate planks regularly for any signs of edge swelling, the earliest warning sign that moisture management needs improvement.
Living Room and Bedroom Laminate Floors
Living room and bedroom laminate floors face less moisture risk than kitchen and bathroom floors, and are generally more straightforward to maintain. The primary concerns are dust accumulation, pet hair, and furniture-related scratching. Felt pads on all furniture legs are essential. Chairs, sofas, tables, bed frames, all of it. Replace them every six to twelve months as they compress. A robot vacuum running daily keeps these rooms free of the fine grit that causes progressive wear layer scratching. Weekly damp mopping with your chosen laminate cleaner maintains floors in excellent condition.
Entryway and Hallway Laminate Floors
Entryways and hallways expose laminate to outdoor grit, moisture from wet shoes and umbrellas, and winter road salt, some of the most damaging substances these floors can encounter. A high-quality outdoor doormat and a highly absorbent indoor mat at every exterior entry point are essential protective measures. A no-outdoor-shoes policy dramatically reduces the amount of abrasive grit and outdoor moisture that reaches the laminate surface. Sweep entryway laminate daily, the grit concentration in entryways is significantly higher than anywhere else in the home and causes correspondingly faster wear layer degradation.

How to Deep Clean Laminate Floors Safely
Recognizing When Deep Cleaning Is Needed
Several signs indicate a deep clean is appropriate. If the floor feels slightly sticky or tacky despite regular cleaning, product residue has accumulated on the wear layer surface. If the floor looks persistently dull and flat even immediately after mopping, the same residue issue is at work. If mopping seems to smear rather than clean, residue buildup is preventing the cleaning solution from reaching the floor surface effectively. These symptoms almost always respond to a targeted deep clean before any consideration of floor replacement is warranted.
Removing Product Buildup Safely
The most common deep cleaning task for laminate floors is removing the accumulated residue of cleaning products used over months or years. To address this, switch temporarily to a rubbing alcohol and water solution, one part alcohol to three parts water, applied with a microfiber mop in small sections. The alcohol dissolves and lifts many types of cleaning product residue without leaving any residue of its own. Work systematically across the entire floor, using fresh sections of mop pad frequently to avoid redepositing dissolved residue.
For stubborn product buildup that the alcohol solution doesn’t fully address, a commercial laminate floor residue remover, specifically formulated for this purpose, is the appropriate tool. Apply according to product instructions, working in small sections, and buff dry immediately after each section.
Restoring Shine to Dull Laminate Floors
When laminate floors look dull despite thorough cleaning, meaning the dullness is in the wear layer surface rather than caused by residue, the options are more limited. If the dullness is localized to specific high-traffic areas where the wear layer has thinned, individual plank replacement is the most effective remedy. If dullness is widespread across the entire floor, a commercial laminate floor restorer product, specifically formulated for laminate surfaces, can improve the appearance by filling in fine surface wear. These products are distinct from wax and polish, are formulated to be compatible with laminate chemistry, and don’t leave the dulling residue that wax creates.
How to Protect and Maintain Laminate Floors Long-Term
Building Your Maintenance Routine
A sustainable laminate floor maintenance routine requires minimal time when built correctly. Daily: a 60-second dry sweep or robot vacuum pass in high-traffic areas prevents the grit accumulation that causes progressive wear layer damage. Weekly: a thorough dry sweep of the entire floor followed by a barely damp microfiber mop maintains floors in genuinely excellent condition. Monthly: focused attention on edges, corners, residue-prone areas, and any developing staining or damage. This three-tier routine, applied consistently, keeps laminate floors in beautiful condition throughout their useful lifespan.
Rugs and Mats for Laminate Protection
Strategic rug and mat placement is one of the most cost-effective laminate floor protection strategies available. Place mats at every exterior door, in front of the kitchen sink and cooking area, at bathroom entrances, and in the highest-traffic paths through hallways and living areas. Area rugs in living rooms and bedrooms protect large sections of floor from concentrated foot traffic wear. Choose rugs with felt or non-slip backing rather than rubber. Rubber backing can discolor or damage the laminate with prolonged contact. Rotate rugs periodically to ensure the floor wears evenly.
Furniture Protection
Felt adhesive pads on every furniture leg. Chairs, tables, sofas, beds, bookcases, everything, prevent the majority of scratching and denting damage to laminate floors. Replace pads every six to twelve months as they compress and thin. For heavy furniture that rarely moves, adhesive felt pads provide sufficient protection. For dining chairs and other frequently moved furniture, hard floor glides specifically rated for laminate surfaces provide more durable and reliable protection.
Managing Indoor Humidity
Laminate floors, despite their engineered construction, are affected by indoor humidity changes. Extreme low humidity — common in winter with central heating — causes the planks to contract and develop gaps between boards. Extreme high humidity causes slight expansion and potential buckling if insufficient expansion gaps were left during installation. Maintain indoor humidity between 30 and 60 percent year-round for optimal laminate floor stability. A digital hygrometer monitors humidity levels accurately and alerts you when adjustments are needed.
Repairing Minor Damage
Minor scratches in the wear layer can be addressed with laminate floor repair markers or laminate touch-up kits, available in a wide range of wood tones and colors to match most floor styles. These kits fill in the scratched area with a colored compound that blends with the surrounding floor, minimizing the visual impact of the damage. Small chips at plank edges can similarly be filled with laminate repair putty. These repairs are cosmetic rather than structural, they improve appearance but don’t restore the wear layer’s protective function in the repaired area.
When to Replace Rather Than Repair
Laminate floors have a finite lifespan and reach a point where repair or cleaning is no longer the appropriate solution. Significant edge swelling across multiple planks, widespread bubbling caused by moisture damage, extensive wear layer degradation that exposes the decorative layer, large chips or cracks, or widespread discoloration all indicate that replacement is the appropriate remedy. Modern laminate flooring is available at accessible price points in a wide range of styles, and replacing a damaged floor represents an opportunity to upgrade both the appearance and the quality specification of the new installation.
Conclusion
Laminate floor cleaning is genuinely straightforward once you internalize the two fundamental rules that govern everything: keep moisture minimal and use products specifically formulated for laminate surfaces. Every other correct cleaning decision flows naturally from those two principles. The floors that look stunning after 15 years are almost always the ones that have been cleaned correctly from day one, not necessarily more frequently, not with more expensive products, but with the right, moisture-controlled techniques applied with consistency.
Take the key lessons from this guide and put them into practice starting today. Swap your mop for a flat microfiber one and wring it out to barely damp before it touches your floor. Stop using vinegar, all-purpose cleaners, and soap in high concentrations and switch to a laminate-specific product or a dilute rubbing alcohol solution. Dry sweep before you mop, every single time without exception. Respond to spills within seconds rather than minutes. Place felt pads on every piece of furniture. Put mats at every door. Build a simple daily and weekly routine and follow it consistently.
Your laminate floors are a significant investment in your home’s comfort, appearance, and value. With the right care, and everything in this complete guide gives you precisely that, they will reward you with years of beautiful, durable performance that looks as good in a decade as it does today. Start with one change from this guide right now and build from there. The difference that the correct laminate floor cleaning makes is visible from the very first session!