Here’s a number that might make you look at your kitchen floor differently: a single square foot of tile floor can harbor up to 17,000 bacteria, and that’s after a regular mop. Tile floors are in every room of most homes. They take a beating every single day, and yet so many people are cleaning them with the wrong products, the wrong techniques, or both. Sound familiar? I’ve been there too!
The frustrating thing about tile floors is that they look so easy to clean. Hard surface, smooth finish, how hard can it be? But anyone who’s battled streaky tiles after mopping, grout that won’t come clean no matter what you try, or dull surfaces that once gleamed knows the reality is a little more complicated. The good news is that once you know the right hacks, cleaning tile floors becomes genuinely straightforward, and the results are dramatic.
Understanding Your Tile Floor Before You Start Cleaning
Before you fill a bucket or reach for a spray bottle, the single most valuable thing you can do is identify exactly what type of tile floor you’re dealing with. This isn’t just background information. It’s the foundation of every cleaning decision you’ll make, because the wrong product on the wrong tile can cause permanent damage that no amount of cleaning will fix.
Ceramic Tile
Ceramic tile is the most common tile flooring in residential homes, made from clay fired at high temperatures and typically finished with a glaze that creates a hard, smooth, somewhat water-resistant surface. The glaze on ceramic tile makes it relatively easy to clean and resistant to staining on the tile surface itself, but ceramic is softer and more porous than porcelain, which means the tile body can absorb moisture if the glaze is chipped or worn. Most household cleaning products are safe on glazed ceramic tile, making it one of the more forgiving floor types to maintain.
Porcelain Tile
Porcelain is a denser, harder, less porous form of ceramic tile fired at higher temperatures with finer clay. It’s more durable, more water-resistant, and more resistant to staining than standard ceramic, but it also comes in a wider range of surface finishes that require different cleaning approaches. Polished porcelain is beautiful but shows every fingerprint, watermark, and streak. Matte porcelain hides imperfections better but can be harder to deep clean. Textured porcelain provides grip underfoot but traps dirt in its surface relief. Knowing your porcelain’s finish type shapes your cleaning approach significantly.
Natural Stone Tile
Marble, travertine, slate, limestone, and granite tile floors are in a category of their own when it comes to cleaning requirements. Natural stone is porous, some types more than others, and highly sensitive to acidic cleaners. Vinegar, lemon juice, and most commercial multi-surface cleaners will etch and permanently dull polished stone surfaces. Natural stone requires pH-neutral, stone-specific cleaners, regular sealing, and careful moisture management. If you have natural stone floors, this is the most critical thing to internalize before cleaning: acid is the enemy, and it causes damage that cannot be reversed without professional intervention.
Encaustic and Cement Tiles
These decorative tiles, with their beautiful patterns and matte, handcrafted appearance, are made from cement rather than fired clay and are extremely porous. They stain easily, react badly to acidic cleaners, and require specific pH-neutral products and regular sealing to maintain their appearance. They’re stunning but demanding, and they reward careful, consistent maintenance.
Glass Tile
Glass tile is most common as a wall tile, but it does appear on some floors, particularly in wet areas. It’s non-porous and easy to clean on the tile surface itself, but is prone to showing streaks, water marks, and smears. Streak-free glass cleaner and microfiber cloths are your best friends with glass tile.
Glazed vs. Unglazed, Polished vs. Matte
Beyond tile type, the surface finish matters enormously. Glazed tiles have a glass-like coating that resists staining and is easy to wipe clean. Unglazed tiles expose the raw tile material and are significantly more porous and prone to staining. Polished surfaces show dirt and marks more clearly but clean up quickly. Matte and textured surfaces hide dirt better visually but require more effort to clean thoroughly because dirt embeds in the surface texture.
Grout Type and Width
The grout between your tiles is often more challenging to maintain than the tiles themselves. Standard cement-based grout is highly porous and absorbs staining agents, bacteria, and moisture readily. Epoxy grout is denser, less porous, and far more resistant to staining, but requires specific cleaning products and cannot be treated with acidic cleaners. Urethane grout falls between the two in terms of porosity and maintenance requirements. Wider grout lines accumulate more dirt and require more aggressive cleaning than narrow grout lines. All of this shapes your approach to grout cleaning significantly.

Essential Tools and Products for Tile Floor Cleaning
The right tools make tile floor cleaning faster, more effective, and significantly less physically demanding. Here’s exactly what deserves a place in your cleaning kit, and what should be thrown out immediately.
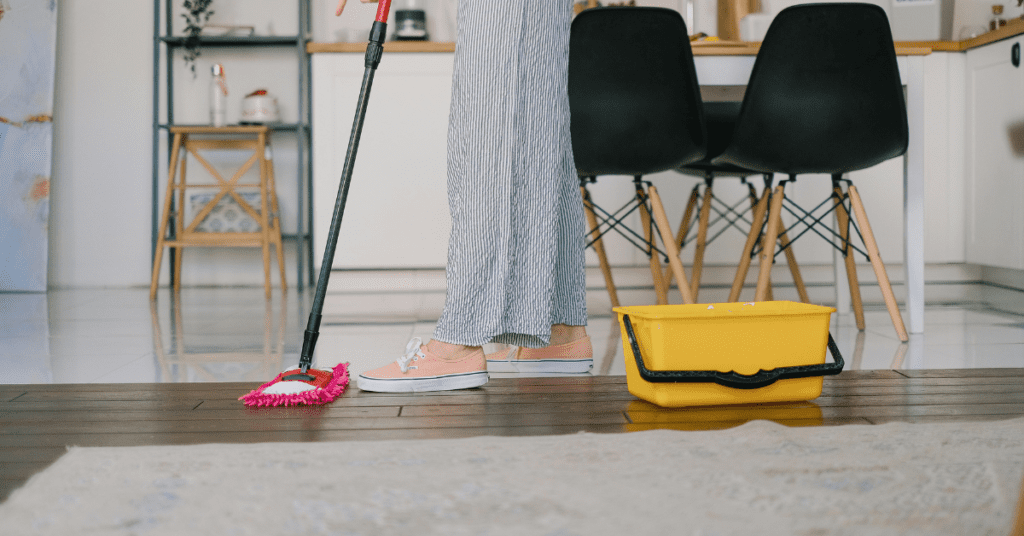
The Best Mops for Tile Floors
The flat microfiber mop is the gold standard for tile floor cleaning. It picks up bacteria, fine debris, and grime effectively, distributes cleaning solution evenly across the tile surface, and holds far less water than a traditional string mop. Excess moisture sitting in grout lines causes long-term damage to cement-based grout, promotes mold growth, and can work its way under tile edges. A well-wrung microfiber mop leaves the floor barely damp and dry within minutes.
Spin mops with microfiber heads are a solid alternative for larger floor areas. The centrifugal wringing mechanism removes water effectively, and the 360-degree mop head reaches into corners easily. For tile floors specifically, the Bona Microfiber Floor Mop and the O-Cedar EasyWring Spin Mop are consistently top-rated options.
Steam mops deserve a special mention for tile floors. Unlike hardwood floors, where steam causes serious damage, ceramic and porcelain tile handle steam beautifully. The high-temperature steam penetrates grout lines, kills bacteria and mold spores without chemicals, and loosens soap scum and mineral deposits with remarkable effectiveness. For natural stone, waxed, or sealed decorative tile, test steam in an inconspicuous area first or avoid it entirely.
The Grout Brush
This is the single most underrated and underused tile cleaning tool. A dedicated stiff-bristled grout brush, narrow enough to work directly in grout lines, does what no mop can: it physically agitates and lifts embedded grime from porous grout surfaces. You can find one for under five dollars, and the difference it makes on grout cleaning results is nothing short of transformative. If you only add one tool to your tile cleaning arsenal, make it this one.
Natural Cleaning Staples
Four ingredients form the foundation of virtually every effective DIY tile floor cleaning solution. White vinegar cuts through mineral deposits, soap scum, and light grease effectively, but remember, never on natural stone. Baking soda provides gentle abrasion and deodorizing power for targeted stain treatment. Hydrogen peroxide is a powerful natural disinfectant and stain lifter, safe on most tile types. Dish soap handles grease and general grime gently on all tile types, including stone. Keep all four stocked, and you’re equipped for almost any tile cleaning challenge.
Commercial Products Worth Buying
For everyday tile cleaning, Black Diamond Marble and Tile Floor Cleaner is excellent across multiple tile types, including stone. Zout Tile and Grout Cleaner is consistently effective for deeper cleaning sessions. For natural stone specifically, StoneTech Revitalizer or Method Squirt and Mop Stone Floor Cleaner provide safe, effective results. For grout specifically, Soft Scrub with Bleach Cleanser and OxiClean Versatile Stain Remover are both highly effective options for cement grout.
What to Avoid
Steel wool and abrasive scrubbing pads scratch glazed tile and polished stone surfaces permanently. Traditional string mops deposit excessive moisture into grout lines. Bleach used regularly degrades cement grout over time and strips colored grout of its pigment. Highly concentrated acidic cleaners damage natural stone, etching the surface in a way that requires professional restoration to address.
The Best Tile Floor Cleaning Hacks for an Instant Transformation
These are the hacks that deliver the most dramatic, visible results in the shortest amount of time, the ones that make you genuinely astonished by how clean your tile floors can look.
Hot Water and Dish Soap
This is the foundational tile floor cleaning hack, and it works across virtually every tile type, including natural stone. Add three to four drops of mild dish soap to a bucket of the hottest water your gloved hands can handle. The heat loosens grime and grease while the dish soap emulsifies it for easy removal. Apply with a microfiber mop, work in sections, and follow up with a clean water rinse to prevent any soapy residue from leaving a dull film on the tile surface. Simple, inexpensive, safe for all tile types, and remarkably effective. This is your go-to weekly cleaning solution.
Baking Soda and Vinegar Paste
For ceramic and porcelain tile surfaces with more stubborn grime, mix baking soda with white vinegar to form a thick paste. It will fizz vigorously, which is part of the cleaning action. Apply directly to stained or grimy tile surfaces, allow it to sit and work for 10 to 15 minutes, scrub with a non-scratch brush, and rinse thoroughly. The mild abrasiveness of the baking soda, combined with the grease-cutting acidity of the vinegar, lifts surface grime and light staining effectively. Never use this combination on natural stone, marble, travertine, or any acid-sensitive tile surface.
Hydrogen Peroxide for Brightening
Pour undiluted three percent hydrogen peroxide, the standard drugstore variety, directly onto dull, stained, or discolored tile surfaces. Allow it to dwell for 10 to 15 minutes, then scrub lightly and mop clean. Hydrogen peroxide is a mild bleaching agent that brightens dull tile surfaces and lifts organic staining without the harshness or fume issues of chlorine bleach. It’s safe on ceramic, porcelain, and grout, breaks down into water and oxygen, and is considerably safer around children and pets than traditional bleach-based products.
The WD-40 Hack for Scuff Marks
This one surprises people every time. A small spray of WD-40 applied to a scuff mark on ceramic or porcelain tile and wiped with a clean cloth removes even the most stubborn dark scuff marks, from shoes, furniture legs, appliances, that nothing else will touch. The key is to clean the treated area thoroughly with dish soap and water afterward to remove the oily residue before mopping. Use this targeted on the scuff mark rather than spraying broadly across the floor.
Baby Oil for a Streak-Free Shine
After cleaning dark-colored ceramic or porcelain tile, a few drops of baby oil on a clean microfiber cloth buffed across the dry tile surface produce a remarkable, streak-free shine that makes tiles look polished and new. Apply sparingly, a little goes a very long way, and buff thoroughly to avoid any slippery residue. This finishing hack is particularly effective on large-format dark porcelain tiles that tend to show every watermark and cleaning streak.

Grout Cleaning Hacks That Deliver Real Results
Grout is where tile floor cleaning gets serious. It’s porous, it stains easily, it grows mold and mildew in humid conditions, and it looks terrible when neglected. But with the right approach, even severely stained grout can be dramatically restored to something close to its original color.
Why Grout Gets So Dirty
Standard cement-based grout is essentially a porous sponge set between your tiles, absorbing everything it contacts. Dirt, soap residue, body oils, grease, mineral-rich water, and mold spores. Every footstep, every spill, every mopping session deposits something into those pores. Without sealing and regular targeted cleaning, grout darkens progressively and becomes harder to restore over time. The encouraging truth is that most grout discoloration is surface and near-surface contamination rather than permanent staining, which means it responds very well to the right cleaning treatment.
Baking Soda and Hydrogen Peroxide Paste
This is the single most effective DIY grout cleaner available, and it costs almost nothing to make. Combine baking soda with enough hydrogen peroxide to form a thick, spreadable paste, roughly two parts baking soda to one part hydrogen peroxide. Apply generously along all grout lines using a small brush, old toothbrush, or grout brush, pressing the paste firmly into the lines. Allow it to sit and work for 10 to 15 minutes, then scrub firmly along the grout lines with your grout brush and rinse thoroughly with clean water. The results on discolored grout are frequently remarkable. Grout that appeared permanently dark reveals itself several shades lighter. Repeat on heavily stained sections for even better results.
The Electric Toothbrush Hack
Manual grout scrubbing is effective but physically exhausting, particularly across large tiled areas. An old electric toothbrush transforms the experience entirely. Apply your cleaning paste to the grout lines, set the toothbrush to its highest speed setting, and work it methodically along each line. The rapid oscillation does the scrubbing work for you, agitating the cleaning solution deep into porous grout without requiring significant physical effort from you. This is genuinely one of the most practical grout cleaning hacks available and makes the task accessible even for people who find extended scrubbing physically challenging.
The Bleach Pen Hack
For white or light-colored grout that has become heavily discolored or spotted with mildew, a household bleach pen, the type used for laundry stain treatment, allows precise, controlled application of bleach gel directly onto grout lines without the mess and risk of liquid bleach spreading across surrounding tile surfaces. Apply the gel directly along the grout lines, leave it to work for 10 to 15 minutes, then rinse thoroughly with clean water. The results on white cement grout are dramatic. Always work with adequate ventilation, wear gloves, and critically, never use chlorine bleach on colored grout, as it will permanently strip the pigment from the grout material.
Oxygen Bleach for Whole-Floor Grout Revival
When grout across an entire tiled floor needs revival rather than spot treatment, oxygen bleach, products like OxiClean dissolved in warm water per package instructions, is the most powerful and practical approach. It’s color-safe, produces no harsh chlorine fumes, and is considerably gentler on surrounding surfaces and the environment than chlorine bleach while remaining highly effective on organic staining, mildew, and general discoloration. Apply the solution generously across all grout lines, allow it to dwell for 15 to 30 minutes, scrub with your grout brush, and rinse thoroughly. This approach can transform the appearance of an entire tiled floor in a single treatment session.
Steam Cleaning Grout Lines
Professional tile and grout cleaning services rely heavily on steam cleaning for excellent reasons. High-temperature steam penetrates deep into porous cement grout, loosening embedded grime, killing mold and bacteria, and lifting staining without any chemical cleaners required. Direct the steam cleaner’s nozzle along grout lines, work slowly and methodically, and wipe the lifted residue with a clean cloth as you progress. For heavily stained grout, pre-treating with the baking soda and hydrogen peroxide paste before steam cleaning combines the chemical action of the paste with the physical penetrating power of steam for maximum results.
Sealing Grout After Cleaning
Cleaning grout thoroughly and then failing to seal it is like washing your car and leaving it in the rain without waxing it. Grout sealer creates a barrier that repels moisture, staining agents, and mold growth for 12 to 24 months before reapplication is needed. Once your grout is completely clean and thoroughly dry, allow at least 24 hours after wet cleaning, and apply a penetrating grout sealer using a small applicator brush or the product’s built-in applicator, working it into each grout line carefully. Allow it to penetrate according to the product instructions, then wipe away any excess from tile surfaces. This single maintenance step reduces your future grout cleaning effort more dramatically than any other action you can take.
Natural and DIY Tile Floor Cleaning Solutions That Actually Work
For households that prefer to minimize chemical exposure or simply want cost-effective alternatives to commercial products, these natural solutions deliver genuine cleaning power for most tile floor situations.
White Vinegar and Warm Water
A solution of equal parts white vinegar and warm water in a spray bottle or mop bucket is one of the most versatile everyday tile floor cleaners available. The acetic acid in vinegar cuts through mineral deposits, soap scum, and light grease effectively while acting as a mild natural disinfectant. It’s inexpensive, widely available, and leaves no harmful residue. Apply with a microfiber mop, allow a brief dwell time on heavily soiled areas, and mop clean. The vinegar smell dissipates completely as the floor dries. Critical reminder: never use vinegar or any acidic solution on natural stone, marble, travertine, limestone, or encaustic cement tiles, the acid will etch and permanently damage these surfaces.
Baking Soda Paste for Targeted Stain Removal
A paste of baking soda and a small amount of water applied directly to any stained or grimy area on ceramic or porcelain tile, left to sit for five to ten minutes, and then scrubbed gently with a soft brush is a safe, effective, non-toxic spot cleaner for most tile staining challenges. The mild abrasiveness lifts surface contamination without scratching glazed tile finishes. Rinse thoroughly afterward to remove all baking soda residue, which can leave a white film if not completely cleared.
Hydrogen Peroxide as a Natural Disinfectant
Three percent hydrogen peroxide, available at any pharmacy for under two dollars, applied to tile and grout surfaces and allowed to dwell for five to ten minutes before mopping clean, is a genuinely effective natural disinfectant. It kills a broad spectrum of bacteria, viruses, and mold spores, brightens discolored tile and grout, and breaks down safely into water and oxygen. It’s odorless, non-irritating compared to bleach, and safe for households with children, pets, and anyone with sensitivities to chemical cleaners. Use it as a weekly disinfecting treatment for kitchen and bathroom tile floors.
Castile Soap and Water
A few drops of pure, unscented castile soap dissolved in warm water make a gentle, effective, completely plant-based tile floor cleaner that is safe on all tile types, including natural stone. It produces a light cleaning lather that lifts grime without leaving heavy residue, and it’s completely non-toxic. Always follow up with a clean water rinse to prevent any soapy film from building up on the tile surface over time. Dr. Bronner’s unscented castile soap is the most widely available option and the best choice for cleaning purposes.
Lemon Juice and Salt Scrub
For naturally brightening dull ceramic or porcelain tile surfaces, cut a lemon in half, dip the cut face into a small pile of salt, and use it directly as a scrubber across the tile surface. The citric acid in lemon juice dissolves light mineral deposits and brightens dull glazed surfaces, while the salt crystals provide gentle abrasion to lift surface grime. The result is a visibly brighter tile surface and a genuinely fresh, natural scent. Rinse thoroughly after treatment and, as with all acidic applications, never use on natural stone tile.
Essential Oil Additions for Antibacterial Power
Adding 10 to 15 drops of tea tree essential oil to any of the above cleaning solutions provides a natural antibacterial and antifungal boost that is particularly valuable in bathroom and kitchen tile cleaning contexts. Tea tree oil has well-documented antimicrobial properties and is especially effective against the mold and mildew strains that thrive in humid tiled environments. Lavender oil adds a pleasant fragrance while contributing its own mild antibacterial properties. Neither affects the cleaning power of the base solution. They simply enhance its disinfecting capability and leave a genuinely fresh scent.

Tile Floor Cleaning Hacks by Room
Different rooms create entirely different tile cleaning challenges. A one-size-fits-all approach doesn’t serve tile floors as well as targeted strategies developed for the specific demands of each space.
Kitchen Tile Floors
The kitchen is the most demanding environment for tile floors. Cooking grease, food spills, dropped ingredients, and constant foot traffic from multiple family members create a uniquely challenging combination of grime types. Grease is the primary villain in kitchen tile cleaning, it accumulates invisibly on tile surfaces and grout lines, creating a sticky film that attracts and holds every other type of dirt that passes over it.
The most important kitchen tile habit is daily dry sweeping or vacuuming to remove food debris and fine grit before it gets ground into tile and grout by foot traffic. For weekly mopping, a degreasing dish soap solution in hot water is your most effective tool, the surfactants in dish soap are specifically designed to emulsify and lift grease. For grout lines in kitchen floors, the baking soda and hydrogen peroxide paste applied monthly prevents the gradual greasy darkening that makes kitchen grout so notoriously difficult to restore once neglected. Place a mat or runner in front of the cooking area and sink to intercept the worst of the grease and moisture before it reaches the tile floor.
Bathroom Tile Floors
Bathroom tile battles soap scum, hard water mineral deposits, mildew, and constant moisture exposure. The squeegee habit is the single most effective preventive measure for bathroom tile floors, a 30-second push of the squeegee across the floor after every shower dramatically reduces the soap scum and mineral deposit buildup that makes bathroom tile floors look perpetually grimy.
For weekly bathroom tile cleaning, a white vinegar and water solution handles soap scum and mineral deposits on ceramic and porcelain tile beautifully. For mildew in grout lines, hydrogen peroxide applied directly and left to dwell for 15 minutes before scrubbing is effective and considerably safer than chlorine bleach in an enclosed space. Ensure your bathroom exhaust fan is functioning properly, it’s the most powerful mold prevention tool available for bathroom tile, removing the humidity that feeds mold growth before it can settle on tile surfaces and grout.
Entryway and Hallway Tiles
Entryway tile floors are on the front line, bearing the full impact of everything tracked in from outdoors. Dirt, grit, sand, mud, salt, leaf debris, and moisture from rain and snow. A high-quality outdoor doormat and a second absorbent indoor mat at every entry point capture the majority of this debris before it reaches and scratches the tile surface. Sweep entryway tiles daily if possible, the fine grit tracked in on shoes is one of the most damaging things tile floors encounter, acting like sandpaper under every foot that passes over it.
For weekly cleaning, a standard hot water and dish soap mop handles most entryway tile grime effectively. During winter in areas that use road salt, rinse the floor with clean water after mopping to remove salt residue, which can bleach and discolor grout if allowed to accumulate.
Laundry Room Tile Floors
Laundry room tile deals with detergent residue, fabric softener spills, lint, and frequent moisture exposure from washing machine operation and drainage. Detergent residue is the primary challenge. It builds up gradually on tile surfaces and grout lines, creating a dull, slightly sticky film that attracts lint and dust. A monthly treatment with an oxygen bleach solution addresses detergent buildup effectively and keeps the laundry room grout looking clean. Ensure the room has adequate ventilation to prevent the moisture from regular laundry operation from promoting mold in grout lines.
Outdoor and Patio Tiles
Outdoor tile faces challenges unlike any indoor surface: UV exposure, freeze-thaw cycles, algae and moss growth, bird droppings, leaf tannin staining, and heavy soil contamination. A garden hose or pressure washer is your first line of attack on seriously dirty outdoor tile. The mechanical force of water removes loose debris that would take significant effort to mop away. For algae and moss, a dilute bleach solution or a commercial outdoor tile cleaner applied and left to dwell before scrubbing and rinsing is highly effective. For moss in particular, a proprietary moss and algae killer applied according to instructions kills the growth at its root and prevents rapid regrowth. Seal outdoor tile grout annually with an exterior-grade grout sealer rated for freeze-thaw conditions in colder climates.
How to Remove the Toughest Tile Floor Stains
Some tile stains require targeted treatment well beyond your regular cleaning routine. Here is your comprehensive reference for the most stubborn and common tile floor staining challenges.
Grease and Cooking Oil Stains
Fresh grease on tile responds quickly to dish soap applied directly to the spot, worked gently into the stain with a soft cloth, then wiped clean. For dried or baked-on grease, apply a paste of baking soda and dish soap, cover with plastic wrap to prevent drying, and leave for 30 minutes before scrubbing and rinsing. Commercial degreasers like Zep Heavy Duty Citrus Degreaser are highly effective on stubborn kitchen grease staining when DIY approaches fall short.
Hard Water Stains and Limescale
The chalky white or grey mineral deposits that form wherever water sits and evaporates on tile surfaces are dissolved by acidic cleaners on ceramic and porcelain tile. White vinegar applied undiluted and allowed to dwell for 15 to 30 minutes before scrubbing handles most hard water staining effectively. For severe buildup, commercial limescale removers like CLR or Lime-A-Way dissolve mineral deposits more aggressively. For natural stone tile, use only stone-safe limescale treatments, never acidic products, to avoid etching the surface.
Mold and Mildew
Surface mold on ceramic and porcelain tile responds well to a hydrogen peroxide and water solution applied and left to dwell for 20 to 30 minutes before scrubbing and rinsing. For mold embedded in grout lines, the oxygen bleach treatment or carefully applied bleach pen hack addresses it most effectively. The critical long-term strategy for preventing recurring mold is addressing the moisture and ventilation conditions that allow it to grow. Clean the mold, seal the grout, and fix the humidity problem, or the mold will simply return.
Rust Stains
Rust stains from metal objects left sitting on wet tile, furniture legs, aerosol cans, and metal accessories look alarming but are generally treatable. Bar Keepers Friend, which contains oxalic acid, is one of the most effective treatments: make a paste, apply to the rust stain, leave for several minutes, scrub gently, and rinse thoroughly. Lemon juice and salt left on a lighter rust mark for several hours is an effective natural alternative. Never use chlorine bleach on rust stains. It reacts with the iron oxide and permanently sets the stain.
Paint, Adhesive, and Construction Residue
Dried paint on tile can often be carefully scraped with a plastic scraper or razor blade held at a low angle to the tile surface, followed by cleaning with mineral spirits on a cloth to remove any remaining residue. Adhesive residue responds to WD-40 or commercial adhesive removers like Goo Gone. Always test any solvent-based product in an inconspicuous area first. Grout haze, the thin film of dried grout left on tile after grouting work, requires a dedicated grout haze remover product, available at tile supply stores, applied according to instructions.
Ink, Wine, and Food Stains
For ink stains on ceramic or porcelain tile, rubbing alcohol applied on a cotton ball and dabbed gently onto the stain lifts most ink types effectively. Wine and dark liquid stains respond best to immediate blotting followed by hydrogen peroxide treatment. Dried food stains should be softened first with a warm, damp cloth, then treated with dish soap solution and gently scrubbed. For any organic stain that has penetrated into porous tile or grout, an enzymatic cleaner, the type designed for pet stain removal, breaks down the organic compounds effectively and is worth trying on any stubborn organic staining that other methods haven’t fully addressed.
Speed Cleaning Hacks for Tile Floors When You’re Short on Time
Not every tile floor cleaning needs to be a major undertaking. These speed hacks keep your floors looking clean and presentable between deeper sessions with minimal time investment.
The 10-Minute Tile Floor Reset
Set a timer for ten minutes. Dry sweep or vacuum first to remove all loose debris, two to three minutes. Spray your cleaning solution across the tile surface for thirty seconds. While it dwells, wipe down baseboards and cabinet bases quickly. Mop the floor with your microfiber mop in methodical parallel passes for four to five minutes. Done. A ten-minute reset done consistently three times a week keeps tile floors in genuinely good condition and eliminates the need for the exhausting deep-clean sessions that result from extended neglect.
The Dry Sweep First Rule
This single habit transforms tile floor cleaning efficiency more than any product or technique change. Dry sweeping or vacuuming before any wet cleaning removes the loose debris, hair, and grit that a mop would otherwise push around and embed further into grout lines. What remains after a thorough dry sweep, the actual bonded grime and residue, is a fraction of the total floor contamination, and it responds much better to mopping than it would if buried under loose debris. Dry sweep first. Every single time. No exceptions.
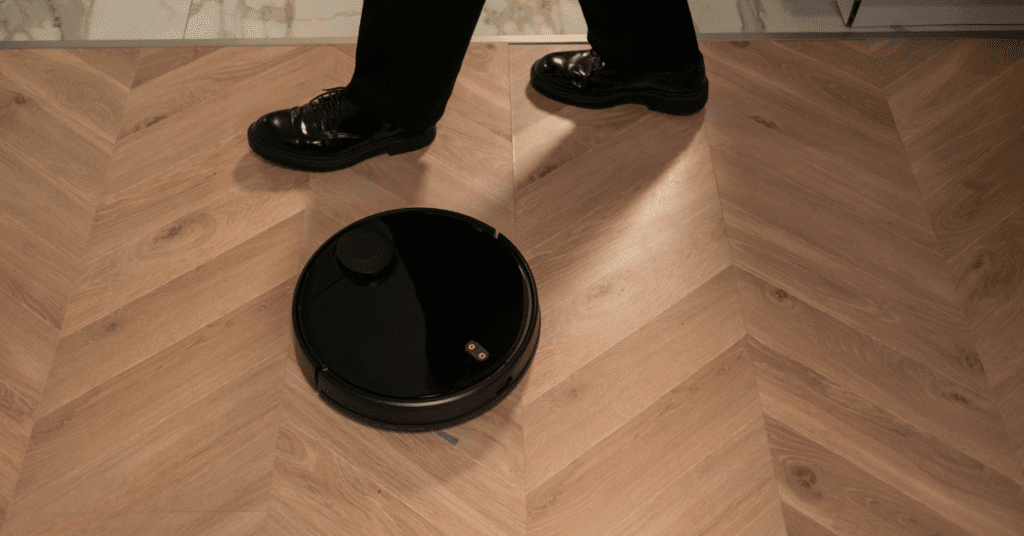
Robot Mops for Daily Maintenance
A robot mop set to run daily or every other day on tile floors is one of the most effective investments for reducing the frequency and intensity of manual cleaning sessions. Models like the Shark Matrix Plus with mop functionality keep light surface grime from accumulating on tile surfaces between manual cleans, apply cleaning solution consistently, and handle the daily maintenance that most people don’t have time to do manually. They don’t replace deep cleaning or grout scrubbing, but they extend the intervals between those more intensive sessions significantly.

The Spray and Walk Away Hack
For light everyday maintenance on kitchen and bathroom tile floors, keeping a spray bottle of your daily cleaning solution, white vinegar and water for ceramic tile, or a dilute castile soap solution for stone, in the room and doing a quick spray-and-mop pass in under two minutes whenever you notice the floor looking grimy is far more effective than waiting for a scheduled clean. The key is keeping the supplies immediately accessible. When the spray bottle is right there under the sink, a two-minute floor freshen-up actually happens instead of being mentally filed under “things to do later.”
Microfiber Mop Efficiency
Using a microfiber mop correctly, with the pad genuinely wrung out to barely damp, working in consistent parallel passes that overlap slightly, and changing to a fresh pad when the current one becomes visibly soiled, cuts tile floor mopping time roughly in half compared to a traditional mop and bucket approach. The microfiber material picks up rather than redistributes grime, meaning each pass actually cleans rather than just moving dirty water around. A clean floor in fewer passes in less time.
How to Keep Tile Floors Cleaner for Longer
The ultimate goal is a tile floor that stays genuinely clean with minimal ongoing effort. These habits and strategies make it achievable in any home.
Daily Habits That Prevent Buildup
The most impactful daily habits for tile floor maintenance are also the simplest. A quick dry sweep taking 60 seconds removes the daily accumulation of hair, dust, and fine grit that causes progressive floor dullness and grout discoloration. Wiping up spills immediately rather than leaving them to dry prevents the staining and grout penetration that creates so much reactive cleaning work. In bathrooms, the after-shower squeegee habit prevents soap scum and mineral deposit accumulation more effectively than any cleaning product. These three micro-habits, practiced consistently, have a more significant impact on long-term tile floor condition than any periodic deep clean.
Sealing Tile and Grout Properly
Sealing is the most powerful long-term maintenance action available for tile floors. Most ceramic and porcelain tile surfaces don’t require sealing. The glaze provides inherent protection, but unglazed ceramic, natural stone, and encaustic cement tile absolutely do. All cement-based grout benefits enormously from sealing regardless of the tile type surrounding it. Apply a penetrating tile and grout sealer to clean, dry surfaces annually, following product instructions for dwell time and excess removal. Sealed surfaces repel staining agents, moisture, and mold growth, reducing your cleaning effort dramatically throughout the year.
Strategic Mat and Rug Placement
Place absorbent mats at every entry point, in front of the kitchen sink and cooking area, at the bathroom entrance and shower exit, and anywhere furniture legs rest on tile. These mats intercept the majority of dirt, moisture, and grit before it reaches the tile surface and protect high-traffic areas from concentrated wear. Wash mats weekly — a damp mat left in place becomes a mold and bacteria source. Rotate mats occasionally so the tile surface ages evenly in areas of varying light exposure.
Indoor Footwear Policy
A no-outdoor-shoes policy is the single most effective behavioral intervention for maintaining clean tile floors. The grit, chemicals, bacteria, and general contamination tracked in on outdoor shoes are responsible for a disproportionate share of tile floor soiling and grout discoloration. This is especially true in areas that use road salt in winter, where salt tracked across tile floors bleaches and degrades grout over time. Even a partial policy, removing shoes at the front door, delivers noticeable improvements in floor cleanliness.
A Realistic Cleaning Schedule
The most effective cleaning schedule is one that’s sustainable for your actual lifestyle. For tile floors: daily dry sweep in high-traffic areas. Weekly mop with your chosen cleaning solution. Monthly targeted grout scrubbing in problem areas and treatment of any developing stains. Every three to six months: a full deep clean including steam treatment where appropriate, full grout scrub and stain treatment across the entire floor, and grout resealing once clean and dry. Built into your regular home routine, this schedule keeps tile floors in excellent, genuinely clean condition year-round without any single cleaning session becoming an overwhelming undertaking.
Conclusion
Tile floors are one of the hardest-working surfaces in your home, and with the right hacks, they can also be one of the easiest to keep looking genuinely spectacular. The secret isn’t scrubbing harder or spending more on fancy products. It’s knowing exactly which hack to use for which situation, building a few smart daily habits, and protecting your work with proper sealing and maintenance.
The biggest takeaway from everything in this guide? Consistency beats intensity every single time. A quick daily sweep, a weekly mop with the right solution, and a monthly grout treatment will produce better long-term results than an occasional marathon cleaning session followed by weeks of neglect. Small actions, applied consistently, compound into tile floors that genuinely gleam, not just on the day you clean them, but every day in between.
Start with one hack from this guide today. Try the baking soda and hydrogen peroxide paste on those grout lines you’ve been avoiding all year. Swap your string mop for a microfiber one. Add a squeegee to your bathroom tile routine. Seal your grout this weekend. Every small change you make builds toward a tile floor that maintains itself almost effortlessly, and a home that feels cleaner, fresher, and more beautiful as a result.
Your tile floors have the potential to be one of the most striking features of your home. All they need is the right care, and now you have every single hack you’ll ever need to give it to them!