Your floors take a beating every single day. Foot traffic, pet paws, spilled drinks, tracked-in dirt, it all adds up fast. And yet, clean floors might be one of the most impactful things you can do for the overall look and feel of your home. Walk into a room with gleaming, well-maintained floors and the entire space feels cleaner, brighter, and more inviting. Walk into the same room with grimy, dull floors? The opposite effect, even if everything else is spotless!
The challenge, of course, is that not all floors are created equal. What works beautifully on ceramic tile can absolutely ruin a hardwood floor. The mop you use on vinyl might be completely wrong for natural stone. In this comprehensive guide, I’m breaking down everything you need to know about floor cleaning: by floor type, by technique, and by the best products available in 2026. Whether you’re dealing with a muddy entryway, a dull kitchen floor that’s lost its shine, or carpet that’s seen better days, I’ve got you covered.
Understanding Your Floor Type Before You Clean
Before you grab a mop and bucket, there’s one crucial step that most people skip entirely, and it’s the step that prevents some very expensive mistakes. You need to know exactly what type of floor you’re dealing with.
Using the wrong cleaning product or technique on the wrong floor type can cause serious, sometimes irreversible damage. Excessive moisture can warp hardwood and swell laminate. Acidic cleaners like vinegar can etch and dull natural stone. Harsh scrubbing can strip the protective finish from vinyl. The list goes on. Understanding your floor type isn’t just helpful; it’s a must-know.
The most common floor types you’ll encounter in residential homes include solid hardwood and engineered hardwood, laminate, ceramic and porcelain tile, luxury vinyl plank (LVP) and vinyl sheet flooring, carpet, natural stone (including marble, travertine, slate, and limestone), and polished concrete. Each one has a distinct composition, finish, and set of care requirements.
If you’re not sure what type of flooring you have (perhaps you moved into a home and the previous owners left no documentation), there are a few ways to figure it out. Hardwood has visible wood grain and feels solid underfoot. Laminate often has a photographic layer visible at the edges and produces a slightly hollow sound when knocked. Tile is hard, cold, and has visible grout lines. Natural stone has unique veining and variation that no two tiles replicate exactly. Vinyl tends to be softer and warmer underfoot than tile or stone.
Once you’ve identified your floor type, check the manufacturer’s guidelines if you have them. These will tell you exactly what products and methods are safe. Pay particular attention to whether the manufacturer recommends a pH-neutral cleaner. Many sensitive floor surfaces, including natural stone and some hardwood finishes, require it. Using an alkaline or acidic cleaner on these surfaces can cause long-term damage that’s costly to repair.
What I do when I’m in doubt is test any new cleaning product in a small, inconspicuous area before applying it to the entire floor. A hidden corner or inside a closet is perfect. Leave the product for the recommended time, wipe away, and check for any discoloration, dulling, or damage before proceeding.
Hardwood Floor Cleaning: How to Clean Without Causing Damage
Hardwood floors are one of the most beautiful and timeless flooring choices available. And one of the most misunderstood when it comes to cleaning. The biggest myth? You need to wet mop hardwood floors to get them truly clean. In reality, excessive moisture is hardwood’s worst enemy. It causes warping, swelling, cupping, and can permanently damage the wood fibers. The goal with hardwood is always to use as little water as possible.
Daily and Weekly Maintenance
For day-to-day maintenance, a microfiber dust mop is your best friend. Microfiber attracts and traps dust, dirt, pet hair, and fine debris without scratching the surface. And it does so far more effectively than a traditional broom, which can scratch the finish and simply push debris around rather than capturing it. Sweep or dry mop your hardwood floors daily in high-traffic areas, and at least two to three times per week in lower-traffic zones.
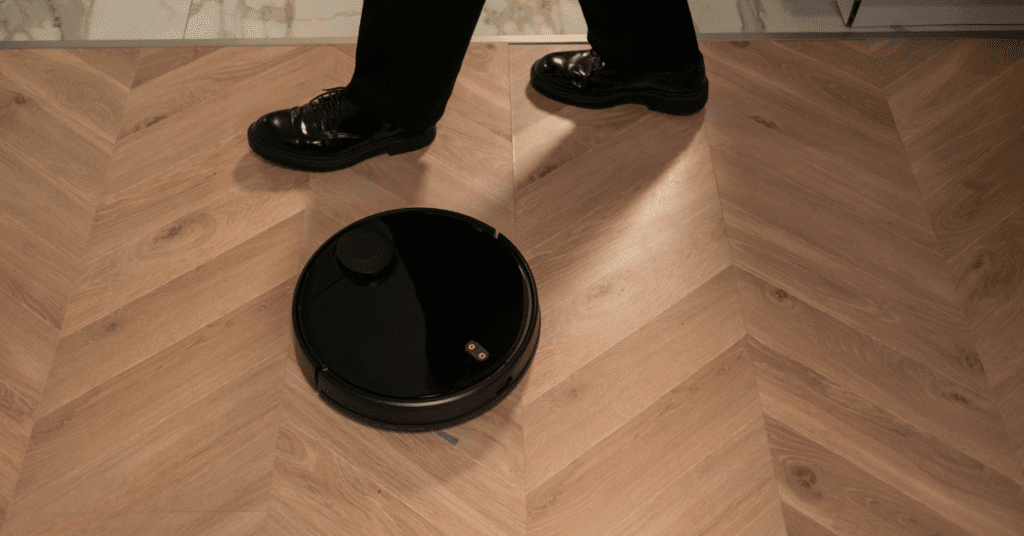
When vacuuming hardwood, always use a vacuum with a hard floor setting or a dedicated hard floor attachment. Never use a beater bar or rotating brush on hardwood; these can leave scratches and scuff marks in the finish. A soft-bristled floor brush attachment is ideal. And when you want to vacuum your floor automatically, check out the best robot vacuums here or click on the image below.

Wet Mopping Hardwood the Right Way
When your hardwood floors need more than a dry clean, perhaps after a dinner party or when sticky residue has built up, wet mopping is appropriate, but with strict rules. Always use a flat microfiber mop rather than a string mop or sponge mop. Dampen the mop pad so it’s barely moist; it should never be dripping or even noticeably wet. The pad should feel almost dry to the touch.
Use a cleaning solution specifically formulated for hardwood floors, or make your own by adding just a few drops of dish soap to a bucket of warm water. Mop in the direction of the wood grain, working in small sections. Never let water pool or sit on the surface. If you notice any moisture remaining after mopping, buff it dry with a clean microfiber cloth immediately.
Steam mops are a controversial topic in the hardwood floor world. The short answer? Avoid them entirely on solid hardwood. The heat and steam force moisture into the wood fibers and the seams between planks, which can cause serious long-term damage. Even manufacturers of engineered hardwood, which is more moisture-resistant than solid hardwood, generally advise against steam mop use.
Removing Common Stains From Hardwood
Water marks and white rings on hardwood are usually caused by moisture trapped in the finish rather than in the wood itself. For fresh water marks, try rubbing gently with a small amount of mayonnaise or petroleum jelly; the oil can help displace the trapped moisture. Leave it for several hours, then wipe it clean. For more stubborn marks, a small amount of fine steel wool (0000 grade) rubbed very gently in the direction of the grain can help.
For scuffs and heel marks, try rubbing with a clean tennis ball or a pencil eraser. The gentle friction often removes surface scuffs without any chemical involvement at all. For pet accidents, act immediately. Blot up as much liquid as possible with paper towels, then clean with a wood-safe enzymatic cleaner that breaks down the organic compounds responsible for odor.
Best Hardwood Floor Cleaners in 2026
Look for pH-neutral, water-based formulas specifically designed for finished hardwood. Products that are concentrate-based are generally more cost-effective and environmentally friendly than ready-to-use spray bottles. Avoid any product containing oil soaps on polyurethane-finished floors, as they can leave a residue that dulls the finish over time and makes future refinishing more difficult.

Tile Floor Cleaning: Getting Grout and Surfaces Spotless
Tile floors are durable, water-resistant, and relatively forgiving, which makes them one of the easiest floor types to clean. The real challenge with tile isn’t the tile itself. It’s the grout. Those narrow lines between tiles are porous, textured, and practically designed to trap dirt, grease, bacteria, and mold. Keeping grout clean requires a bit more effort than the tile itself, but the results are absolutely worth it.
Regular Tile Floor Cleaning
For routine cleaning, sweep or vacuum tile floors to remove loose dirt and debris before mopping. This step is more important than many people realize. Mopping over gritty debris drags it across the tile surface and can cause fine scratches over time.
Mop tile floors with warm water and a pH-neutral floor cleaner, or a solution of warm water with a small amount of dish soap. Avoid using overly soapy cleaners on tile, as they can leave a filmy residue that actually makes the floor look duller and attracts more dirt over time. Rinse with clean water after mopping if you’ve used a soap-based cleaner.
For ceramic and porcelain tile, a spin mop or a flat microfiber mop both work well. These surfaces are non-porous and can handle more moisture than hardwood or laminate, making them much more forgiving in terms of wet cleaning.
The Grout Challenge: Effective Cleaning Methods
For lightly soiled grout, a stiff-bristled brush (an old toothbrush works perfectly for small areas, while a dedicated grout brush covers more ground faster) and a solution of warm water with baking soda will do an excellent job. Apply the paste, scrub in circular motions along the grout lines, and rinse clean.
For more heavily stained or discolored grout, a solution of hydrogen peroxide and baking soda creates a powerful cleaning paste that lightens staining without the harshness of bleach. Apply the paste, allow it to sit for 10 to 15 minutes, then scrub and rinse. You’ll be genuinely amazed at the difference.
For the most stubborn grout staining, particularly black mold or years of built-up grime, a diluted bleach solution (one part bleach to ten parts water) is highly effective. Apply with a brush, leave for five minutes, scrub, and rinse thoroughly. Always ensure the room is well ventilated when using bleach, and never mix it with any other cleaning products.
If you have a large area of grout to clean, a power drill with a stiff-bristle brush attachment can save enormous amounts of time and effort. Apply your cleaning solution first, then let the drill do the scrubbing work.
Sealing Grout for Easier Future Cleaning
Once your grout is clean, consider applying a grout sealer. Grout sealer fills the porous surface of the grout, creating a barrier that repels moisture, staining, and bacteria. It dramatically reduces how often you need to deep clean your grout and keeps it looking cleaner for much longer. Most grout sealers need to be reapplied every one to two years, depending on traffic and wear.
Cleaning Tile in Bathrooms and Kitchens
Bathroom tile floors face unique challenges, specifically, soap scum, hard water deposits, and mold in humid conditions. A solution of equal parts white vinegar and warm water is excellent for dissolving soap scum and mineral deposits on ceramic and porcelain tile. Note: never use vinegar on natural stone tile, as its acidity will etch the surface.
Kitchen tile floors contend with grease, food spills, and tracked-in dirt. For greasy kitchen floors, add a small amount of dish soap to your mopping water. Dish soap is specifically formulated to cut through grease and works beautifully on tile surfaces.

Laminate Floor Cleaning: Protecting the Surface While Getting It Clean
Laminate flooring has become enormously popular thanks to its durability, affordability, and convincing wood-look aesthetic. But it has one significant vulnerability: moisture. Unlike solid hardwood, which can sometimes be sanded and refinished if water damage occurs, laminate has a photographic wear layer over a high-density fiberboard (HDF) core. Once that core swells from moisture penetration, the damage is permanent.
The Golden Rules of Laminate Cleaning
Rule one: never use excessive water. This cannot be stressed enough. A soaking wet mop on laminate flooring is a disaster waiting to happen. Water seeps into the seams between planks, penetrates the core, and causes swelling, warping, and bubbling that cannot be reversed. This is what I have experienced myself: moisture was underneath my laminate floor, and this was the result:

Rule two: never use a steam mop on laminate. The heat and moisture from steam penetrate the surface layer and can destroy the floor. Most laminate manufacturers explicitly void warranties if steam mops are used.
Rule three: avoid vinegar and acidic cleaners. Despite being a popular natural cleaning recommendation, white vinegar is too acidic for laminate. Over time, it breaks down the protective surface layer and leaves the floor looking dull and worn.
Rule four: avoid wax and polish products. Laminate floors have a built-in sheen from their protective wear layer. Applying wax or polish creates a filmy buildup that dulls the appearance and is very difficult to remove.
The Right Way to Clean Laminate Floors
Start with dry cleaning. Use a microfiber dust mop or a vacuum on the hard floor setting to remove all loose dirt and debris. This step is particularly important for laminate because grit and debris can scratch the surface layer when dragged across it.
For damp cleaning, use a flat microfiber spray mop: these allow you to apply a fine mist of cleaning solution directly to the floor in small sections, giving you much better control over the amount of moisture used. Alternatively, dampen a microfiber mop pad until it’s barely moist and mop in small sections, drying each section as you go.
Use a laminate-specific floor cleaner, or make a simple solution by adding a very small amount (half a teaspoon) of dish soap to a litre of warm water. Less is genuinely more here, a light clean with minimal moisture is far better for laminate than a thorough wet clean.
Removing Stains and Scuffs From Laminate
For sticky residue or stubborn spots, dampen a cloth with a small amount of acetone (nail polish remover) or rubbing alcohol and rub gently. Both are effective at dissolving adhesive residue, nail polish, ink, and other stubborn marks without damaging the surface layer.
For scuffs, try rubbing gently with a clean pencil eraser or a small amount of toothpaste on a soft cloth. Buff in the direction of the grain and wipe clean with a barely damp cloth.
Carpet Cleaning Tips: From Daily Maintenance to Deep Cleaning
Carpet is the floor type that arguably requires the most consistent and varied cleaning approach. It’s comfortable, warm, and sound-absorbing, but it’s also a trap for dirt, allergens, bacteria, pet dander, and odors. Regular, thorough cleaning isn’t just about appearance. For carpet, it’s genuinely a health issue.
The Foundation: Regular Vacuuming
Vacuuming is the single most important thing you can do to maintain your carpet. It removes the loose dirt, debris, and allergens that settle into the fibers before they get ground deeper into the pile. For high-traffic areas and homes with pets, vacuum at least three to four times per week. For lower-traffic bedrooms and guest rooms, once a week is generally sufficient.
When vacuuming, go slowly. Moving the vacuum too quickly means it doesn’t have time to effectively suction debris from the carpet pile. Overlap each pass slightly and vacuum in multiple directions, particularly for plush or thick pile carpets, to ensure you’re lifting dirt from every angle.
Use a vacuum with strong suction and a rotating brush bar, which agitates the carpet fibers and brings embedded dirt to the surface. If you have pets, look for a vacuum specifically designed for pet hair with tangle-free brush roll technology.
Check out the best robot vacuums if you don’t feel like vacuuming manually:
DIY Carpet Cleaning Solutions
For everyday freshening, sprinkle a generous layer of baking soda over the carpet, leave it for 20 to 30 minutes (or overnight for maximum effect), then vacuum thoroughly. Baking soda is exceptionally effective at neutralizing odors, not just masking them, making it a brilliant natural deodorizer for carpets that smell of pets, cooking, or general mustiness.
For light stains, a solution of one tablespoon of dish soap mixed with one tablespoon of white vinegar and two cups of warm water is a reliable all-purpose carpet spot cleaner. Apply to the stain with a clean cloth, blot from the outside of the stain inward (never rubbing spreads the stain and damages the carpet fibers), and repeat until the stain lifts. Rinse by blotting with a cloth dampened with clean water, then blot dry.
Tackling Specific Carpet Stains
Red wine is one of the most feared carpet stains, but it’s very manageable if you act quickly. Blot up as much of the wine as possible immediately, then pour a small amount of cold sparkling water over the stain. The carbonation helps lift the wine from the fibers. Continue blotting, then apply a dish soap and hydrogen peroxide solution (mix one part dish soap with two parts hydrogen peroxide) and blot until the stain is gone.
For coffee stains, blot up the excess liquid, then apply cold water and continue blotting. A solution of dish soap, white vinegar, and warm water works well for the remaining stain. For dried coffee stains, you may need to rehydrate the stain with a little warm water before treating.
Pet urine is particularly challenging because of both the staining and the odor. For fresh accidents, blot up as much liquid as possible. Stand on a thick layer of paper towels if needed to absorb the maximum amount. Then apply a commercial enzymatic cleaner specifically designed for pet urine. Enzymatic cleaners contain biological enzymes that break down the uric acid crystals responsible for the persistent smell. Leave for the time specified on the product, then blot clean. Do not use steam or hot water on pet urine stains, heat sets the odor permanently into the fibers.
For mud, resist the temptation to clean immediately. Allow the mud to dry completely, then vacuum up as much as possible before treating the remaining stain with a dish soap solution.
Deep Cleaning Your Carpets
Even with excellent regular maintenance, carpets need a deep clean at least once or twice a year to remove the embedded dirt, bacteria, and allergens that regular vacuuming can’t reach. You have two main options: rent or buy a carpet cleaning machine, or hire a professional carpet cleaning service.
If you’re using a carpet cleaner at home, vacuum thoroughly first. Always use the cleaning solution recommended for the machine; using the wrong products can damage the machine or leave sticky residue in the carpet. Work in overlapping passes, and make several dry passes at the end to extract as much moisture as possible. Allow the carpet to dry completely before walking on it; this usually takes several hours with good ventilation.
Professional carpet cleaning, particularly hot water extraction (sometimes called steam cleaning), delivers a deeper clean than most home machines can achieve. It’s worth investing in professional cleaning once a year, particularly for high-traffic areas or if you have pets.
Vinyl and LVP Floor Cleaning: Easy Care for a Popular Floor Choice
Luxury vinyl plank flooring has exploded in popularity over the past decade, and it’s easy to see why. It’s waterproof, scratch-resistant, comfortable underfoot, incredibly realistic in its wood and stone aesthetics, and relatively easy to care for. It’s become the go-to choice for kitchens, bathrooms, and family homes. And cleaning it is genuinely straightforward once you know the rules.
Daily and Weekly Vinyl Floor Care
For daily maintenance, a microfiber dust mop is ideal for vinyl and LVP floors. It captures fine dust and debris without scratching the surface. Vacuum using a hard floor setting (no beater bar) for a more thorough clean, particularly if you have pets.
For weekly mopping, vinyl and LVP floors are more moisture-tolerant than hardwood or laminate, but this doesn’t mean you should soak them. Excess standing water can still work its way into seams over time, particularly on glue-down installations. Use a damp flat mop or spray mop with a vinyl-safe floor cleaner, and avoid leaving puddles on the surface.
What to Avoid on Vinyl and LVP Floors
Despite being marketed as nearly indestructible, vinyl and LVP floors have a few specific enemies. Avoid abrasive scrubbing pads and stiff-bristled brushes, which can scratch the wear layer. Avoid “mop and shine” products and wax-based cleaners; these create a buildup that dulls the surface and is extremely difficult to remove. Avoid ammonia-based cleaners, which can break down the surface finish over time. And despite vinyl’s water resistance, avoid steam mops; the intense heat can warp the planks and damage the adhesive in glue-down installations.
Removing Stains and Scuffs From Vinyl
For stubborn stains (including ink, marker, and food stains), a small amount of rubbing alcohol on a clean cloth works effectively without damaging the surface. For scuff marks from shoes, a clean pencil eraser or a dab of WD-40 on a cloth removes most scuffs beautifully. Wipe away any WD-40 residue with a damp cloth afterward.
Natural Stone Floor Cleaning: Marble, Slate, and Travertine Care
Natural stone floors are undeniably beautiful, and undeniably high-maintenance. Marble, travertine, slate, limestone, and granite all require specialized care that differs significantly from other floor types. The single most important thing to understand about natural stone is that it is sensitive to pH. Both acidic and highly alkaline cleaners can cause etching, dulling, and irreversible surface damage.
The Non-Negotiable Rule: pH-Neutral Cleaners Only
For all natural stone floors, use only pH-neutral, stone-specific cleaning products. This rules out white vinegar, lemon juice, and most general-purpose household cleaners, which are acidic. It also rules out bleach and ammonia-based cleaners, which are highly alkaline. Even products marketed as “natural” or “gentle” can be problematic for stone if they’re outside the neutral pH range.
The safest approach is to use a cleaner specifically formulated for natural stone floors. These products are designed to clean effectively without disrupting the stone’s surface chemistry.
Cleaning Marble Floors
Marble is the most demanding of all natural stone floors. It is highly porous and exceptionally sensitive to acid, even a splash of orange juice or wine can etch the surface if not wiped up immediately. For daily cleaning, a dry microfiber mop is safest. For damp cleaning, use a barely moist microfiber mop with a pH-neutral stone cleaner.
Spills on marble should be addressed immediately. Blot (don’t wipe) the spill to prevent spreading, then clean with a damp cloth. The longer an acidic substance sits on marble, the deeper the etching goes.
Cleaning Travertine and Slate
Travertine is similarly sensitive to acids but generally more durable than marble for floor use. It often has natural pits and holes in the surface that can trap dirt, a soft-bristled brush used gently can help clean these without causing damage.
Slate is more forgiving than marble or travertine and handles a wider range of cleaning products, though pH-neutral is still the safest choice. Slate can be mopped with slightly more moisture than marble, but the same principle of minimal water applies.
Sealing Natural Stone
Sealing is essential for natural stone floors. A quality stone sealer penetrates the surface and creates a barrier that repels moisture and staining, significantly reducing the risk of damage. Most natural stone floors should be sealed at initial installation and resealed every one to two years, depending on traffic and wear. You can test whether your stone needs resealing by dropping a few drops of water on the surface. If the water beads, the seal is intact. If it absorbs into the stone, it’s time to reseal.

The Best Floor Cleaning Tools and Equipment in 2026
Having the right tools makes floor cleaning dramatically faster, easier, and more effective. Here’s a breakdown of the key equipment and how to choose what’s right for your home.
Mops: Choosing the Right Type for Your Floor
The flat microfiber mop is the gold standard for most hard floor types: hardwood, laminate, vinyl, LVP, and tile. Microfiber pads trap and hold dirt rather than pushing it around, can be used dry for dusting or lightly dampened for mopping, and are machine washable. Look for mops with swivel heads for easy maneuvering around furniture.
Spray mops combine a mop with a built-in water reservoir and spray trigger, allowing you to apply a fine mist of cleaning solution to small sections of floor as you go. They give you excellent control over moisture levels, making them particularly suitable for hardwood and laminate.
Spin mops use a centrifugal spinning mechanism to wring the mop head to your desired dampness level. They’re effective on tile and vinyl floors but should be wrung very thoroughly before use on hardwood or laminate.
Avoid string mops and sponge mops for most residential floor cleaning. String mops hold far too much water and are difficult to wring effectively. Sponge mops have a tendency to push dirty water across the floor rather than absorbing it.
Vacuums: Hard Floor vs. Carpet
For hard floors, look for a vacuum with a dedicated hard floor mode that disengages the beater bar and uses gentle suction to remove debris without scratching. Stick vacuums have become increasingly powerful and are excellent for quick daily cleans on hard floors.
For carpets, a full-size upright or canister vacuum with a rotating brush bar provides the best deep-cleaning performance. Look for strong suction power, a HEPA filtration system (particularly important for allergy sufferers), and a sealed system that prevents dust from leaking back into the air.
Robot Vacuums and Mops in 2026
Robot vacuums have come a long way. The latest generation of robot vacuums offers impressive suction, intelligent mapping technology, automatic obstacle avoidance, and self-emptying bases that reduce how often you need to interact with the device. For maintaining hard floors between manual cleans, a robot vacuum is a genuinely useful tool.
Robot mops, or combination vacuum-mop robots, have also improved significantly. While they don’t replace a thorough manual mop, they’re excellent for maintaining clean hard floors with minimal effort. Look for models with active scrubbing pads rather than passive dragging, which provide a more effective clean.
Steam Cleaners
Steam cleaners use high-temperature steam to sanitize and clean surfaces without chemicals. They’re excellent for tile and grout, where steam penetrates the porous grout and effectively kills bacteria and mold. They can also be used safely on sealed natural stone, vinyl, and some sealed hardwood, but always check your floor manufacturer’s guidelines before use. As noted throughout this guide, steam mops should never be used on laminate or unsealed hardwood.
Natural and DIY Floor Cleaning Solutions
The shift toward natural, non-toxic cleaning products has accelerated significantly in recent years, and for good reason. Many conventional floor cleaners contain harsh chemicals, synthetic fragrances, and compounds that aren’t great for indoor air quality, particularly in homes with children and pets. The good news is that some of the most effective floor cleaning solutions can be made at home with just a few simple, affordable ingredients.
All-Purpose Hard Floor Cleaner
For tile, vinyl, and LVP floors, mix 1 litre of warm water with 1 teaspoon of dish soap and 1/4 cup of white vinegar. This solution cuts through grease and grime effectively and leaves hard floors clean and streak-free. Remember, do not use vinegar on natural stone or hardwood floors.
Hardwood Floor Cleaner
For hardwood, skip the vinegar entirely. Mix one litre of warm water with just a few drops, literally three to five drops of dish soap. That’s it. This gentle solution is all hardwood floors need for routine damp cleaning. Add a few drops of essential oil (lavender or lemon works beautifully) for a pleasant natural fragrance.
Natural Stone Floor Cleaner
For marble, travertine, and other natural stone, warm water alone is often the safest cleaning option. If you need something slightly stronger, add a small amount of pH-neutral dish soap to warm water. Avoid any DIY recipes that include vinegar, lemon juice, or baking soda on natural stone; all of these are outside the neutral pH range and can cause etching.
Carpet Deodorizer and Freshener
Mix one cup of baking soda with 15 drops of your preferred essential oil (lavender, eucalyptus, and tea tree are all popular choices) in a jar. Stir well to combine. Sprinkle liberally over carpet, leave for at least 20 minutes, and vacuum thoroughly. The baking soda neutralizes odors while the essential oils leave a pleasant, lingering fragrance.
Grout Cleaner
Combine half a cup of baking soda with a quarter cup of hydrogen peroxide and one teaspoon of dish soap to form a paste. Apply to grout lines, leave for 10 to 15 minutes, scrub with a stiff brush, and rinse clean. This DIY grout cleaner rivals commercial products in effectiveness and costs a fraction of the price.
Floor Cleaning Tips for Pet Owners and Allergy Sufferers
Sharing your home with pets is one of life’s great joys, but it does add a layer of complexity to floor cleaning. Between fur, dander, muddy paws, and the occasional accident, pet owners generally need to clean their floors more frequently and more thoroughly than those without animals.
Managing Pet Hair on Hard Floors
Pet hair on hard floors has a frustrating tendency to clump together in corners and along baseboards, drift across the room in the slightest breeze, and wrap itself around vacuum brush rolls. A rubber broom, which uses static electricity to attract and gather pet hair, is surprisingly effective on hard floors and much easier to clean than a traditional broom. For vacuum brush rolls that constantly get tangled with hair, look for models with tangle-free technology or self-cleaning brush rolls.
Managing Pet Hair on Carpet
For carpet, a rubber squeegee dragged across the pile before vacuuming pulls embedded pet hair to the surface, where the vacuum can pick it up more effectively. A damp rubber glove rubbed across upholstered stairs achieves the same result. Vacuuming in multiple directions also helps lift hair that’s worked its way deep into the carpet fibers.
Dealing With Pet Accidents
Speed is everything when it comes to pet accidents on any floor surface. The longer urine sits, the deeper it penetrates, and the harder it becomes to eliminate both the stain and the odor. On hard floors, blot up immediately and clean with a pet-safe enzymatic cleaner. On carpet, blot up as much liquid as possible first, then apply an enzymatic cleaner and allow it to fully dry before assessing whether a second application is needed.
Reducing Allergens Through Floor Cleaning
For allergy sufferers, floor cleaning is a critical component of managing symptoms. Carpets in particular harbor enormous quantities of dust mites, pet dander, pollen, and other allergens. Vacuuming with a HEPA-filtered vacuum at least three times per week significantly reduces allergen levels. Washing hard floors with a damp mop (rather than dry sweeping, which can disperse fine particles into the air) also helps.
Consider replacing bedroom carpet with hard flooring if allergies are severe; hard floors are dramatically easier to keep allergen-free than carpet.
How to Deep Clean Your Floors: A Room-by-Room Guide
Different rooms accumulate different types of dirt and grime, and a deep cleaning approach should reflect those differences.
Kitchen Floors
Kitchen floors are exposed to grease, food particles, liquid spills, and heavy foot traffic, often all in the same day. For a kitchen floor deep clean, start by removing everything from the floor, including rugs, mats, and any furniture you can move. Sweep or vacuum thoroughly, paying close attention to the areas under and around appliances.
For tile or vinyl kitchen floors, mop with a degreasing solution; warm water with dish soap is excellent for cutting through cooking grease. Pay particular attention to the areas around the stove and sink where grease and food residue accumulate. For stubborn grease buildup, a paste of baking soda and water applied and left for 10 minutes before scrubbing works well.
Bathroom Floors
Bathroom floors deal with soap scum, hard water deposits, mold, and high humidity. For tile bathroom floors, a vinegar-water solution (not for stone) or a commercial bathroom cleaner works well for soap scum and mineral deposits. Pay special attention to the area around the base of the toilet and the shower or bath entry, where soap scum and mildew tend to concentrate.
For grout in bathrooms, the hydrogen peroxide and baking soda paste method described earlier is particularly effective, as bathroom grout is especially prone to mold and discoloration from the humid environment.
Living Rooms and Bedrooms
These rooms accumulate dust, pet hair, and general dirt from daily activity. For carpeted living rooms and bedrooms, move furniture to vacuum underneath and along the edges, these areas are often neglected in regular vacuuming. For hard floors, move furniture to clean underneath and use a crevice tool to clean along baseboards and in corners.
Entryways and Hallways
High-traffic entryways and hallways are your home’s first line of defense against outdoor dirt. Deep cleaning these areas regularly prevents tracked-in debris from spreading throughout the rest of the house. For tile or stone entryways, a thorough scrub with an appropriate cleaner should address any ground-in dirt. For hardwood or laminate hallways, a careful damp clean with a barely moist mop is the approach.
How to Keep Your Floors Clean Longer: Prevention Tips
The best cleaning tip of all is to minimize how much cleaning you need to do in the first place. A few simple preventative measures can dramatically reduce the rate at which your floors get dirty.
Place high-quality doormats both outside and inside every exterior door. Outdoor mats with a coarse texture remove the bulk of dirt and debris from shoes before they enter. Indoor mats with an absorbent surface capture any remaining moisture and fine dirt. Studies suggest that a good doormat system can remove up to 80% of the dirt that would otherwise be tracked through your home.
Consider implementing a no-shoes policy in your home. This is perhaps the single most effective thing you can do to keep your floors clean, particularly for light-colored carpet and hardwood floors. Shoes track in an astonishing amount of dirt, bacteria, pesticides, and outdoor pollutants. Providing a designated shoe storage area near the entrance makes the habit easy to maintain for family members and guests.
Use furniture pads on the legs of all chairs, tables, and other furniture that sits on hard floors. Unprotected furniture legs are a primary cause of scratches and scuff marks on hardwood, laminate, and vinyl. Check and replace these pads periodically, as they can accumulate dirt that makes them abrasive rather than protective.
Place area rugs in high-traffic zones, particularly in hallways, living rooms, and around kitchen workstations. Area rugs protect the floor surface underneath from wear and are much easier and cheaper to clean or replace than flooring itself.
Finally, establish a regular maintenance schedule and stick to it. Consistent, frequent light cleaning prevents the buildup of dirt and grime that requires intensive deep cleaning to address. A floor that’s swept daily and mopped weekly will always look better and last longer than one that’s neglected between infrequent marathon cleaning sessions.
Conclusion
Clean, well-maintained floors are the foundation of a truly beautiful home, and now you have the knowledge to care for every single floor type with confidence. From the delicate care required by natural stone and hardwood, to the more forgiving nature of tile and vinyl, to the deep-cleaning demands of carpet, every floor has its own personality and its own needs.
The key takeaways? Always match your cleaning method and products to your specific floor type. Use less moisture than you think you need on sensitive surfaces. Invest in quality microfiber tools that genuinely capture dirt rather than redistributing it. Build consistent daily and weekly habits that prevent buildup before it starts. And don’t underestimate the power of prevention, a good doormat and a no-shoes policy will do more for your floors than almost any cleaning product on the market.
Beautiful floors are absolutely within reach, regardless of your budget or how busy your household is. Start with one room, implement the right routine, and build from there. Your floors will thank you for it!