The robot vacuum market is booming, and it shows no signs of slowing down. In fact, the global robot vacuum cleaner market is projected to reach over $21 billion by 2030. Millions of households now own at least one of these handy little devices, and yet one question keeps coming up again and again: where on earth do you actually put it?
Here’s the thing. A robot vacuum isn’t like a traditional vacuum. You can fold it up and shove it in a closet. It needs a home base. It needs to be charged. It needs to be accessible enough to do its job, but tucked away enough that it doesn’t become an eyesore in your living space. Finding that balance? That’s exactly what this guide is all about!
Whether you’re dealing with a tiny apartment, a busy family home, or just a serious case of too-much-stuff-not-enough-space, I’ve pulled together the best robot vacuum storage ideas, hacks, and solutions out there. Let’s find the perfect setup for your home!

Understanding Your Robot Vacuum’s Storage Needs
Before you start rearranging furniture or ordering storage solutions online, it’s worth taking a moment to understand what your robot vacuum actually needs from its storage setup. Because unlike most home appliances, a robot vacuum has very specific requirements, and ignoring them leads to frustrating performance issues down the line.
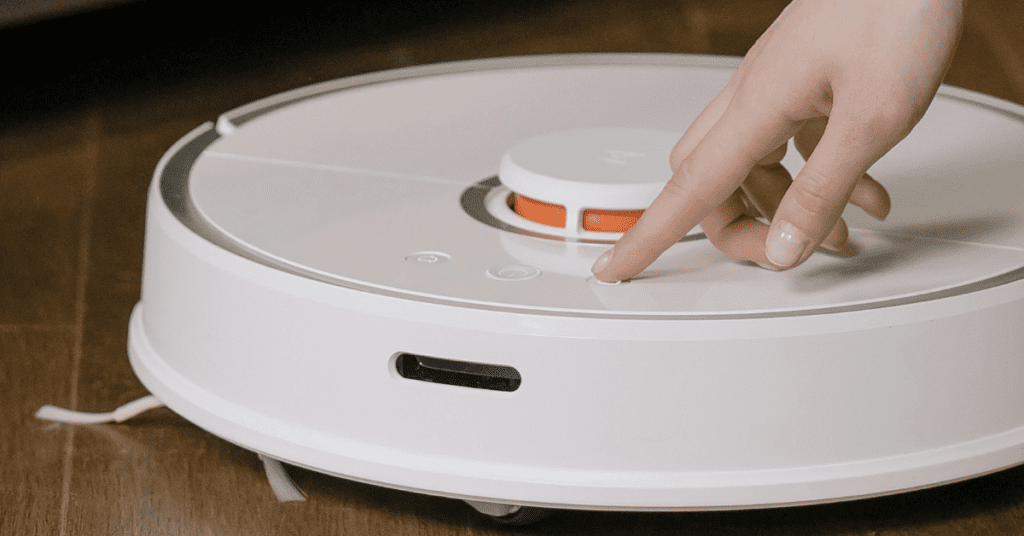
First and most importantly: your robot vacuum needs a permanent, dedicated home base. This isn’t optional. The charging dock is the nerve center of your robot vacuum’s operation. It’s where the device returns after every cleaning cycle, where it recharges between sessions, and in more advanced models, where it empties its dustbin, refills its water tank, and syncs its mapping data. Moving the dock around regularly confuses the robot’s navigation system and causes failed return-to-home attempts. Pick a spot and commit to it.
The charging dock needs to sit on a hard, flat surface. Carpet is generally fine for the robot vacuum itself to navigate, but the dock should ideally be placed on a hard floor. Tile, hardwood, or laminate, for the most reliable docking connection. If your home is fully carpeted, a thin, hard mat placed under the dock solves the problem neatly.
Clearance is the factor most people underestimate. Every robot vacuum manufacturer specifies minimum clearance requirements around the dock, and these exist for a reason. As a general rule, most models need at least 18 inches of clear space in front of the dock and around 6 inches on either side. This gives the robot room to approach, align, and dock successfully without bumping into obstacles. Check your specific model’s manual for exact requirements. They vary more than you’d expect between brands like Roomba, Roborock, Eufy, Shark, and Ecovacs.
Different models also have significantly different dock footprints. A basic charging-only dock is compact and easy to place almost anywhere. An all-in-one auto-empty base station, on the other hand, can be 12 to 18 inches tall and requires more floor space and vertical clearance. Know what you’re working with before you plan your storage setup, and measure twice before committing to any furniture arrangement.
The Best Locations to Store Your Robot Vacuum at Home
Location is everything when it comes to robot vacuum storage. The right spot means your device cleans efficiently, returns home reliably, and integrates seamlessly into your daily routine. The wrong spot means missed areas, failed docking, and a device that becomes more frustrating than helpful.
The golden rule of robot vacuum placement is to store it centrally relative to the area it cleans most. If your robot vacuum is responsible for your entire ground floor, a central hallway or open living area gives it the shortest, most efficient route to cover everything. If it’s dedicated to one room, store it in or just outside that room. The further the robot has to travel from its dock to reach its cleaning zone, the more battery it burns before it even starts working.
Living Room Placement
The living room is the most common storage location for robot vacuums, and for good reason, it’s usually the largest, most open space in the home, and benefits most from regular automated cleaning. The challenge is making the dock look like it belongs rather than like a piece of technology that crashed a furniture arrangement. Tuck the dock along a wall, ideally behind or beside a sofa or media console where it’s out of immediate sightlines. Coordinate the dock color with your baseboards or wall color, where possible. Many manufacturers now offer docks in white, black, and grey to suit different interiors.
Kitchen Placement
The kitchen is where messes happen most, making it an excellent candidate for robot vacuum storage. Under a kitchen island or beside a cabinet unit works well, provided the clearance requirements are met. Be mindful of water and humidity near the dock, keep it away from the sink area and any spots where splashes could reach the charging contacts.
Hallway and Entryway Placement
Hallways and entryways offer surprisingly good robot vacuum storage options, particularly in open-plan homes where the robot can access multiple rooms from a central corridor. The main challenge is space. Hallways are often narrow, and a dock with clearance requirements can feel obstructive. Measure carefully and ensure the dock doesn’t create a hazard or restrict movement through the space.
Bedroom Placement
Storing and running a robot vacuum in the bedroom requires a bit more thought, particularly around scheduling. Most robot vacuums are quiet enough not to be disruptive, but running them while you sleep isn’t ideal. Schedule bedroom cleans for when you’re up and about, and position the dock out of the main traffic path, beside the wardrobe or under a bedside table, which works well in most bedrooms.
Utility Room or Laundry Room
For auto-empty models with larger base stations, a utility room or laundry room can be an ideal storage solution. The robot can clean the surrounding living areas and return to its base without the station being visible in your main living space. This is particularly effective in homes with open-plan ground floors where the utility room sits adjacent to the main living and kitchen areas.

Creative Robot Vacuum Storage Ideas for Small Spaces
Small space living presents real challenges for robot vacuum storage, but it also inspires some genuinely clever solutions. The key is thinking creatively about the space you do have rather than lamenting the space you don’t.
Under-Furniture Storage
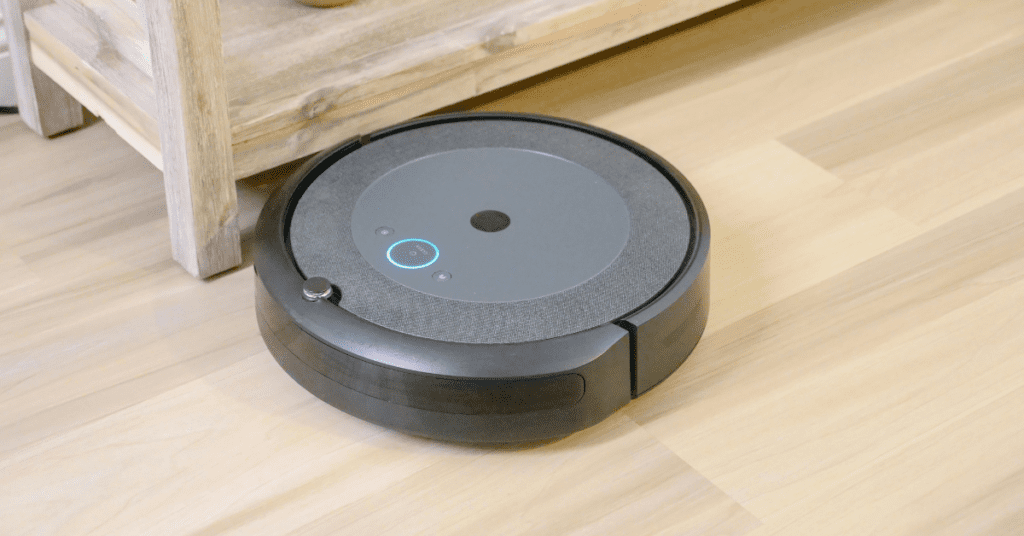
Many sofas, beds, and console tables have enough clearance underneath to accommodate a robot vacuum dock perfectly. Measure the height of your furniture carefully, most robot vacuum docks are between 3.5 and 5 inches tall, and the robot vacuum itself adds another inch or so when docked. If you have at least 5 to 6 inches of clearance, you have a potential storage solution. This approach completely hides the dock from view while keeping the robot accessible and centrally located.
Built-In Cabinet Nooks
If you’re doing any kind of renovation or have a skilled DIY hand, building a dedicated robot vacuum nook into a cabinet or built-in unit is one of the cleanest storage solutions available. Cut out a section of the cabinet’s kick plate, run a power outlet to the inside of the nook, and you have a completely hidden charging station that looks like it was always part of the furniture. It requires some effort up front, but delivers a result that looks completely seamless.
Console Tables and Side Tables
A console table positioned against a wall with the robot vacuum dock stored underneath is one of the most popular and accessible storage solutions for small spaces. The table adds surface storage and decorative value to the space above while neatly concealing the dock below. Look for console tables with open bases and legs high enough to accommodate your specific dock model. Many people style the table surface with plants, books, or decorative items that draw the eye upward and away from the dock below.
Corner Placement
Corners are often wasted space in most rooms, and a robot vacuum dock fits into a corner surprisingly well. Position the dock diagonally in the corner with its required clearance space maintained in front of it. This keeps the dock accessible for the robot while using otherwise underutilized floor space. A small corner-appropriate decorative piece beside the dock, a potted plant, a basket, a small floor lamp can help the setup blend into the room naturally.
Apartment Hacks That Need No Renovation
For renters or anyone who can’t make permanent changes to their space, freestanding furniture solutions are the answer. A small bookcase with an open bottom shelf provides storage above and dock space below. An ottoman with storage can sit adjacent to the dock area, creating a cohesive furniture grouping that makes the dock look intentional. The goal is always to make the dock feel like part of your decor rather than an afterthought.
How to Hide Your Robot Vacuum Dock Without Affecting Performance
The desire to hide the robot vacuum dock is completely understandable. These devices, however useful, aren’t exactly interior design highlights. But concealing the dock improperly is one of the most common causes of robot vacuum performance issues. Here’s how to do it right.
The most important rule: never fully enclose the dock. Robot vacuums need a clear, unobstructed approach path to dock successfully. The device uses infrared sensors or visual markers to locate its base, and anything blocking the front of the dock, a door, a curtain, or a box, prevents the robot from finding its way home. Partial concealment from the sides or above is fine. Full enclosure is not.
Airflow matters too. Charging docks and auto-empty base stations generate some heat during operation. Enclosing them too tightly without adequate ventilation can cause overheating over time. Any concealment solution should allow air to circulate freely around the unit.
DIY Dock Covers
A simple and popular DIY approach is to build or buy a three-sided box. Open at the front and the top, that slides over the dock to conceal it from side view while leaving the approach path completely clear. These can be made from wood and painted to match your baseboards or walls, making them virtually invisible against the wall. Etsy has a thriving market of handmade wooden robot vacuum dock covers in various finishes if DIY isn’t your thing.
Furniture as Camouflage
Positioning furniture to partially obscure the dock from casual view, without blocking the front clearance zone, is an elegant and easy solution. A sofa arm, the side of a bookcase, or the leg of a console table can all serve as natural visual barriers that make the dock far less prominent without interfering with its function.
Cord Management
Nothing makes a robot vacuum setup look messier than a trailing power cord. Use cable clips, cord covers, or cable raceways to route the power cord neatly along the baseboard from the dock to the nearest outlet. Paint the cord cover to match your baseboard color, and it becomes essentially invisible. This one step dramatically improves the overall appearance of any robot vacuum storage setup.

Robot Vacuum, Storage Furniture, and Products Worth Buying
The market for robot vacuum storage solutions has grown significantly alongside robot vacuum adoption, and there are now some genuinely excellent products designed specifically for this purpose.
Dedicated Docking Station Furniture
Several furniture companies now produce side tables and console tables with built-in robot vacuum compartments, an open lower section sized specifically to fit common robot vacuum dock models. IKEA’s LACK side table has become a cult favorite among robot vacuum owners for its perfect proportions and budget-friendly price point. The open lower shelf accommodates most standard docking stations, while the tabletop provides a useful surface above. It’s simple, effective, and costs less than $30.
For a more premium option, companies like Roborock and iRobot have begun producing matching furniture accessories designed to complement their dock aesthetics. These look sleek and intentional but come at a premium price.
Cable Management Solutions
The D-Line cable raceway is consistently one of the highest-rated cord management solutions for robot vacuum setups. It’s paintable, available in multiple sizes, and adheres cleanly to baseboards without permanent installation. For a wireless look, consider having an electrician install a floor-level outlet directly behind your planned dock location, it eliminates the cord run.
Accessory Storage
Robot vacuums come with, and require, a surprising number of accessories. Extra filters, replacement brush rolls, side brushes, cleaning tools, and, in the case of wet-dry models, replacement mop pads all need somewhere to live. A small drawer organizer or labeled storage box kept in a nearby drawer or cabinet keeps everything tidy and easy to find when maintenance time comes. The Sterilite small drawer unit is a popular choice, inexpensive, stackable, and perfectly sized for robot vacuum accessories.
Wall-Mounted Accessory Holders
For those who want to go fully organized, wall-mounted pegboards or small tool organizers near the dock station keep all accessories visible, accessible, and off surfaces entirely. Mount a small pegboard panel on the wall beside the dock, add a few hooks and small bins, and you have a complete robot vacuum maintenance station that’s both functional and visually satisfying.
Storing Robot Vacuum Accessories and Spare Parts
Your robot vacuum is only as good as its maintenance routine, and a well-organized spare parts system makes staying on top of that maintenance genuinely easy. Most people buy replacement parts reactively, only when something stops working, but having a small inventory on hand means your robot vacuum is never out of commission waiting for a delivery.
The key accessories to keep stocked are replacement filters, side brushes, and the main brush roll or roller. Filters typically need replacing every one to two months, depending on use and whether you have pets. Side brushes last two to three months on average. Main brush rolls need replacing every six to twelve months. Buy these in multipacks when possible. It’s more economical and ensures you always have a replacement on hand.
Store spare parts in a cool, dry location away from direct sunlight. A small labeled container or zip-lock bag system works well. Label each bag with the part name and the date you opened the current replacement. This makes it easy to track how long each component has been in use and when it’s due for a change.
Create a simple robot vacuum maintenance kit by gathering all your cleaning and maintenance tools in one place. This typically includes the spare parts mentioned above, the small cleaning brush that came with your robot vacuum (for cleaning the brush roll and sensors), a microfiber cloth for wiping down the robot and dock, and any cleaning solution recommended by the manufacturer for the dock contacts.
For the truly organized among us, a digital maintenance log is worth keeping. A simple note on your phone or a reminder app entry for each component’s replacement schedule takes two minutes to set up and saves you from the guesswork of trying to remember when you last changed the filter. Many modern robot vacuum apps now include built-in maintenance reminders, check your app’s settings to make sure these notifications are enabled.
Robot Vacuum Storage Tips for Multi-Floor Homes
Multi-floor living introduces a genuine question for robot vacuum owners: one robot carried between floors, or multiple robots with dedicated docks on each level? Both approaches have merit, and the right answer depends on your home’s layout, your budget, and your tolerance for manual intervention.
One Robot, Multiple Floors
Carrying a single robot vacuum between floors is the most budget-friendly approach, but it requires more manual involvement. You’ll need to carry the robot up or down the stairs, place it on its secondary dock, and ensure it cleans each level on a schedule. If you go this route, invest in a second or third docking station for each floor. They’re significantly cheaper than buying additional robots, so the device always has a home base available wherever it is. Keep the power cord and dock permanently set up on each level so the transition between floors is as seamless as possible.
Dedicated Robot Per Floor
For maximum convenience and automation, a dedicated robot vacuum on each floor is the ultimate solution. Each device learns its level’s layout, maintains its own cleaning schedule, and returns to its own dock independently. You never have to think about it. The obvious downside is cost, you’re buying multiple devices, but for busy households or larger homes, the investment in time savings is often well worth it.
When setting up multiple docking stations across different floors, apply the same placement principles to each: central location relative to the cleaning zone, proper clearance maintained, power cord managed neatly, and dock positioned on a flat, hard surface. Name each robot vacuum in its app to distinguish between them clearly, and set each one’s cleaning schedule based on the specific traffic and usage patterns of its floor.
For the most efficient multi-floor setup, position the dock on each level near the top or bottom of the stairs if possible. This minimizes the robot’s travel distance to reach all areas of that floor and makes the transition when carrying the device between levels as quick and convenient as possible.

Common Robot Vacuum Storage Mistakes to Avoid
Even with the best intentions, these storage mistakes come up time and time again, and they’re almost always the root cause of robot vacuum performance frustrations.
Storing Too Far From the Cleaning Zone
The further your robot vacuum has to travel from its dock to reach the area it needs to clean, the more battery it consumes before the real work begins. In larger homes, this can mean the robot runs out of charge before finishing its cycle. Always store the dock as close to the primary cleaning zone as your space allows.
Blocking the Dock Approach Path
Furniture, bags, shoes, toys, and anything placed in front of the dock’s clearance zone will prevent the robot from returning home successfully. The robot will wander, fail to dock, and eventually run its battery flat on the floor somewhere. Make the dock’s clearance zone a no-go area for clutter, and instill this as a household rule if you have kids or other family members who might inadvertently block the path.
Extreme Temperature and Sunlight Exposure
Robot vacuum batteries, like all lithium-ion batteries, are sensitive to temperature extremes and prolonged direct sunlight. Don’t store the dock in a sun-drenched window alcove, in an uninsulated garage, or anywhere that experiences significant temperature swings. A stable, room-temperature indoor location extends battery life significantly.
Ignoring the Dock’s Cleanliness
The charging contacts on both the dock and the robot vacuum itself accumulate dust and debris over time, leading to unreliable charging connections. Clean the charging contacts on both surfaces with a dry microfiber cloth or cotton swab every month or so. It’s a 30-second task that prevents a surprisingly common source of performance issues.
Underestimating the Return Path
Your robot vacuum doesn’t just need clearance around its dock. It needs a navigable path back to the dock from anywhere in its cleaning zone. Obstacles, rugs with high edges, loose cables, and cluttered corridors can all prevent a successful return. Do a walkthrough of your space from the robot’s perspective occasionally, and clear any obstacles that might be interfering with its ability to find its way home.
Conclusion
Finding the right robot vacuum storage solution is one of those things that seems minor, until you get it right and realize how much of a difference it makes. A well-placed, thoughtfully stored robot vacuum runs more efficiently, lasts longer, charges more reliably, and blends seamlessly into your home rather than sticking out like a piece of technology that doesn’t belong.
The best setup is always the one that works for your specific space, your robot vacuum model, and your daily routine. Whether you opt for a sleek furniture solution, a clever DIY dock cover, a dedicated utility room base station, or simply find the perfect corner to tuck everything neatly into, the goal is the same. A home where your robot vacuum can do its job effortlessly, recharge reliably, and look good doing both.
Start by assessing your space today. Measure your clearance requirements, think about which room benefits most from central placement, and pick one idea from this guide to implement this week. Your floors will be cleaner, your space will look tidier, and your robot vacuum will run better than ever. Now that’s a home upgrade worth making!