Hardwood floors are one of the most beautiful and valuable features a home can have. They’re timeless, durable, and when properly maintained, they can genuinely last a lifetime. But they’re also surprisingly easy to damage with the wrong products, the wrong techniques, or even just too much water. The good news is that cleaning hardwood floors correctly isn’t complicated, once you know what you’re doing.
Whether you’ve just installed brand new hardwood floors and want to start on the right foot, or you’re dealing with dull, tired-looking boards that need some serious revival, this complete guide covers everything you need to know about how to clean hardwood floors.
Understanding Your Hardwood Floor Before You Clean It
Before you pick up a mop or reach for a cleaning product, there’s one thing you absolutely need to know: what kind of hardwood floor you’re actually dealing with. This single piece of information determines everything, which products are safe, which methods work best, and which approaches could cause serious damage.
Solid Hardwood vs. Engineered Hardwood
These two floor types look nearly identical but behave very differently when it comes to cleaning. Solid hardwood is exactly what it sounds like. Planks milled from a single piece of wood all the way through. It’s durable, can be sanded and refinished multiple times, but is more sensitive to moisture and humidity changes. Engineered hardwood consists of a real wood veneer layer bonded to multiple layers of plywood or high-density fiberboard underneath. It’s more dimensionally stable than solid hardwood, handles humidity fluctuations better, but has a thinner wear layer that can’t always be refinished as many times. Both require careful moisture management during cleaning, but engineered hardwood is generally slightly more forgiving.
Identifying Your Floor’s Finish
This is arguably the most important thing to determine before cleaning, and most homeowners have no idea what finish their floors have. The four main finish types are surface-sealed, penetrating-sealed, oil-finished, and wax-finished, and they each respond to cleaners very differently.
Surface-sealed floors have a topcoat of polyurethane, polyacrylic, or aluminum oxide that sits on top of the wood, creating a hard protective barrier. These are the most common floors in modern homes, the most durable, and the easiest to clean. Penetrating-seal finishes soak into the wood grain rather than sitting on top, leaving a more natural, matte appearance but requiring more careful cleaning. Oil-finished floors have a similar penetrating quality and need specialized oil-based cleaners to maintain their finish. Wax-finished floors, most common in older homes, are the most delicate and require entirely different care from all the others.
The Water Droplet Test
Here’s a simple, foolproof way to identify your floor’s finish at home. Find an inconspicuous spot, behind a door or inside a closet, and place a few drops of water on the surface. Watch what happens over the next few minutes. If the water beads up and sits on the surface, you have a surface-sealed floor. If the water soaks in and darkens the wood, you have a penetrating-seal, oil, or wax finish that requires more delicate treatment. This test takes 30 seconds and gives you genuinely useful information that shapes your entire cleaning approach.
Why Floor Age and Condition Matter
A brand-new floor with an intact finish can handle regular damp mopping without issue. An older floor with a worn, thinning finish is more vulnerable. Moisture can penetrate damaged areas and reach the raw wood underneath, causing staining, warping, and deterioration. Inspect your floors periodically for areas where the finish looks worn, dull, or scratched through, and treat these spots with extra care until the floor can be refinished.

The Essential Tools and Products for Cleaning Hardwood Floors
Having the right tools makes hardwood floor cleaning faster, safer, and significantly more effective. Conversely, using the wrong tools is one of the most common ways homeowners unknowingly damage their floors over time. Here’s exactly what you need, and what to get rid of.
The Right Mop Makes All the Difference
Throw out your traditional string mop right now. Seriously. String mops hold an enormous amount of water and release it unevenly onto your floor surface, creating exactly the moisture conditions that warp and damage hardwood over time. The flat microfiber mop is the undisputed gold standard for hardwood floors. It picks up dust, debris, and bacteria effectively, holds far less water than a string mop, and when properly wrung out, leaves your floor barely damp rather than wet. Look for a mop with a washable, replaceable microfiber pad. The Bona Premium Microfiber Mop and the Swiffer WetJet Wood are both excellent choices at different price points.
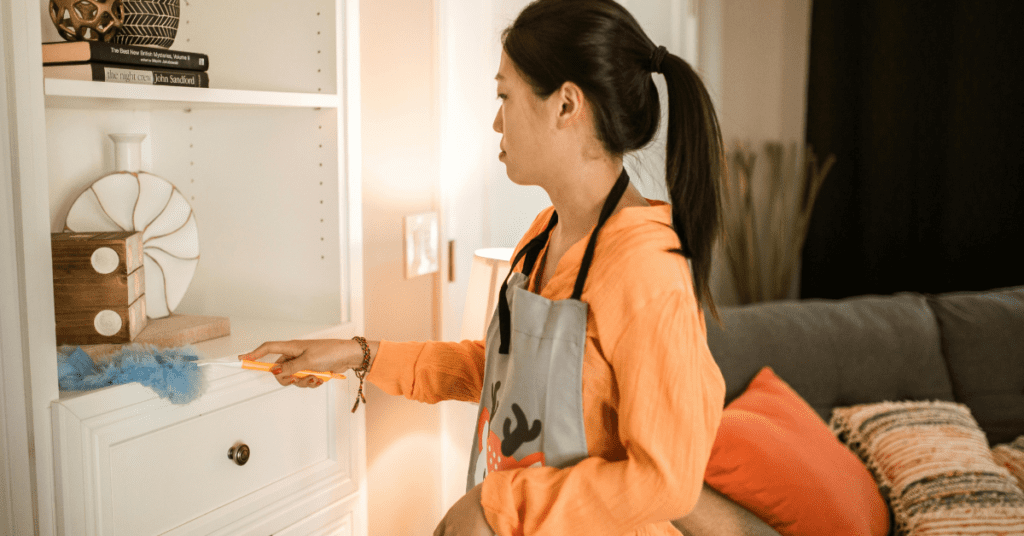
Vacuuming: Your Most Important Daily Tool
A quality vacuum used regularly is arguably more important than any mop for hardwood floor maintenance. The key is using the right settings and attachments. Always switch your vacuum to its hard floor setting, which turns off or raises the beater bar. A spinning beater bar designed for carpet will scratch and dull a hardwood floor surface over time. Use the hard floor attachment with soft bristles rather than any attachment with stiff bristles or rough edges. Robot vacuums set to a daily schedule are a fantastic option for keeping hardwood floors free of the fine grit and debris that causes micro-scratching underfoot.

What to Avoid Completely
Some products have no business being anywhere near a hardwood floor. Avoid anything containing ammonia, it breaks down polyurethane finishes over time. Bleach and bleach-based cleaners damage wood fibers and strip the finish. Vinegar, despite its popularity as a natural cleaner, is acidic enough to dull and etch hardwood finishes with repeated use. Oil soaps used too frequently or in too high a concentration leave a residue that builds up into a dull, sticky film. Steam mops, more on this later, drive moisture directly into wood fibers and cause serious long-term damage.
How to Clean Hardwood Floors: A Step-by-Step Routine
With the right tools and products assembled, here’s the step-by-step routine that keeps hardwood floors in consistently excellent condition. Follow this process, and you’ll achieve better results in less time than most people spend cleaning their floors incorrectly.
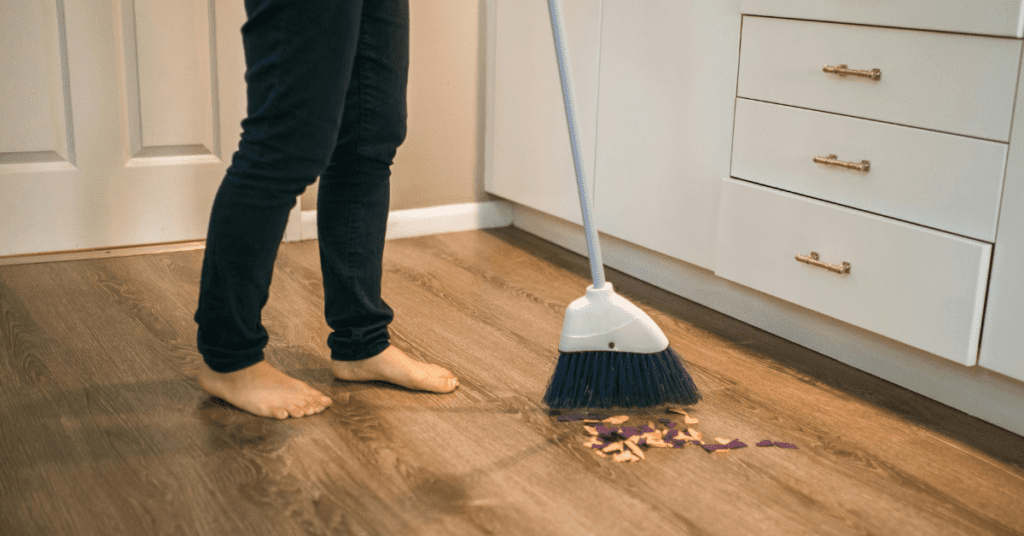
Step 1: Dry Sweep or Vacuum First
This step is non-negotiable and must always come before any wet cleaning. Fine grit, sand, and debris on a hardwood floor act like sandpaper under a mop, creating thousands of tiny scratches in the finish with every mopping stroke. A thorough dry sweep or vacuum pass removes this abrasive material before it can cause damage. Use a microfiber dry mop or a soft-bristle broom for sweeping, or a vacuum on the hard floor setting. Work methodically from one end of the room to the other, paying attention to corners and along baseboards where debris accumulates most.
Step 2: Choose the Right Cleaner
Based on your floor’s finish type, which you’ve now identified, select the appropriate cleaner. For surface-sealed floors, a commercial hardwood floor cleaner or a very dilute dish soap solution works perfectly. For penetrating-seal or oil-finished floors, use a cleaner specifically formulated for those finishes. For wax-finished floors, use a dedicated wax floor cleaner and avoid water-based products entirely.
Step 3: The Barely Damp Mop Technique
This is where most people go wrong, and it cannot be overstated: your mop should be barely damp, not wet. After applying your cleaning solution to the mop pad, wring it out thoroughly, and then wring it again. When you press the pad firmly in your hand, no water should drip out. The pad should feel just slightly cool and damp to the touch. If you can see moisture sitting on your floor after the mop passes over it, your mop is too wet. The floor should look slightly damp and then dry within 30 to 60 seconds of mopping. If it’s taking longer, reduce your moisture level.
Step 4: Mop in the Direction of the Wood Grain
Always mop in the direction the wood planks run, typically lengthwise down the room. Mopping against the grain pushes dirty water into the seams between planks, where it can seep down to the subfloor and cause problems over time. Moving with the grain also produces a cleaner, more streak-free result and is gentler on the finish.
Step 5: Dry the Floor Promptly
After mopping, any remaining moisture on the surface should be dried promptly. In most cases, the floor will air-dry within a minute or two if your mop was properly wrung out. If any areas appear to be staying damp for longer, follow up immediately with a dry microfiber cloth or a fresh dry mop pad. Never leave standing moisture on a hardwood floor.
Step 6: Buff for Shine
Once the floor is completely dry, a quick buff with a clean, dry microfiber cloth or pad in circular motions brings out a beautiful natural shine. This step is optional but makes a noticeable difference, particularly on darker floors where streaks and dullness show up most prominently.
How Often to Clean Hardwood Floors
For daily maintenance, a quick dry sweep or robot vacuum pass in high-traffic areas is ideal and takes just a few minutes. Weekly, do a more thorough dry sweep of the entire floor followed by a damp mop. Monthly, pay extra attention to edges, corners, and under furniture. Every one to three months, plan for a deeper clean that addresses buildup, checks for worn finish areas, and treats any developing stains or scuffs.
How to Deep Clean Hardwood Floors Safely and Effectively
Regular cleaning maintains your floors, but every few months, they need something more thorough. Deep cleaning removes the cumulative buildup of cleaning product residue, foot oil, and embedded grime that regular mopping can’t fully address, and it restores the brightness and clarity to floors that have started looking dull despite regular care.
Signs Your Floors Need a Deep Clean
Several signs indicate it’s time for a deep clean rather than your usual routine. If your floors look dull and flat even right after mopping, product residue has likely built up on the surface. If the floor feels slightly tacky or sticky underfoot, that’s a classic sign of soap or cleaner accumulation. If mopping seems to smear rather than clean, the same issue is at play. And if your floors simply don’t look as good as they once did despite regular cleaning, a deep clean is almost always the answer before considering refinishing.
Removing Product Buildup
This is the most common deep cleaning task and one that surprises many homeowners. Years of cleaning with the wrong products, or even the right products used in too high a concentration, leave behind a film that dulls the finish and attracts more dirt. To remove it, use a commercial hardwood floor cleaner specifically marketed as a “deep cleaner” or “residue remover.” Bona’s Deep Clean formula is an excellent choice. Apply it with a microfiber mop, work in small sections, and follow up with a clean, damp mop pass to remove the lifted residue. You may need to repeat the process in particularly affected areas.
Deep Cleaning High-Traffic Areas
Entryways, kitchen floors, and hallways take the most punishment and often need more focused, deep cleaning attention. For these areas, apply your deep cleaning solution, let it sit for the manufacturer’s recommended dwell time, usually two to five minutes, before mopping to allow it to penetrate and lift embedded grime. A soft-bristle brush can be used very gently on particularly stubborn buildup in corners and along grout lines, but use light pressure and always test in an inconspicuous area first.
Wood Floor Refreshers and Revivers
For floors that are clean but have lost their luster due to finish wear, a wood floor refresher or reviver product, such as Bona Hardwood Floor Refresher or Basic Coatings StreetShoe Refresher, applies a thin, clear coating that restores shine and provides a degree of fresh protection without the full process of sanding and refinishing. These products are applied like a polish, dry quickly, and can extend the life of a finish by several years. They’re particularly valuable for floors that are starting to show light wear but aren’t yet in need of full refinishing.
When to Call a Professional
Some situations are beyond the scope of DIY deep cleaning. If your floors have significant finish wear that’s exposing raw wood, deep staining that has penetrated the finish, widespread scratching, or structural issues like warping or cupping, professional intervention is the appropriate next step. A professional floor cleaning and refinishing company can assess the condition of your floors and recommend the most appropriate course of action, which may be a professional deep clean, a screen-and-recoat to refresh the finish, or a full sand-and-refinish for floors in more serious condition.

How to Remove Common Stains from Hardwood Floors
Stains happen. The key is responding quickly and using the right treatment for the specific type of stain, because what works on one kind of stain can make another one worse. Here’s your complete stain treatment reference guide.
Water Stains and White Rings
White rings and cloudy water marks are caused by moisture that has penetrated the finish but not yet reached the wood itself. They look alarming but are usually treatable. For fresh water marks, try rubbing with a small amount of mayonnaise or petroleum jelly. The oils help displace the trapped moisture. Leave it on for several hours, then wipe it clean. For more stubborn white rings, very fine steel wool (0000 grade) rubbed very gently in the direction of the grain can remove the mark, but use extreme caution as this removes a thin layer of finish along with the stain.
Pet Stains and Urine
Pet urine is one of the most damaging substances for hardwood floors because its ammonia content actively attacks the wood finish and, if left untreated, penetrates deeply into the wood fibers and subfloor. For fresh stains, blot immediately with an absorbent cloth. Never rub, as this spreads the stain. Clean the area with an enzymatic pet stain cleaner specifically formulated for hardwood floors, which breaks down the uric acid crystals rather than just masking the odor. For old, set-in pet stains that have darkened the wood, the damage has often penetrated the finish and reached the raw wood, potentially requiring sanding and refinishing to fully address.
Grease and Oil Stains
For fresh grease stains, apply a small amount of dish soap directly to the spot, work it gently into the stain with a soft cloth, then wipe clean with a barely damp cloth. For dried grease, a small amount of mineral spirits on a soft cloth can dissolve the oil. Apply sparingly, wipe clean, and follow with your regular floor cleaner to remove any residue.
Scuff Marks
Light scuff marks from shoes or furniture are usually surface-level and often come off with surprisingly little effort. Try rubbing the scuff with a clean tennis ball, a pencil eraser, or a small amount of baking soda on a damp cloth. For stubborn scuffs, a tiny dab of mineral spirits on a soft cloth usually does the trick. Always work gently and in the direction of the grain.
Ink, Wine, and Food Stains
For ink stains, apply a small amount of rubbing alcohol to a cotton ball and dab, don’t rub the stained area. For wine and dark liquid stains, act immediately. Blot up as much liquid as possible, then clean with a hardwood floor cleaner. For dried food stains, soften with a barely damp cloth first, then clean with your regular floor cleaner. For any stain that has penetrated the finish and discolored the wood itself, a small amount of hydrogen peroxide on a cloth can help lift the color, test in a hidden area first, as hydrogen peroxide can lighten some wood species.
The Best Natural and DIY Hardwood Floor Cleaning Solutions
Sometimes the most effective solutions are the simplest ones. Here are the DIY cleaning options that genuinely work, along with honest caveats about their limitations.
White Vinegar and Water
This is the most widely shared DIY floor cleaner recipe on the internet, and it deserves an honest assessment. A dilute solution of white vinegar and water, roughly half a cup per gallon, does clean effectively and cuts through grease and light grime well. However, vinegar is acidic, and repeated use over time can dull and etch polyurethane finishes. Use it occasionally for a deeper clean, but not as your regular weekly cleaner. Always dilute properly and ensure your mop is barely damp.
Black Tea
This underrated natural cleaner works beautifully on hardwood floors. Brew two or three black tea bags in a quart of boiling water, allow to cool completely, and use the cooled tea to mop your floors. The tannic acid in black tea enhances the natural color and warmth of the wood and leaves a subtle, beautiful shine. It’s particularly effective on medium to dark hardwood floors and leaves no residue. Use it as an occasional treatment rather than a regular cleaner.
Olive Oil and Lemon Juice
A mixture of three parts olive oil to one part lemon juice creates a natural conditioning cleaner that cleans and nourishes simultaneously. Apply sparingly with a soft cloth, buff into the surface, and wipe away any excess. This is especially effective on older floors that have become dry and dull. The keyword is sparingly. Too much oil leaves a slippery, greasy residue that actually attracts more dirt and can be difficult to remove.
Castile Soap Solution
A few drops of pure castile soap, Dr. Bronner’s is the most widely available brand, dissolved in a gallon of warm water, makes a gentle, effective, plant-based everyday cleaner. It’s biodegradable, non-toxic, safe for households with children and pets, and leaves no harmful residue when properly diluted. Ensure the solution is very dilute. A little castile soap goes a remarkably long way.
Baking Soda for Stains
For targeted stain removal, a paste of baking soda and a small amount of water applied directly to the stain, left for a few minutes, and then gently scrubbed with a soft cloth is a safe and effective approach. Baking soda is mildly abrasive enough to lift surface stains without scratching the finish. Always rinse the area with a barely damp cloth afterward to remove all baking soda residue.
Hardwood Floor Cleaning Mistakes That Are Damaging Your Floors
Knowledge of what not to do is just as valuable as knowing what to do. These are the cleaning mistakes that cause the most damage and the most frustration for hardwood floor owners.
Using Too Much Water
This is the number one cause of hardwood floor damage, full stop. Wood is a hygroscopic material. It absorbs moisture from its environment. When excess water is applied during cleaning, it seeps into the seams between planks, penetrates worn areas of finish, and is absorbed into the wood fibers themselves. The result is swelling, warping, cupping, crowning, and finish deterioration that develops gradually and becomes harder to reverse over time. Your mop must always be barely damp. If you take nothing else from this guide, take that.
Steam Mopping
Steam mops have become enormously popular for hard floor cleaning, and they work wonderfully on tile and stone. On hardwood floors, however, they are genuinely damaging. The high-temperature steam drives moisture directly and forcefully into the wood fibers, bypassing even a healthy finish. Over time, this causes the same warping and swelling problems as excess water, but is accelerated by the heat and pressure. No hardwood floor manufacturer recommends steam mopping, and using a steam mop on hardwood floors typically voids the floor’s warranty. Don’t do it.
All-Purpose Cleaners, Bleach, and Ammonia
Products like Pine-Sol, Fabuloso, most multi-surface sprays, and anything containing bleach or ammonia are not formulated for hardwood floors and should never be used on them. Ammonia breaks down the polyurethane finish over time. Bleach damages and discolors wood fibers. Multi-surface cleaners often leave residue that builds up into a dull film. Always use a product specifically formulated for hardwood floors, or a well-tested DIY solution.
Skipping the Dry Sweep
Mopping a floor that hasn’t been swept is counterproductive and damaging. The fine grit and debris present on any floor surface become abrasive under a mop, creating micro-scratches in the finish with every pass. Over time, this produces a dull, scratched appearance that no amount of cleaning will reverse, only refinishing. Always sweep or vacuum before you mop. Always.
Waxing Over Polyurethane
This is a mistake made most often by homeowners with older floors who want to restore shine, or those who’ve received well-meaning but incorrect advice. Applying wax over a polyurethane-finished floor creates a cloudy, uneven film that is extremely difficult to remove and prevents any future refinishing products from bonding properly to the floor. If your floor has a polyurethane finish, use a polyurethane-compatible refresher product, not wax.
Neglecting Regular Cleaning
Ironically, cleaning too infrequently is also a significant source of floor damage. Fine grit and debris allowed to accumulate on the floor surface get ground into the finish underfoot with every step, creating gradual but progressive finish degradation. Regular dry sweeping, even a quick daily pass in high-traffic areas, prevents this accumulation and dramatically extends the life of the finish.

Room-Specific Hardwood Floor Cleaning Tips
Different rooms present different challenges, and a one-size-fits-all approach doesn’t serve hardwood floors as well as targeted strategies for each space.
Kitchen Hardwood Floors
The kitchen is the most demanding environment for hardwood floors. Cooking grease, water splashes, food spills, and constant foot traffic create a unique combination of cleaning challenges. The most important habit in a kitchen with hardwood floors is immediate spill response. Any liquid, especially acidic ones like vinegar, citrus juice, or tomato sauce, should be wiped up the moment it hits the floor. Sweep or vacuum daily to remove food debris before it gets ground into the finish underfoot. Use a degreasing dish soap solution for your weekly mop to cut through cooking residue, and consider a mat or runner in front of the sink and cooking areas to intercept the worst of the moisture and grease before it reaches the floor.
Bathroom Hardwood Floors
Hardwood in bathrooms is beautiful but requires extra vigilance around moisture management. Ensure excellent ventilation, a properly functioning exhaust fan running during and after showers significantly reduces the humidity that causes wood to expand and contract. Place absorbent bath mats in the shower, tub, and sink, and wash them regularly to prevent mold and mildew transfer to the floor. Wipe up water immediately after bathing, and inspect the floor regularly for any areas where the finish is wearing near water sources. These need prompt attention to prevent moisture penetration into the raw wood below.
Living Room and Bedroom Hardwood Floors
These rooms are generally the easiest to maintain. The primary concerns are dust, pet hair, and furniture-related damage. Place felt pads on the feet of all furniture. Sofas, chairs, tables, bed frames, and replace them when they wear thin. Use area rugs in high-traffic zones to protect the floor from concentrated wear. A robot vacuum on a daily schedule is particularly effective in living rooms and bedrooms where fine dust and pet hair accumulate quickly and consistently.
Entryway and Hallway Floors
Entryway floors bear the brunt of everything that comes in from outside. Dirt, grit, sand, salt, mud, and moisture. A high-quality doormat outside and a second absorbent mat inside the door capture the majority of this debris before it reaches your hardwood. A no-shoes policy, while not always practical, dramatically reduces the amount of outdoor grit that gets tracked across your floors. Sweep or vacuum entryway floors daily, if possible the fine grit brought in on shoes is one of the most damaging things a hardwood floor encounters.
How to Maintain and Protect Hardwood Floors Long-Term
Cleaning is only part of the hardwood floor care equation. Protection and maintenance habits practiced consistently over the years are what determine whether your floors look stunning at 30 years old or require complete replacement at 15.
Building Your Maintenance Routine
A sustainable hardwood floor maintenance routine doesn’t need to be time-consuming. Daily, a quick sweep or robot vacuum pass in high-traffic areas takes minutes and makes an enormous cumulative difference. Weekly, a thorough sweep followed by a damp mop with your chosen cleaner keeps the floor fresh and free of buildup. Monthly, give extra attention to edges, corners, under furniture, and any developing stains or worn areas. Seasonally, assess the overall condition of the finish and plan for any refreshing or deeper treatments needed.
Rugs and Mats
Strategic placement of rugs and mats is one of the most effective and underutilized protection strategies for hardwood floors. Place mats at every exterior door, in front of the kitchen sink, and at the bathroom entrance. Use area rugs in high-traffic living areas, hallways, and anywhere furniture is regularly moved. Ensure rugs have a non-slip backing that is safe for hardwood. Rubber-backed rugs can discolor certain finishes over time, so look for natural fiber or felt-backed options. Rotate rugs occasionally to ensure the floor ages evenly in tone and color.
Furniture Protection
Furniture is responsible for a significant proportion of hardwood floor scratches and dents. Felt pads on every furniture leg, sofas, chairs, tables, bed frames, and bookshelves, provide an essential buffer between hard furniture edges and the floor surface. Check and replace felt pads every six to twelve months as they compress and wear thin. For heavy furniture that gets moved regularly, furniture sliders make repositioning effortless without dragging across the floor surface.
Humidity Control
Wood is a living material that responds continuously to its environment, and humidity is the most powerful environmental force acting on your hardwood floors. Too much humidity causes wood to expand and potentially cup or buckle. Too little causes it to contract and potentially crack or develop gaps between planks. The ideal indoor humidity range for hardwood floors is between 35% and 55%. Use a humidifier in dry winter months and air conditioning or a dehumidifier during humid summers to keep indoor humidity within this range. A simple digital hygrometer, available for under $15, lets you monitor your home’s humidity level accurately.
Refinishing: When and How
Even the best-maintained hardwood floors eventually need refinishing. The finish, not the wood itself, is what protects the floor from damage, and over the years of use, it wears down. Signs that refinishing is needed include widespread dullness that doesn’t respond to cleaning, visible scratches that have penetrated the finish, bare wood showing through in high-traffic areas, or persistent staining that cleaning can’t address. For floors with light finish wear, a screen-and-recoat, light sanding of the existing finish followed by a fresh topcoat, is a faster, less disruptive, and less expensive option than a full sand-and-refinish. Full refinishing involves sanding the floor down to bare wood and applying entirely new stain and finish coats. Done professionally, it restores a floor to essentially new condition.
Conclusion
Beautiful hardwood floors don’t happen by accident. They’re the result of consistent, correct care applied over time. The difference between floors that look stunning after 20 years and floors that look tired after five almost always comes down to how they’ve been cleaned and maintained along the way. And now you know exactly how to be on the right side of that difference.
Start with the fundamentals. Know your floor’s finish type. Use the right tool: a microfiber mop, a hard-floor vacuum, and a quality hardwood-specific cleaner. Keep moisture to an absolute minimum. Sweep before you mop. Respond to spills immediately. Build a simple routine and stick to it.
The investment of time and attention that hardwood floor care requires is genuinely modest. A few minutes daily, a proper clean weekly, and a deeper treatment every few months. What you get in return is floors that add warmth, beauty, and real value to your home for decades. That’s an exceptional return on a small, consistent effort.
Pick one thing from this guide and change it today. Swap out your old mop for a microfiber one. Move the doormat. Put felt pads on your furniture legs. Small actions, done consistently, compound into remarkable results over time. Your hardwood floors are one of the finest features of your home, they deserve the care, and with everything in this guide, you’re now fully equipped to give it to them!
Check out my Pinterest account for more inspiration!